Timesheet
Calendar
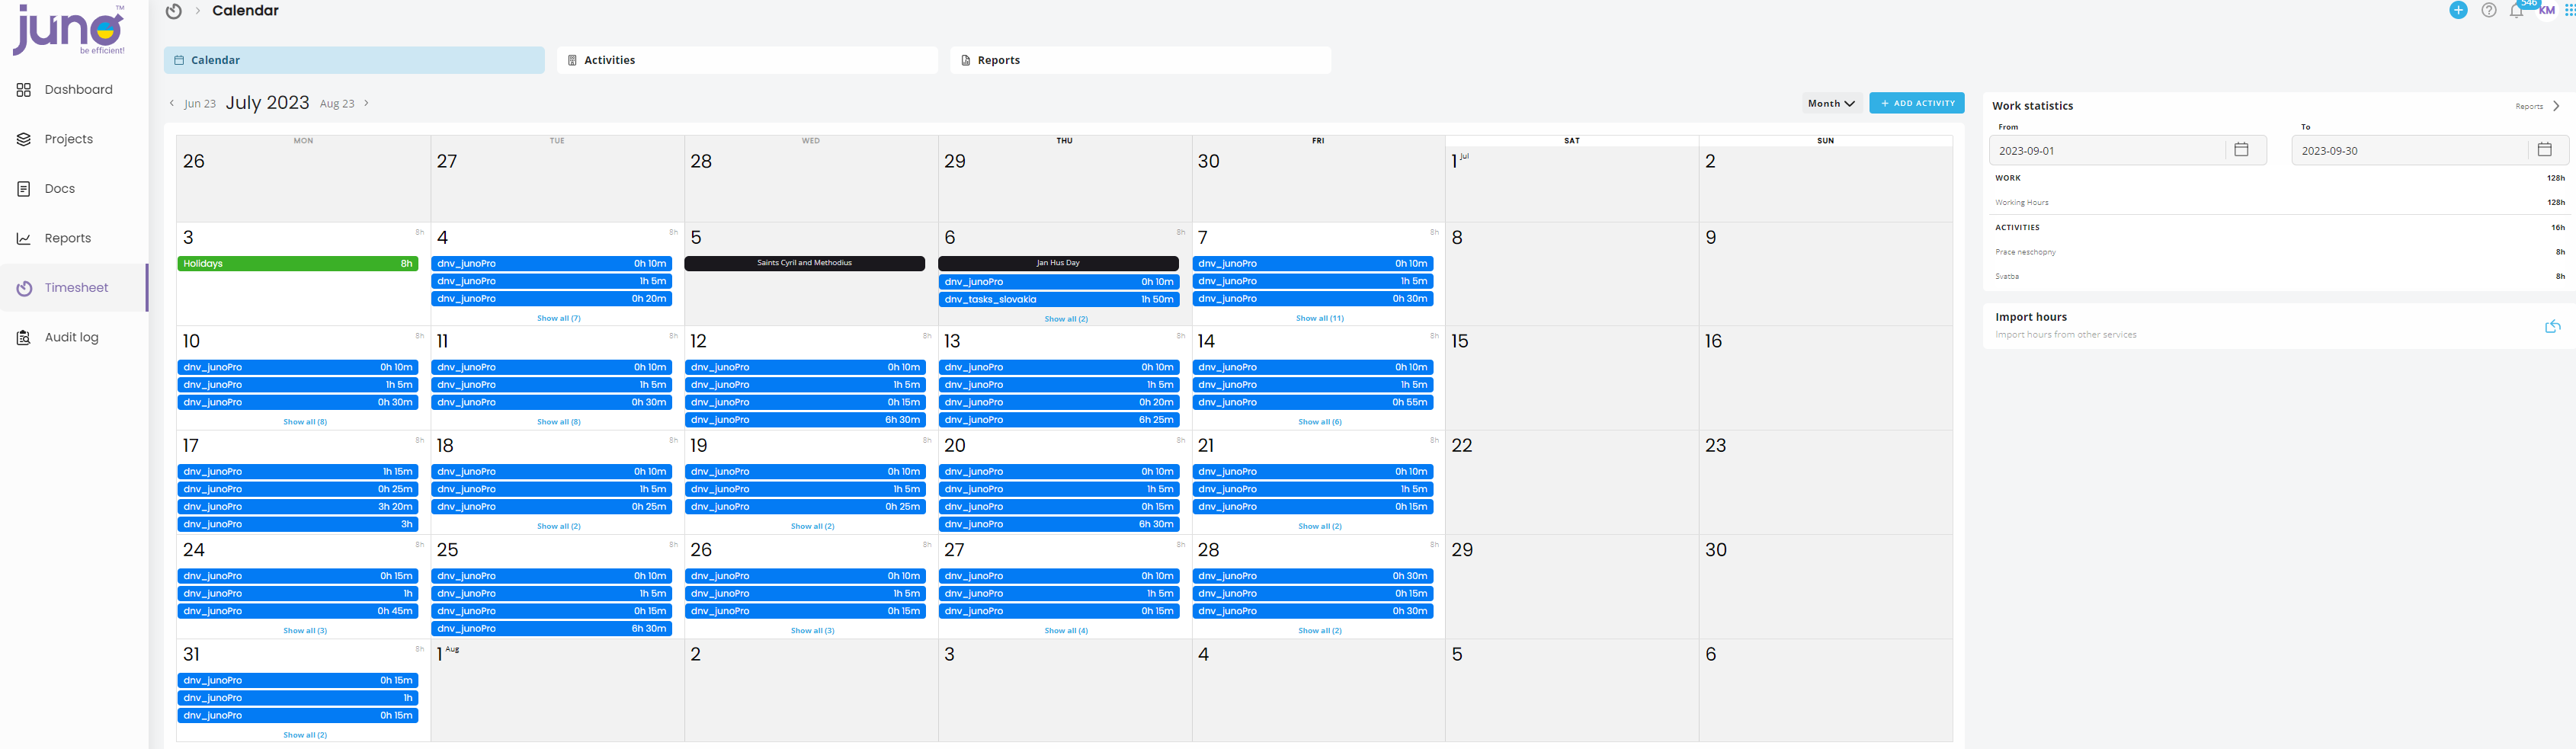
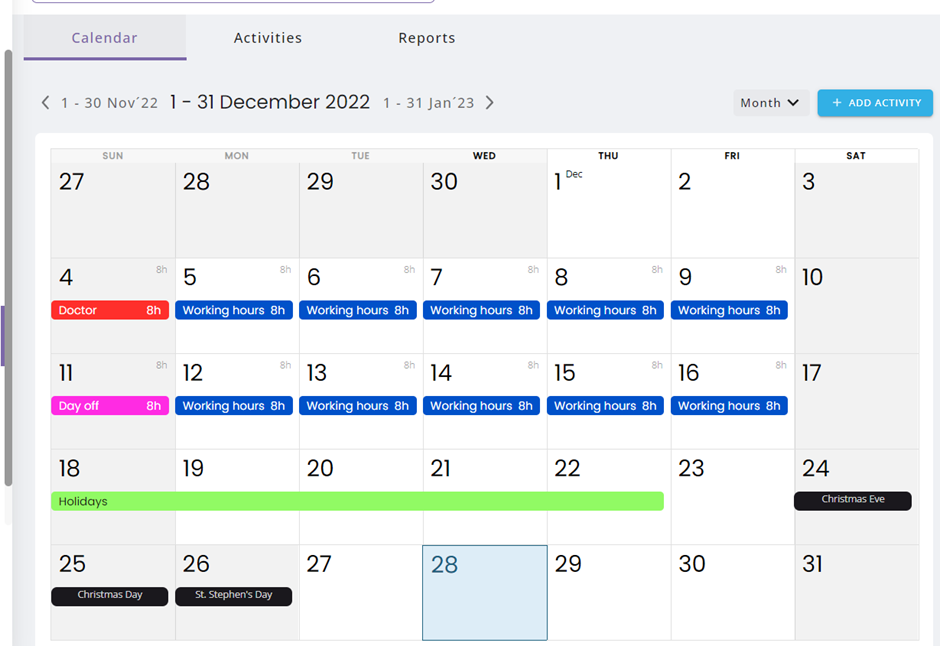
Timesheet features allow you and your company to create / record working and non-working activities and also help you track the efficiency and productivity of teams within your company. In the calendar section there are displayed all of your created activities. You can easily switch between each month by clicking on the name of the month. To change the calendar view, click on the dropdown menu next to ‘Month’. You can set it on Day / Five Day / Week or Month view.
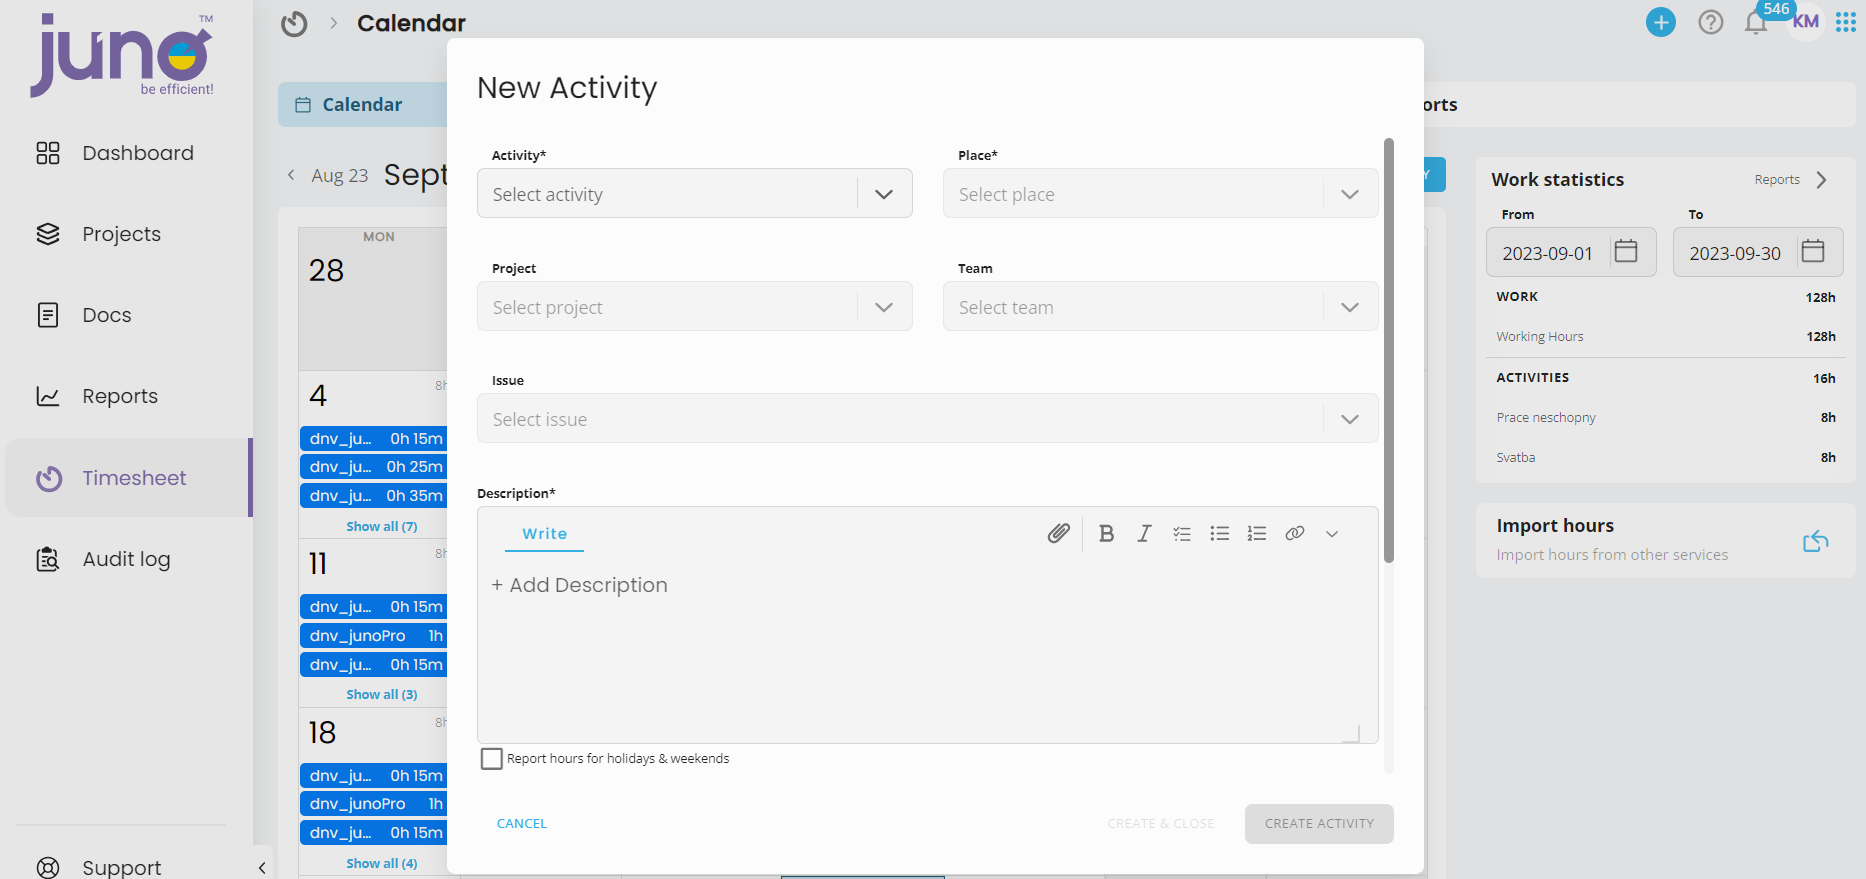
To create an activity in the calendar, simply click on the date you want to create an activity for. Alternatively, you can click on the ‘+Add Activity’ button at the top of the calendar. A new tab will open, where you need to enter the required information. To start with, choose what type of activity you want to create. For a working activity you can also enter additional information like Place / Project / Team and Issue if applicable.
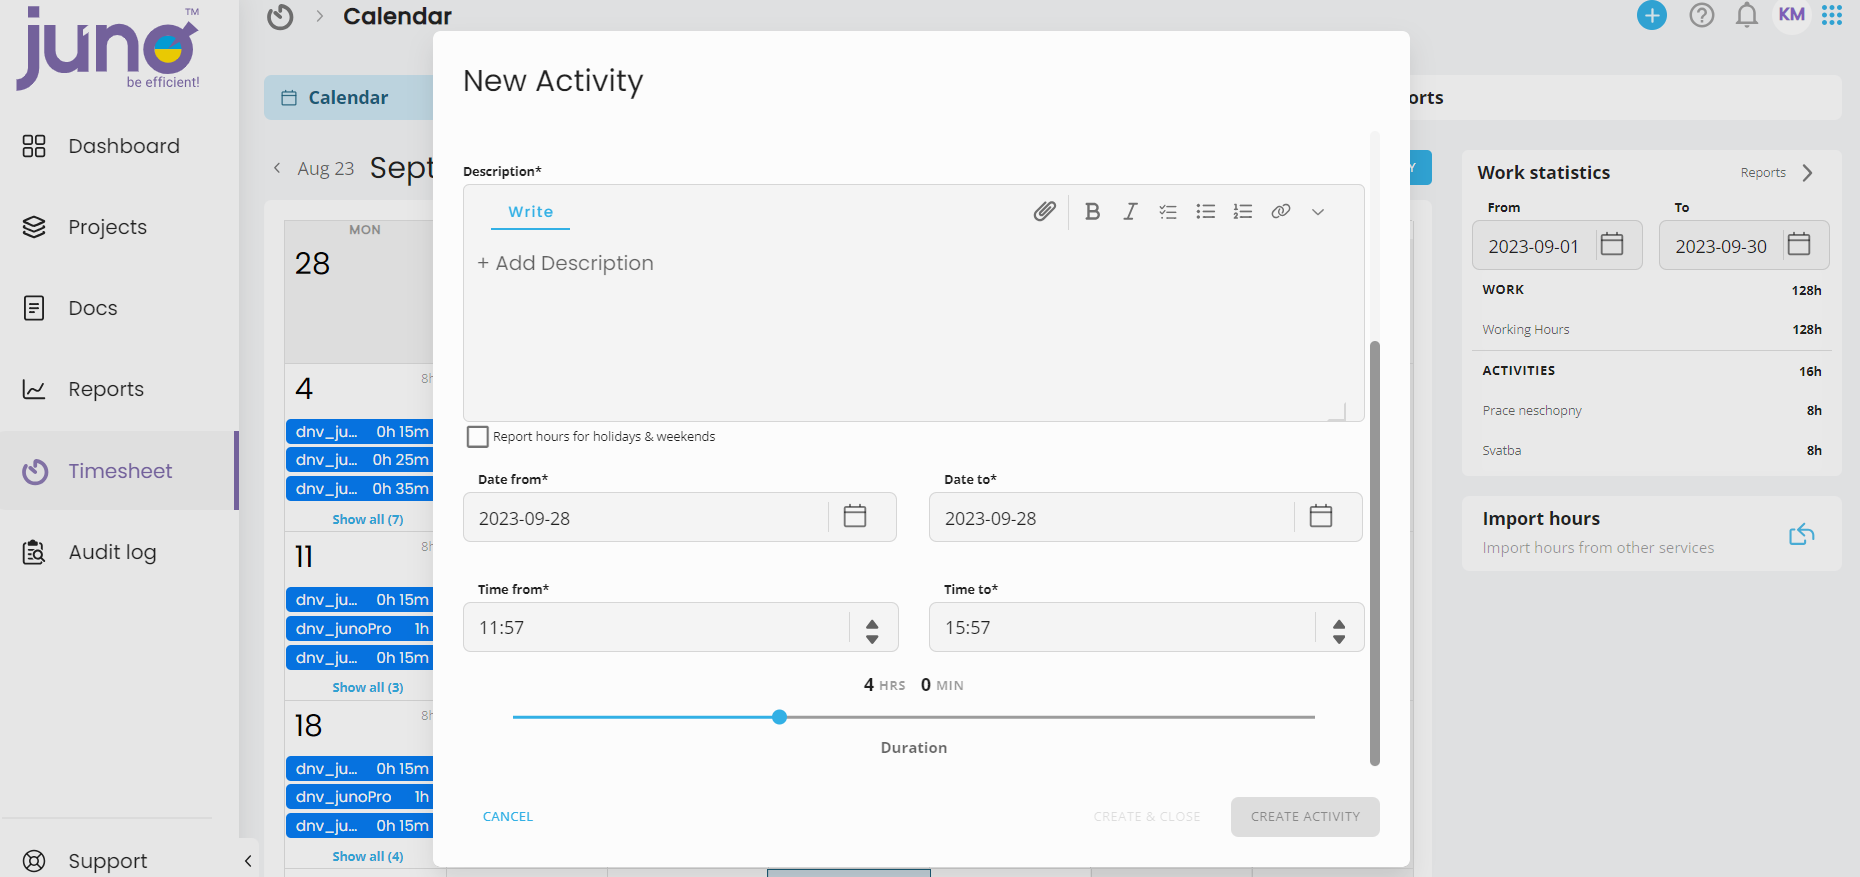
The description needs to be always entered regardless of the activity type. Finally, you need to tick a box if your activity counts towards holidays and weekends and then enter Date and Time. You can use also duration slider which just represents the difference between Time from and Time to. If you change the duration it will scroll Time to. Once all information is confirmed, click on the ‘Create Activity’ button or ‘Create and close’ button. In case you change your mind and do not want to create an activity, simply click on the ‘Cancel’ button.
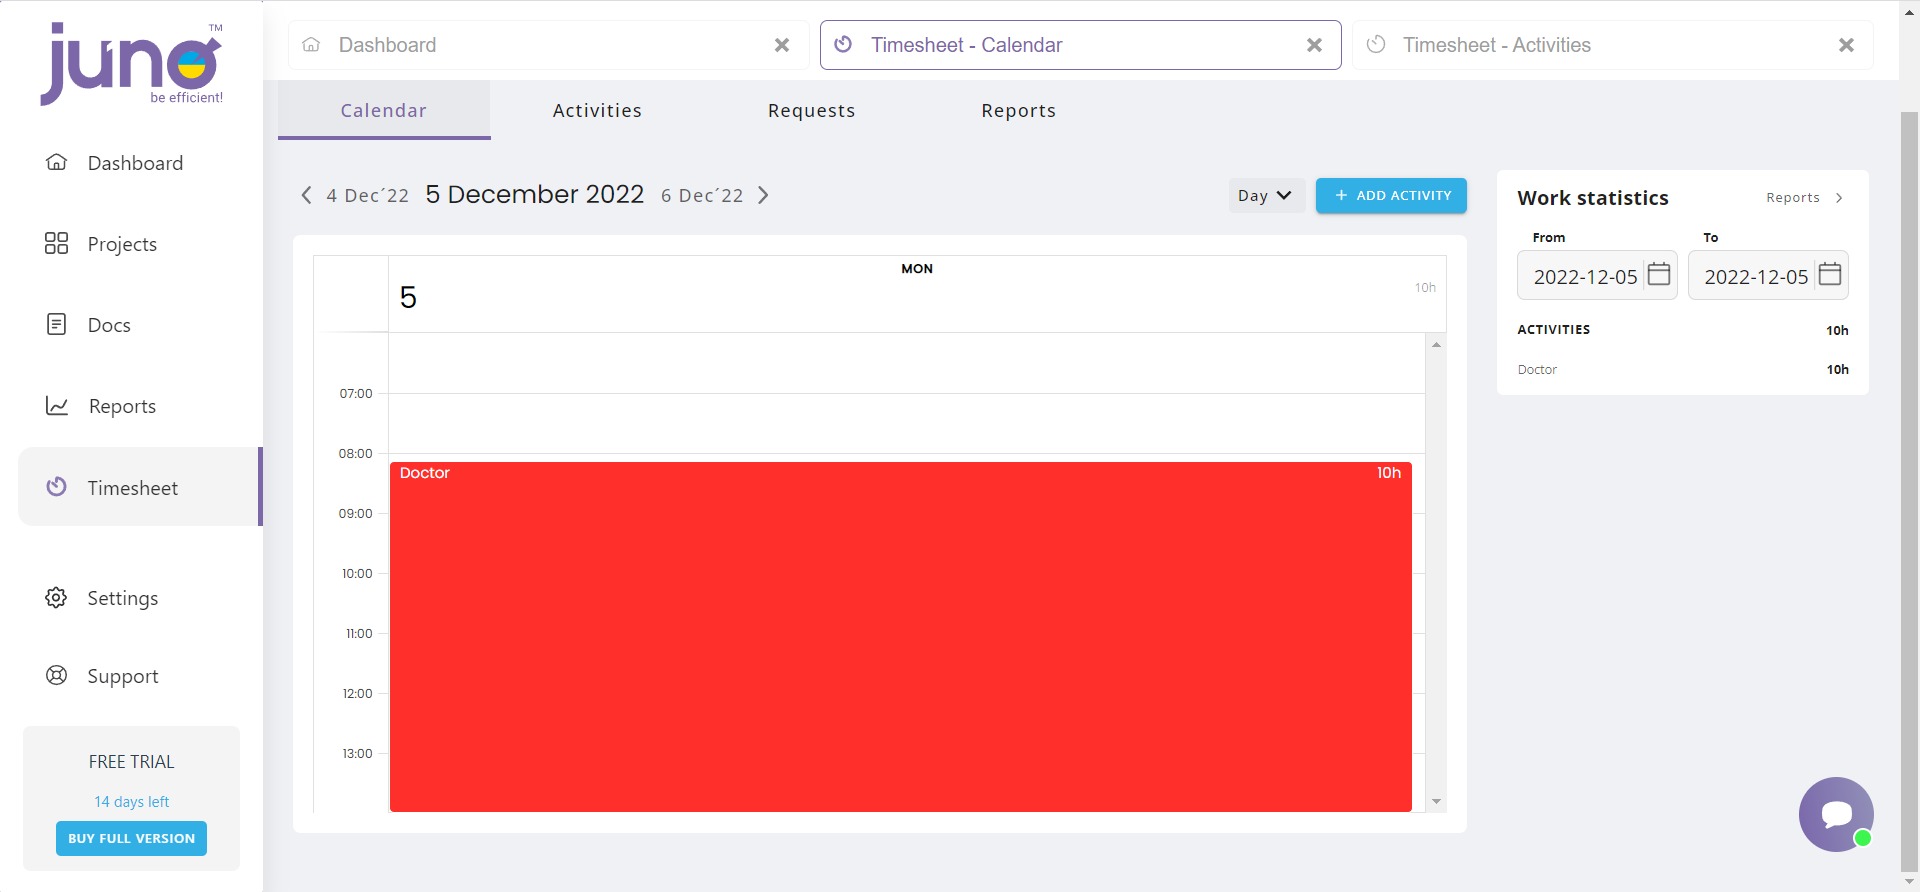
If you click on an already created activity, a modal window will open with all related information. You can see if your activity is still waiting to be approved or was approved/rejected. You can also Delete, Clone or Edit your activity. If you edit an already approved activity, it needs to be approved again after editing.
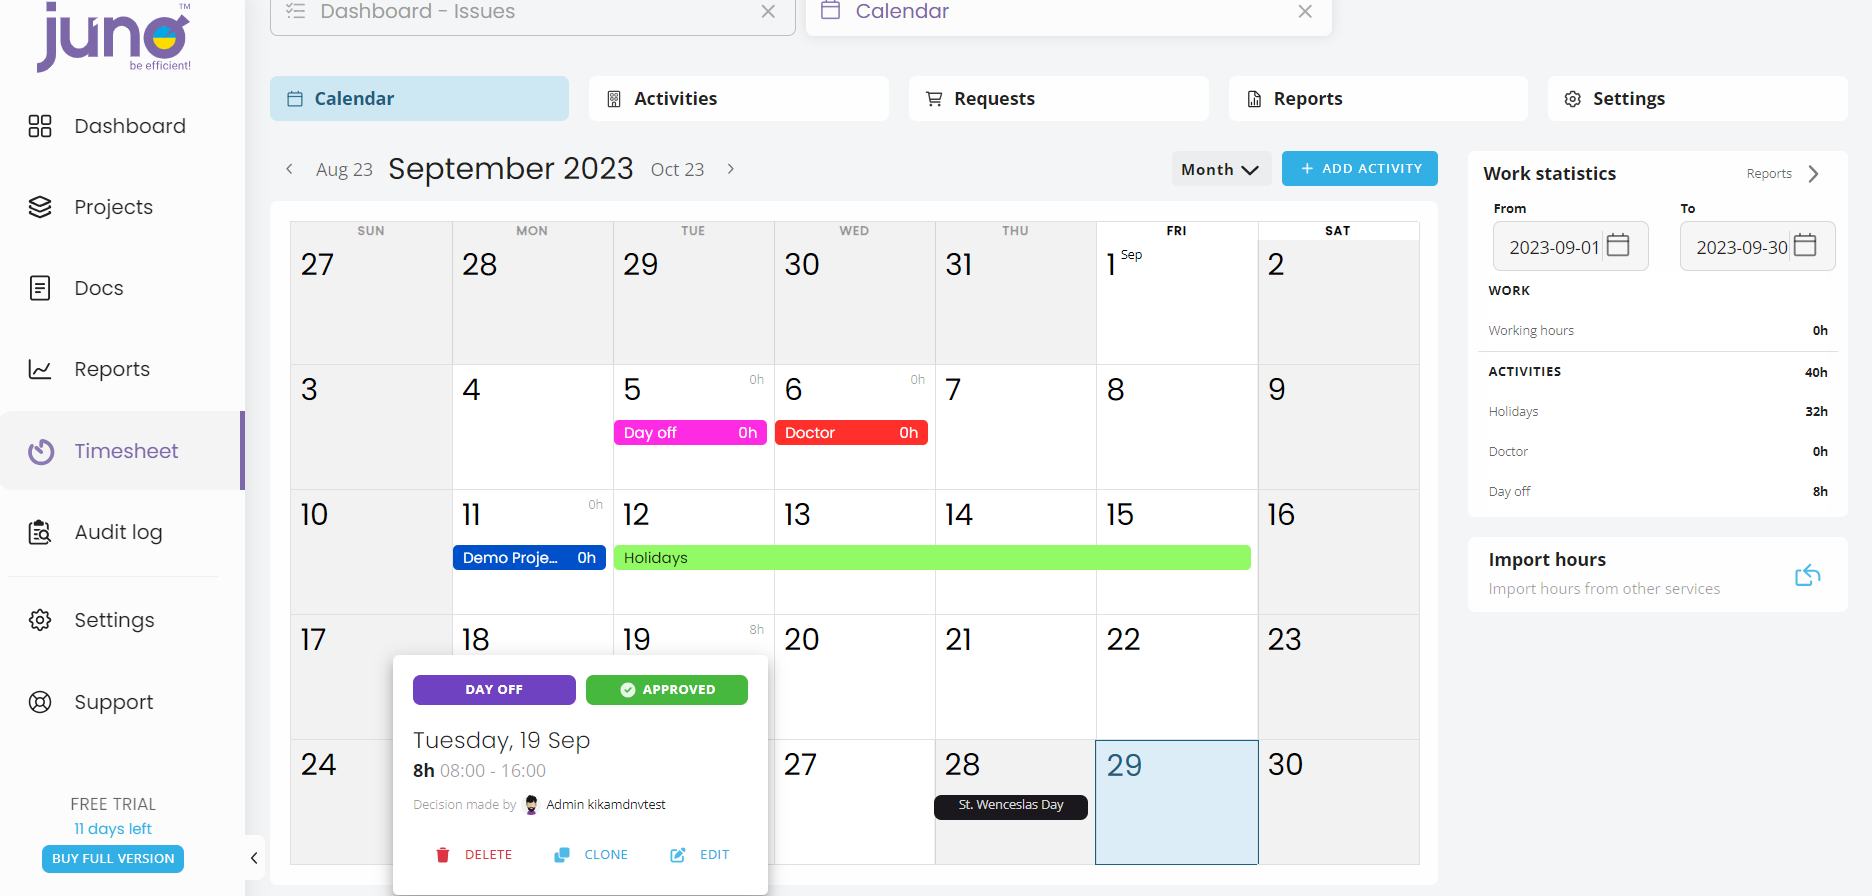
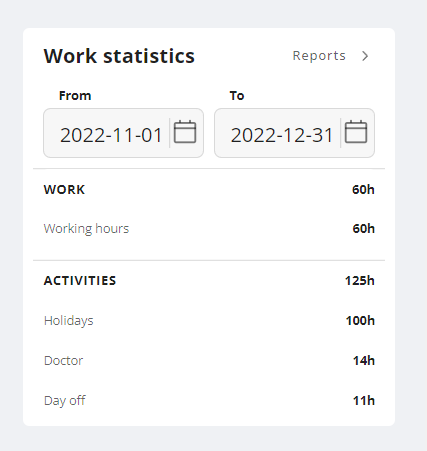
All statistics information is displayed in the ‘Work statistics’ tab, where you can find all work related activities (WORK) and also all non-working activities (ACTIVITIES). Working and non-working hours are calculated automatically. You can see statistics for any set date range.
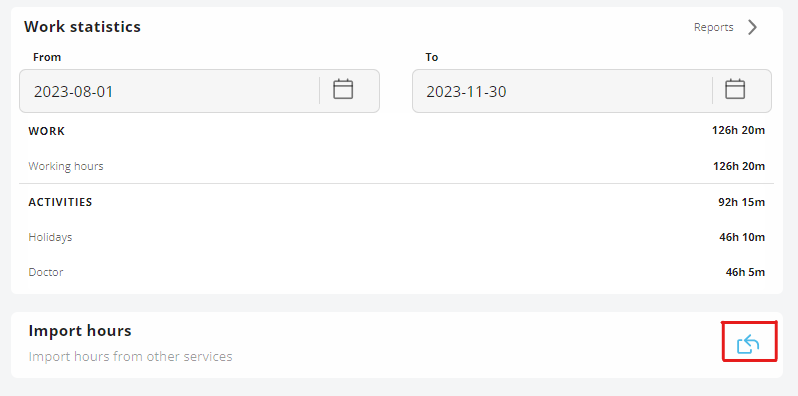
Import to Timesheet
For larger amounts of data, you can use import hours.
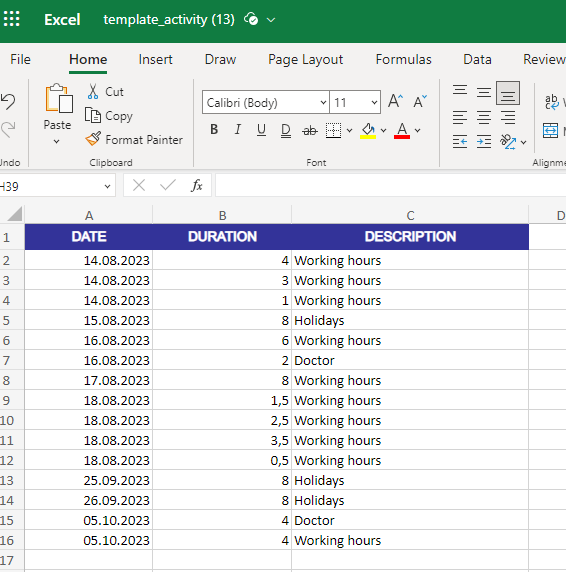
In case of import, it is ALWAYS necessary to use a prepared template, which you can download.
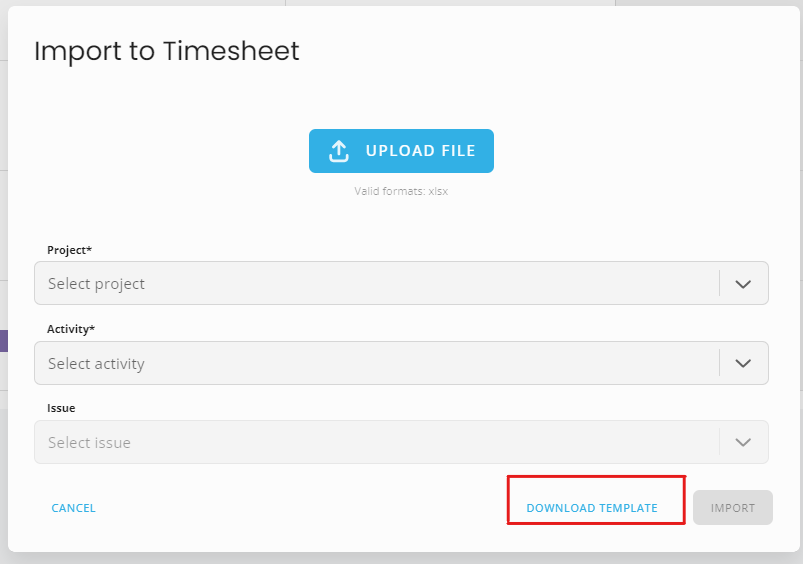
In template is necessary to fill in Date, Duration and Description.
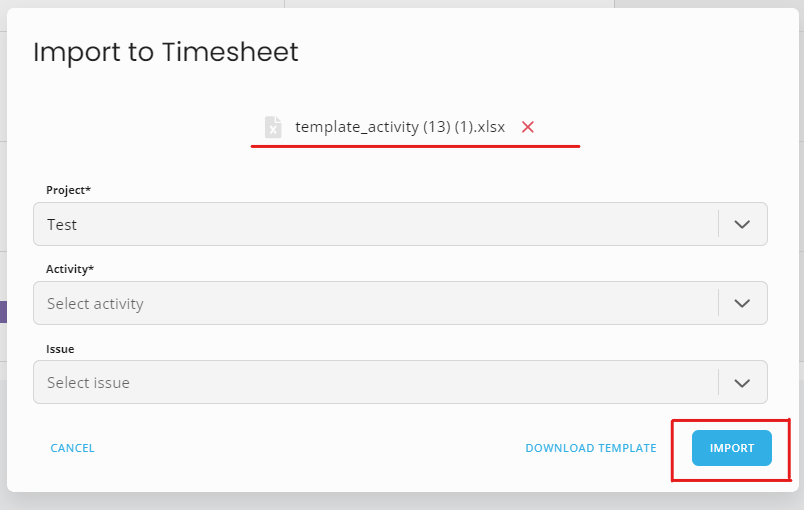
Then you need to select Project, activity type or issue in import tab and upload file.
If you upload a file that is not in the shape of the template, the import will not work.
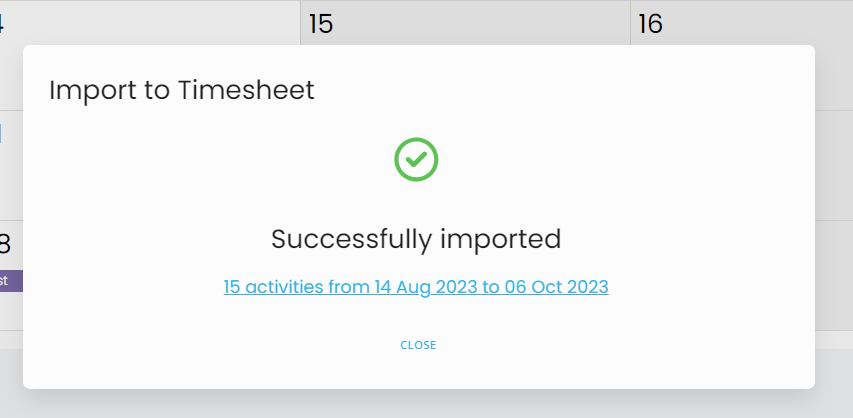
If the import is successful, you will see the above message, which you can click on and you can check the listed activities directly in the calendar.
Activities
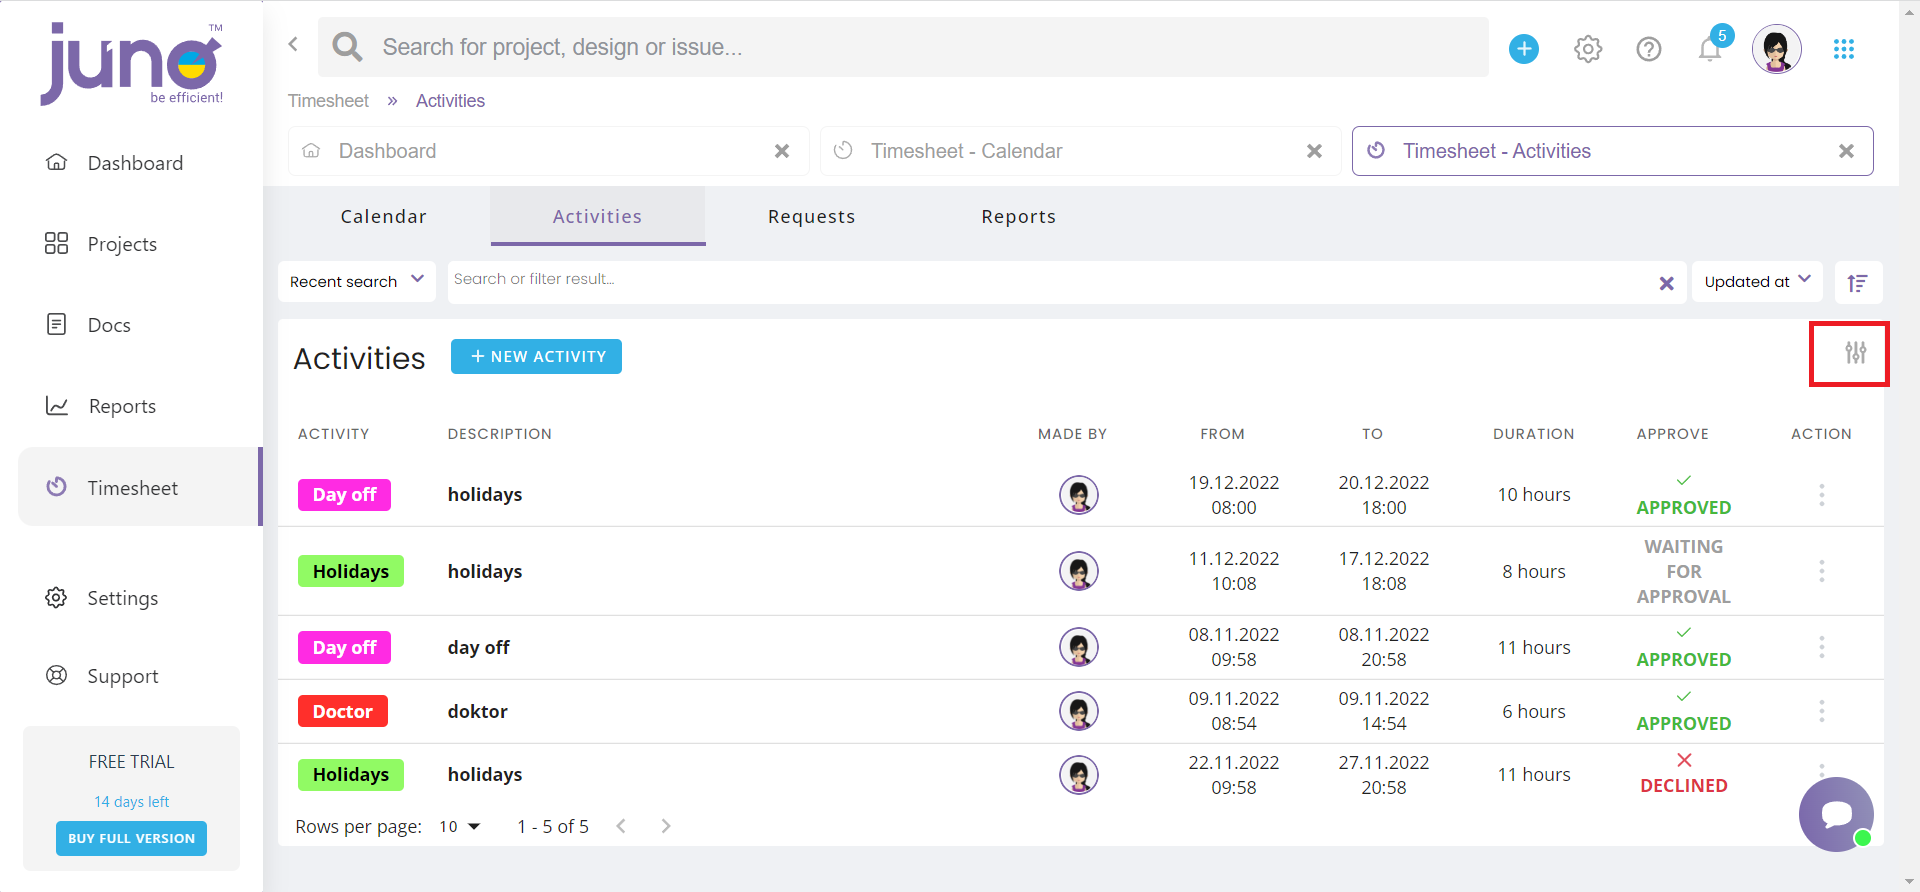
All created non-working activities can be found in this section. Each activity has its name, description, date & time duration. User can find out if their activity is still waiting for approval or has been already approved / declined. At the end of each row there is an Action column. If you click on the tree dots symbol, you will have the following options: Edit, Show in calendar or Delete your activity.
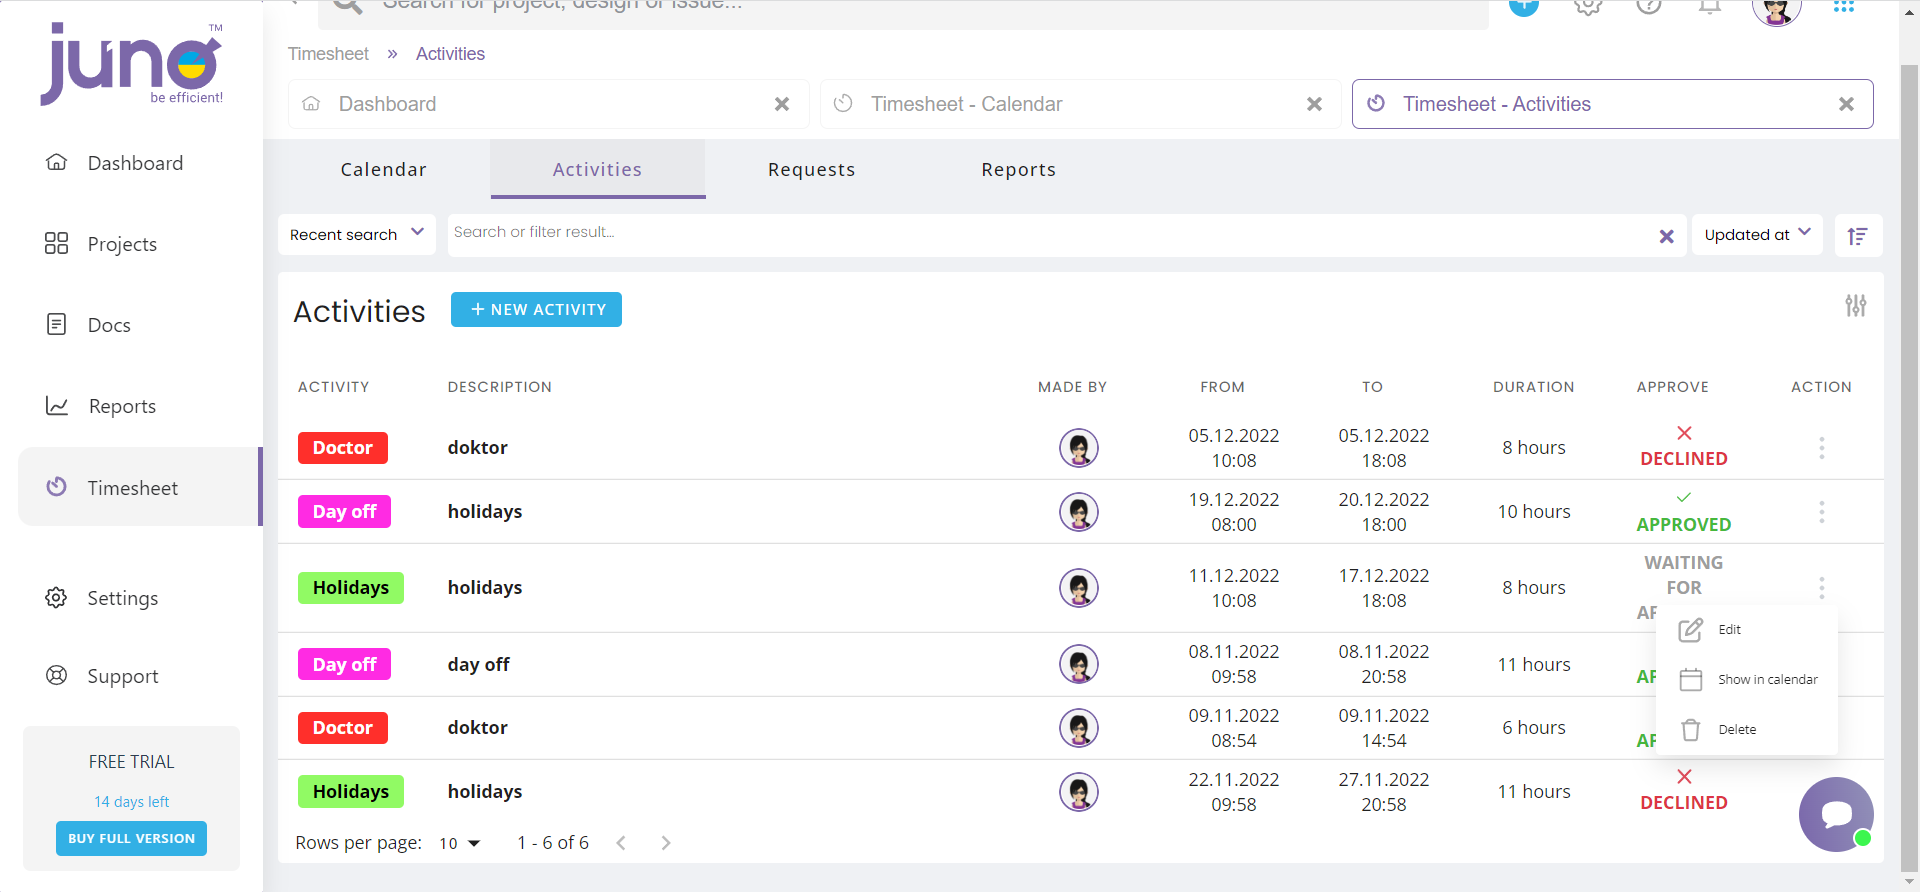
If you click on Edit, an edit window will open, where you can change the details regarding your activity. Regardless if your activity has been approved / declined, after editing it will have the "Waiting for approval" status again.
If you click on Show in calendar, you will see this activity in a day view calendar.
If you click on the Delete option, the non-working activity will be deleted from your Activities list and also from the calendar.
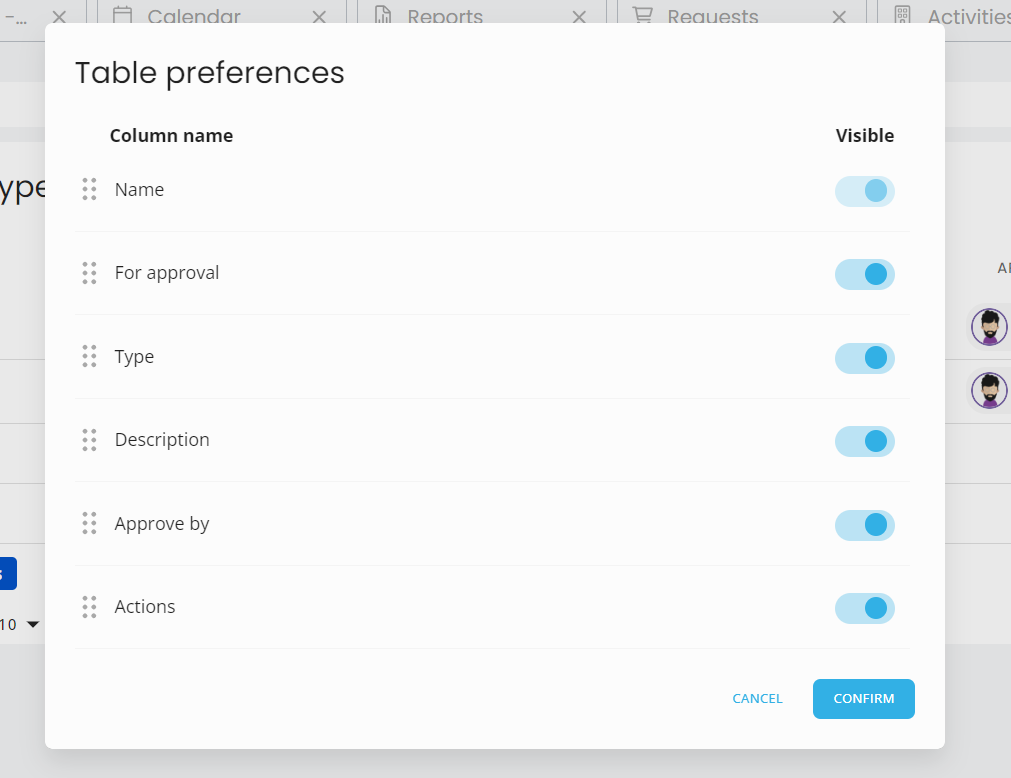
And finally, you have the option to set the view of the Activities module as you like. Simply click on the preferences symbol and choose which information you would like to see.
Then click on the ‘Confirm’ button. In case you don’t want to make any changes, click Cancel.

Requests
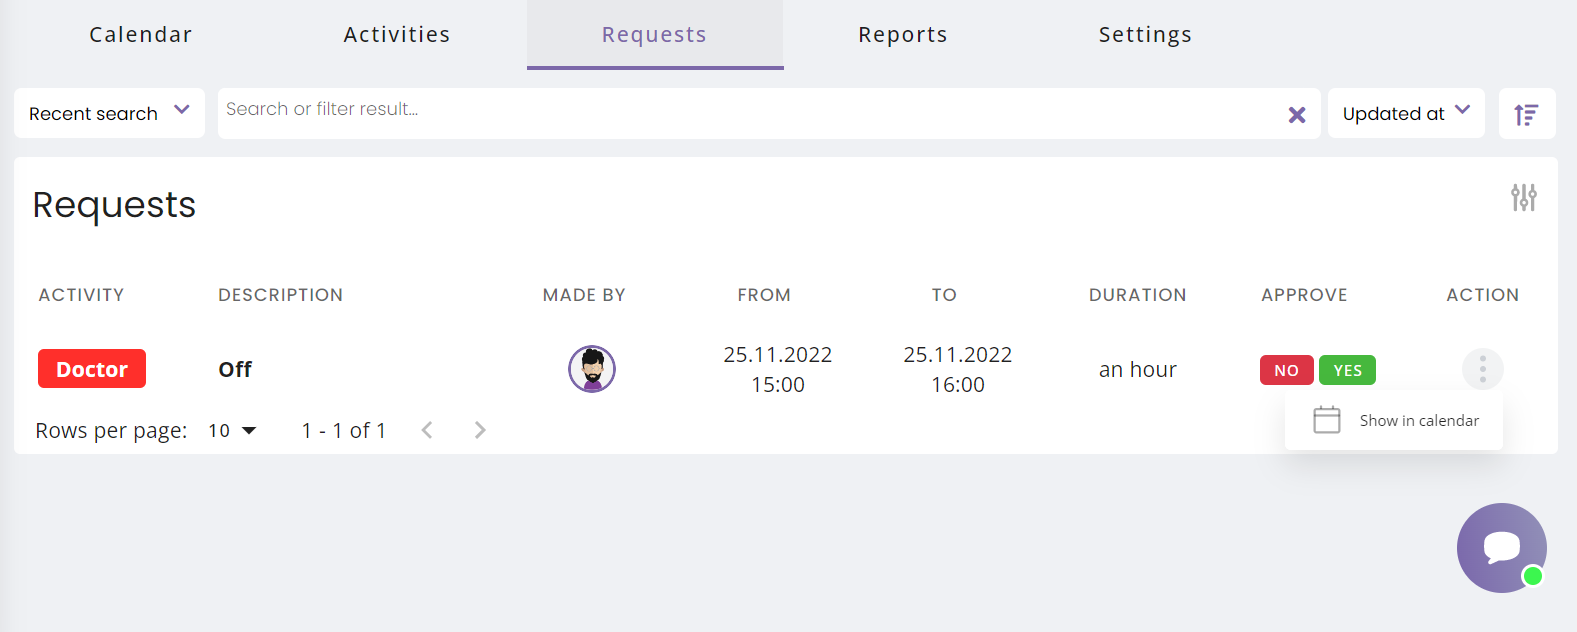
All request waiting for user's approval are displayed on the Requests screen.
The Requests tab is only visible to Super admin or users with permission who can view and approve the requests. If no users have the Requests permission, only the super admin is able to access this tab and approve the requests.It is also possible to create activities without approvals (once created, they don't show up on the Requests screen).
User without permissions Timesheet view
Juno filter with all its features is available to narrow down the search for the Request you currently need to work on.
To approve or deny the Request, simply click on "Yes" or "No" button in the Approve column.
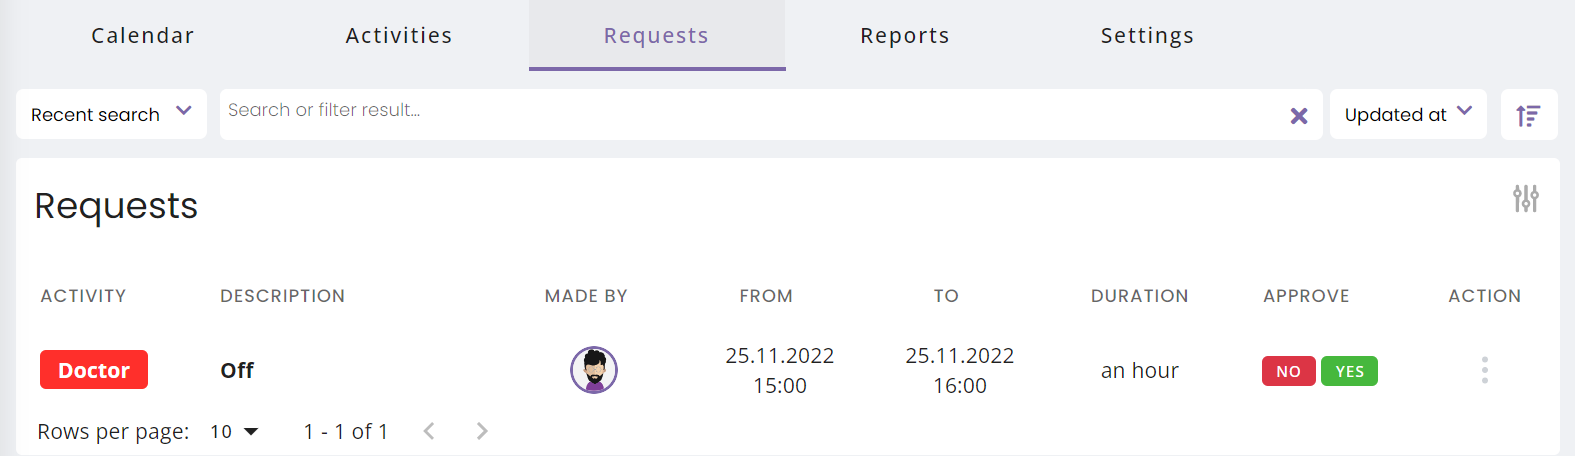
The three dots options button located in the Action column allows you to check the calendar position of the Request by clicking on "Show in calendar".
If you need to manage the list of columns, click on the Options button in the top right corner. In the Table Settings menu you can decide which columns you want to display.
Settings
By default, the Settings section is accessible only for admin roles.
General Settings
Users with admin roles can manage all of the following local project settings :
- Time format (24 hours/AM/PM)
- Week format
- Work day start hour
- State holidays according to country
- Number of hours in a working day

Request types
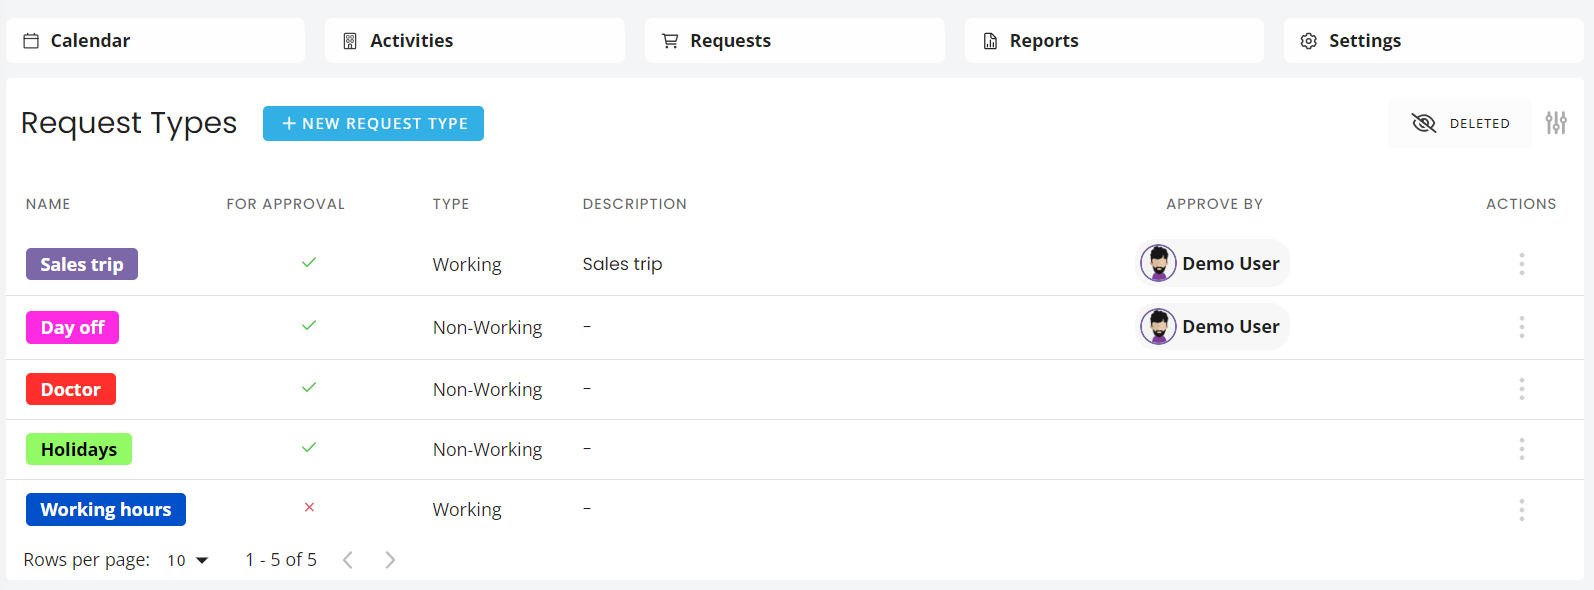
All types of project user Requests are created and managed through the Request Types screen.
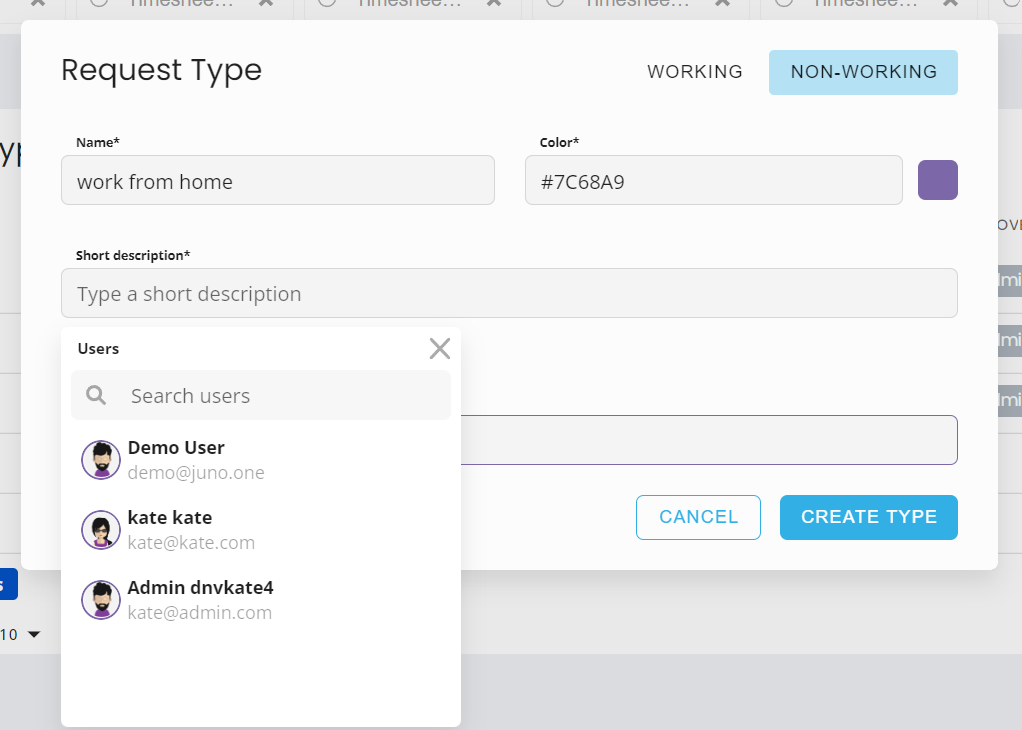
To add a new Request :
- Click on + New Request Type
- Select if the new request is work or non-work related
- Fill in the request name
- Select a color under which the request will be displayed on the Request list
- Enter a description and check the approval
- By checking the Approval box you decide whether the type of your new request needs to go through thea approval process.
- Select a user if need (User needs the approval permission role)
Create Type button becomes active when all mandatory fields are filled in.
The created Requests with all their attributes are listed on the Request Types screen.
 ]
]
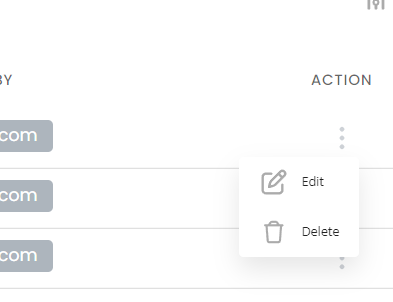
To edit or delete any of the current Requests, click on the three dots icon located in the Action column.
If you want to manage the list of columns, click on the Options button in the top right corner.
In the Table Preferences menu you can decide which columns you want to display.
Reports
The reporting tab provides a tool to create a table output from the Project-related working activities and also from Non-working user activities.
To create a report related to a project :
- Navigate to the Specific reports section
- Select a Project from the dropdown menu
- Select a Team from dropdown menu
- Select User either by choosing from the list or by text search
- Enter dates to select the time interval you want to create the report from
- Select an output format for the Report by clicking on respective button (PDF or .xls MS Excel file)

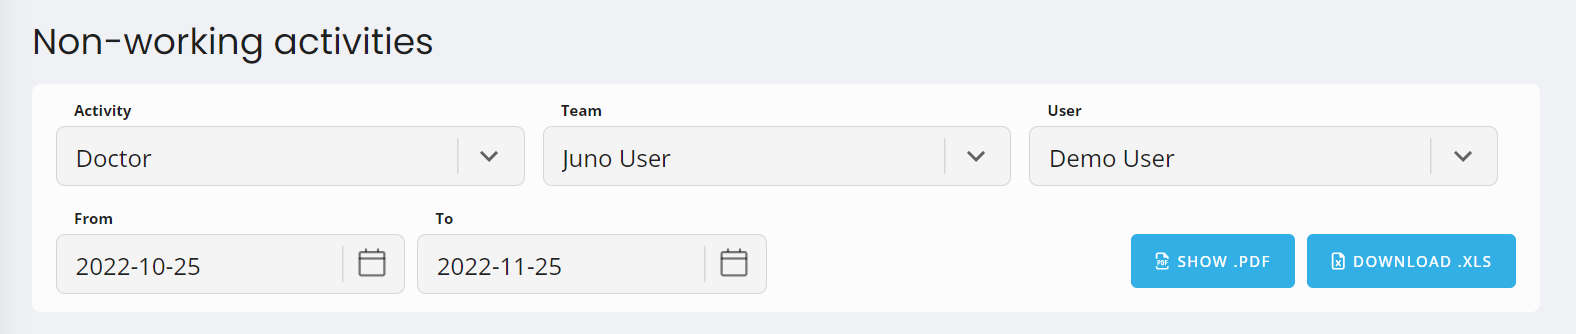
To create a report related to Non-working activities :
- Navigate to the Non-working activities section
- Select an Activity from the dropdown menu
- Select a Team from the dropdown menu
- Select a User either by choosing from the list or by text search
- Enter dates to select the time interval that you want to create the report from
- Now you can select the format of the output file (PDF or .xls MS Excel file)