Test Case Management
Test Case Management
In the Test module you can maintain all test scenarios (test cases) and add them to test plans. Both test cases and test plans can then be sorted into Test Spaces for easier navigation and filtering. This could help you filter test cases for further editing, or to filter & move them into a certain test plan. In addition, you can copy all or selected test cases from one project to another and also Import/Export test cases.

Test module entities & hierarchy
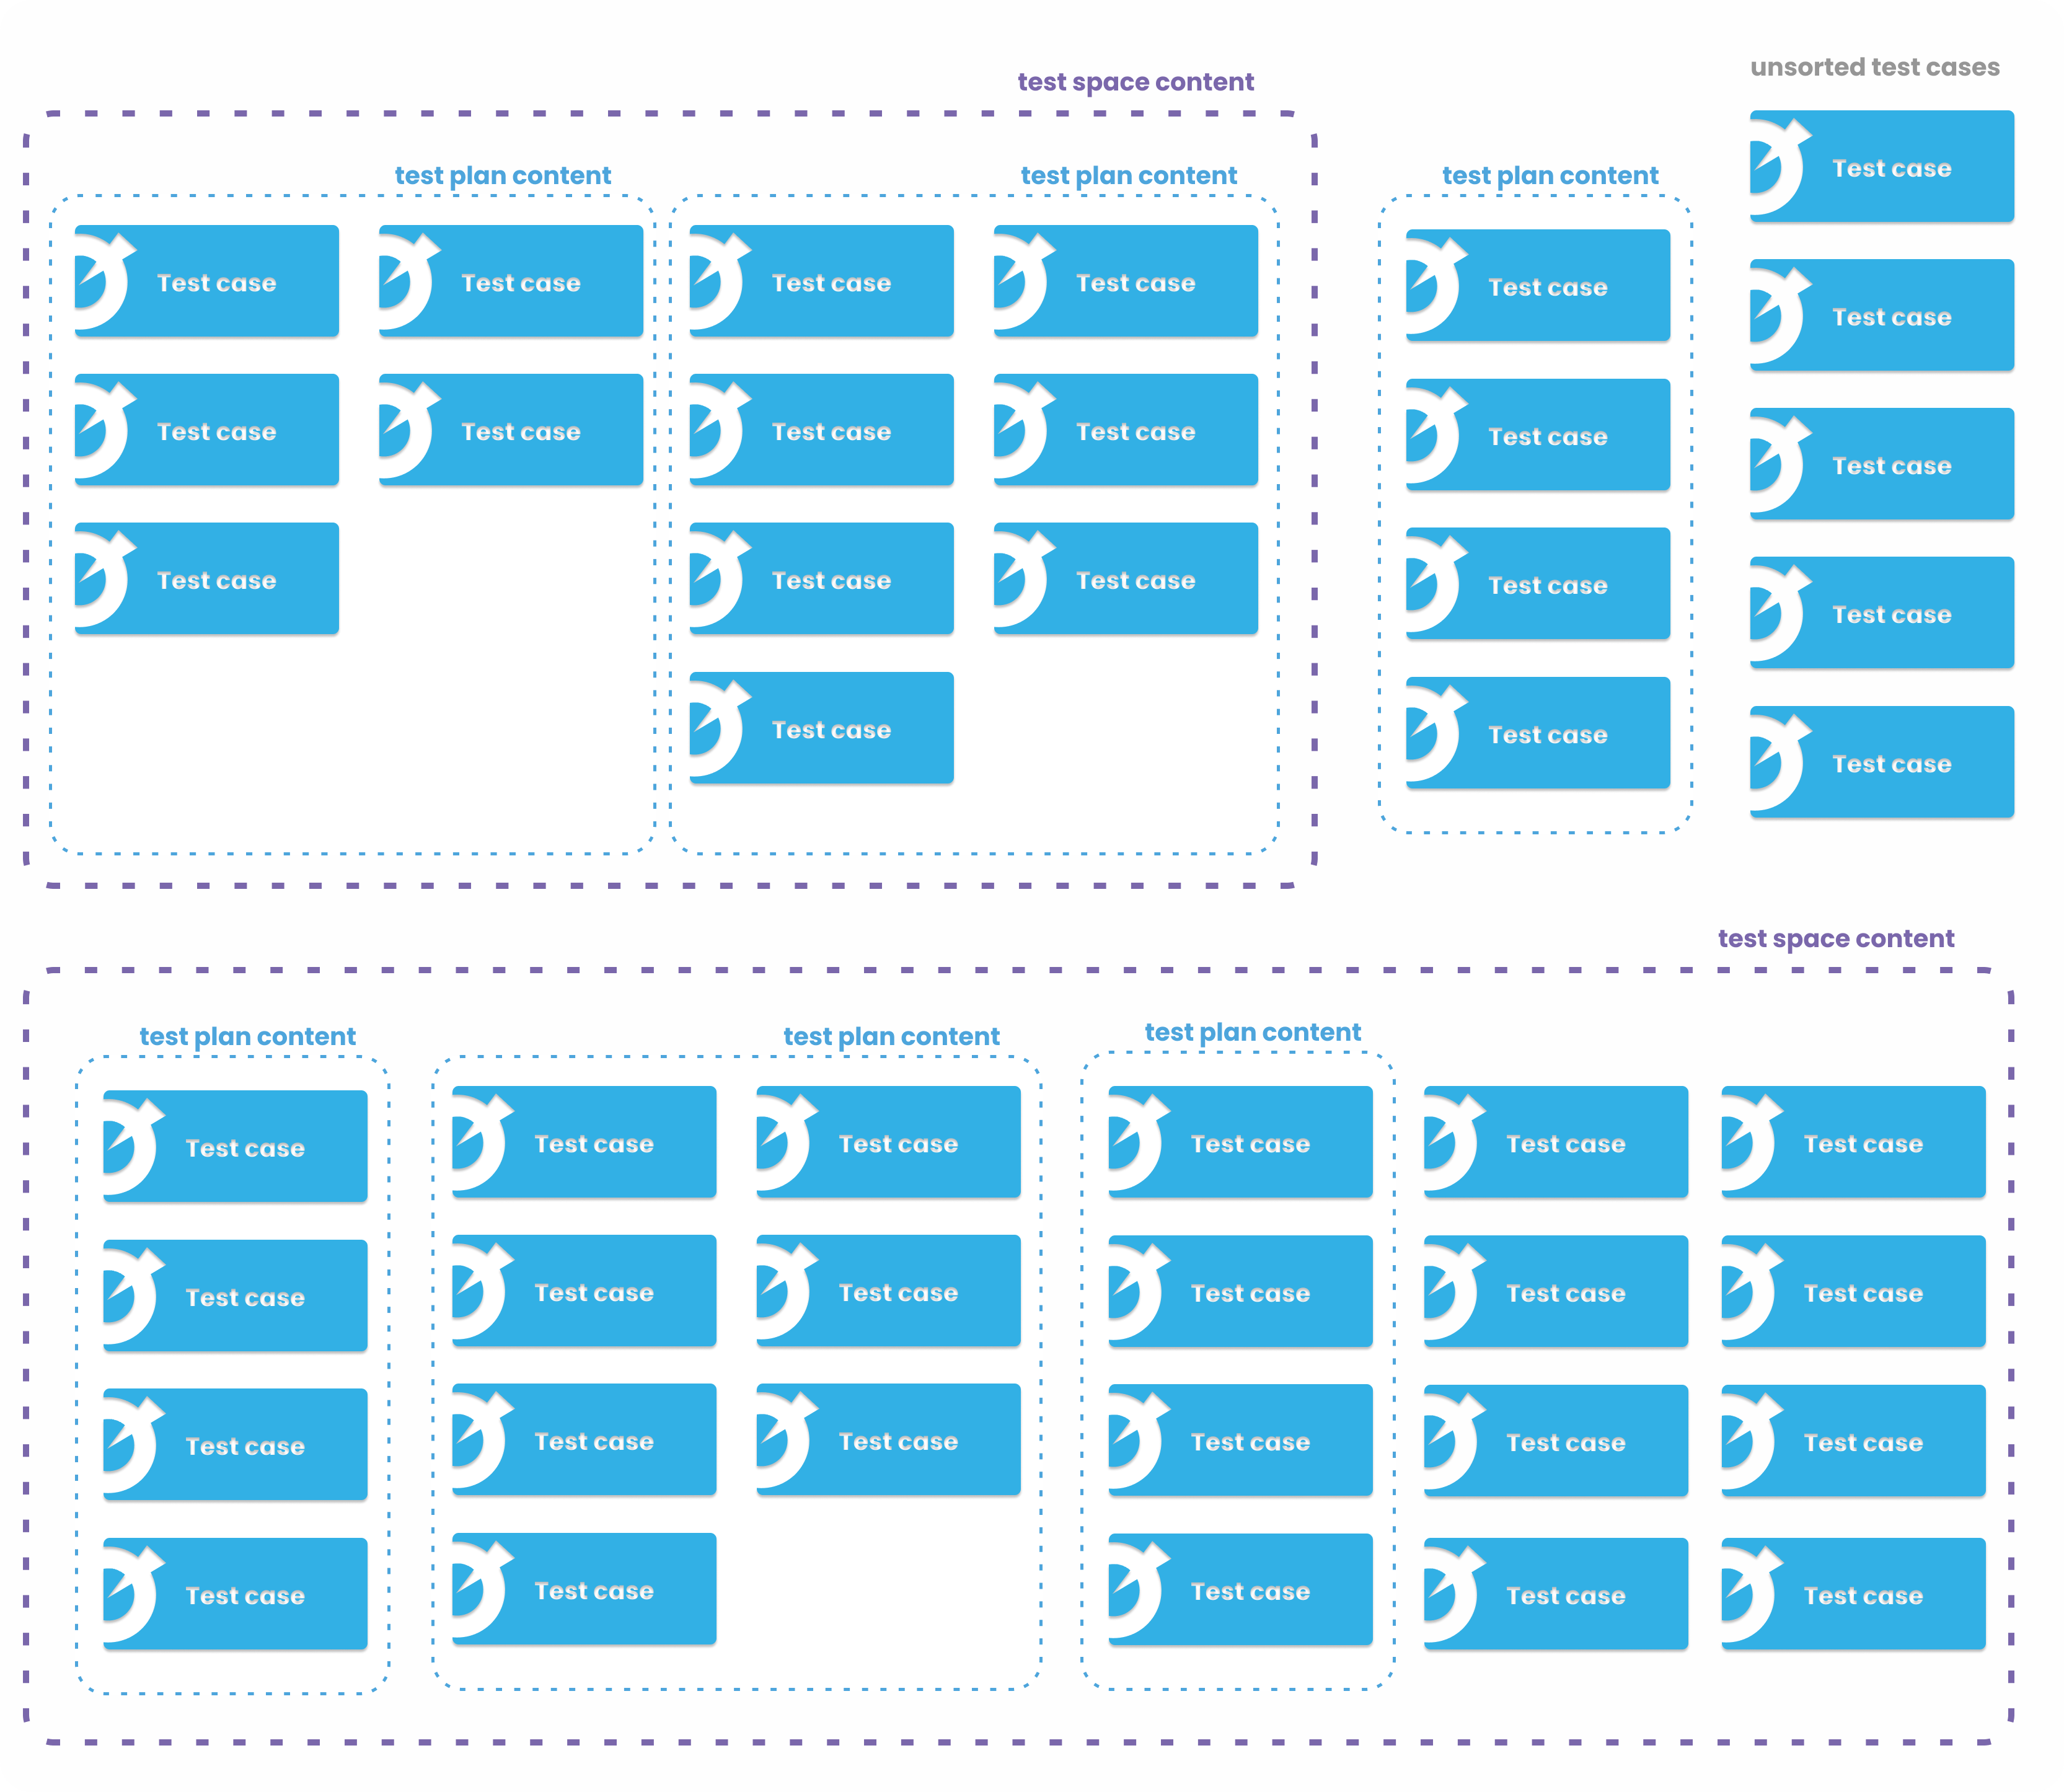
Test space = a lvl 2 "folder" or a "tag" that groups test cases and test spaces together. May contain test cases or whole test plans.
Test plan = a lvl 1 "folder" containing test cases. Cannot contain other test plans.
Test case = a single testing entity, can be sorted into test plans or test spaces.
You can switch off the Test Case or Test Plan display sections for better review and also modify your table preferences.
Detailed Test case view. 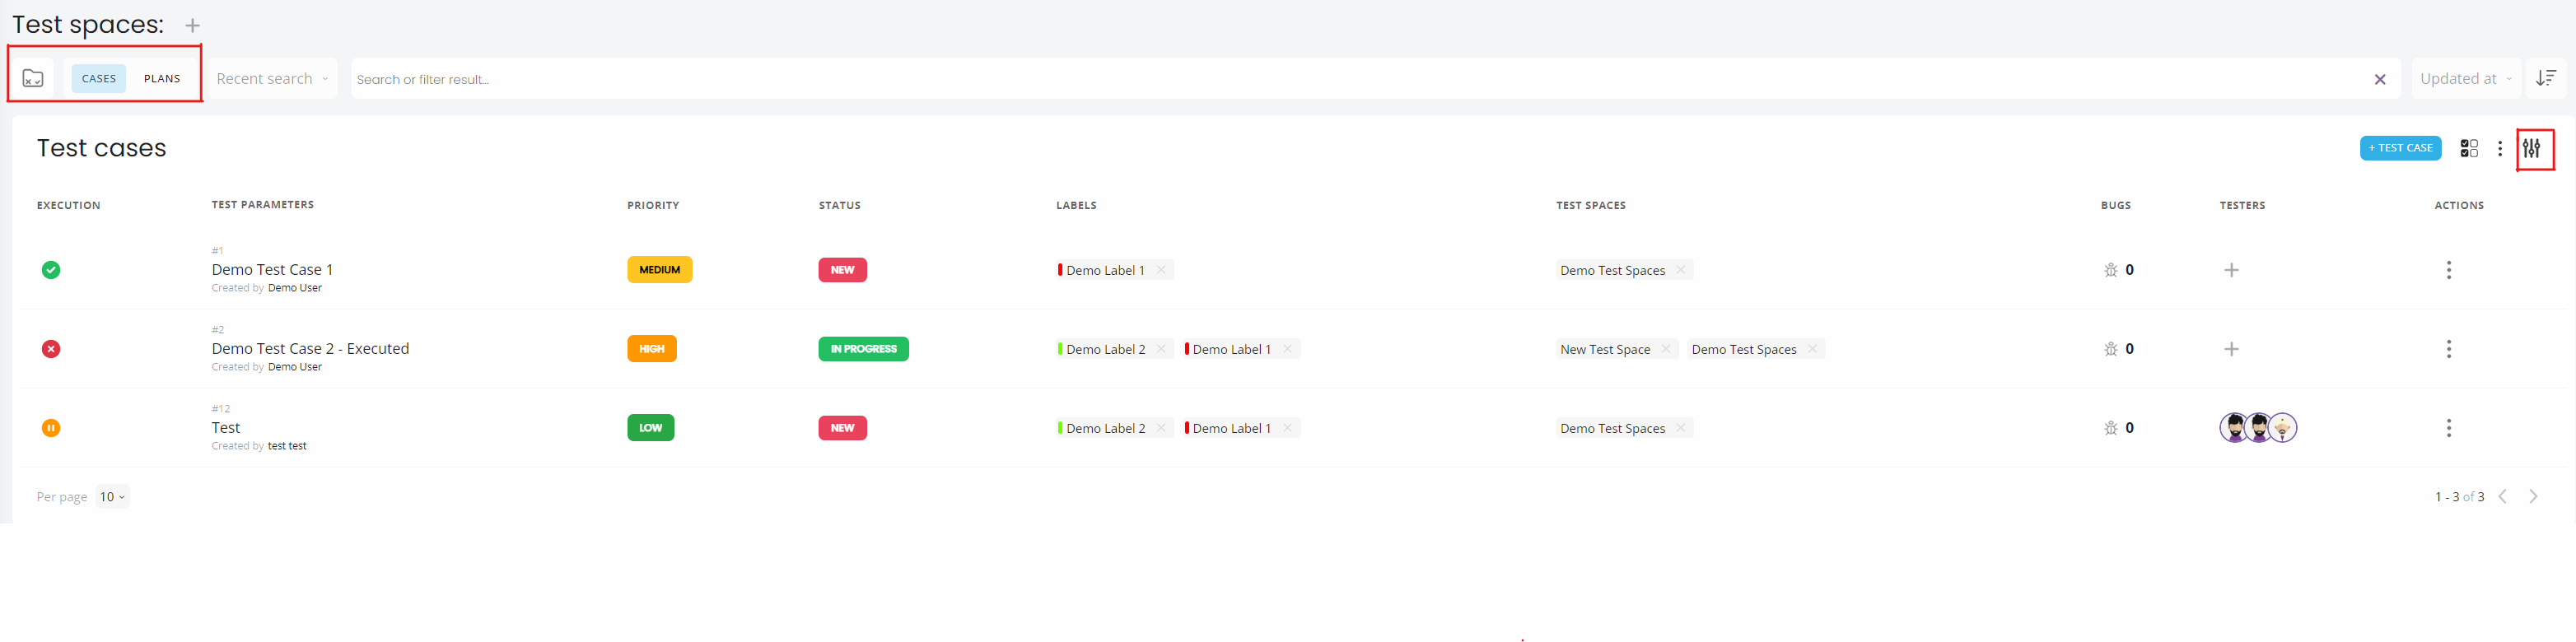
Detailed Test plan view. 
Detailed Test space view. 
Creating a new test case
Create the Test Case by clicking on blue button +Test Case. 
Also you can create by using a plus button.

Creating a new Test case with selected information in juno filter
If more Test Cases with the same information (label/status/ priority/ test space etc.) need to be created, you can simply select them in juno filter. Any newly created Test case will be created with selected information. This feature is very useful while writing test analysis.

Creating Test case steps
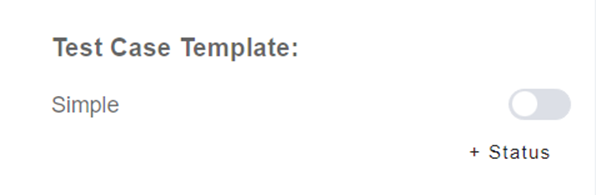
You can set Test case steps in two different views: Simple or Robust. Go to the Project Settings / Test, where you can switch the Test case Template. The difference is in the amount of information shown in your Test cases.
Simple test case step
To create a simple test case step, click into the +Add new step text field. Confirm the name of the test step and press Enter.

Column test case step
This view is available only for full HD screen.
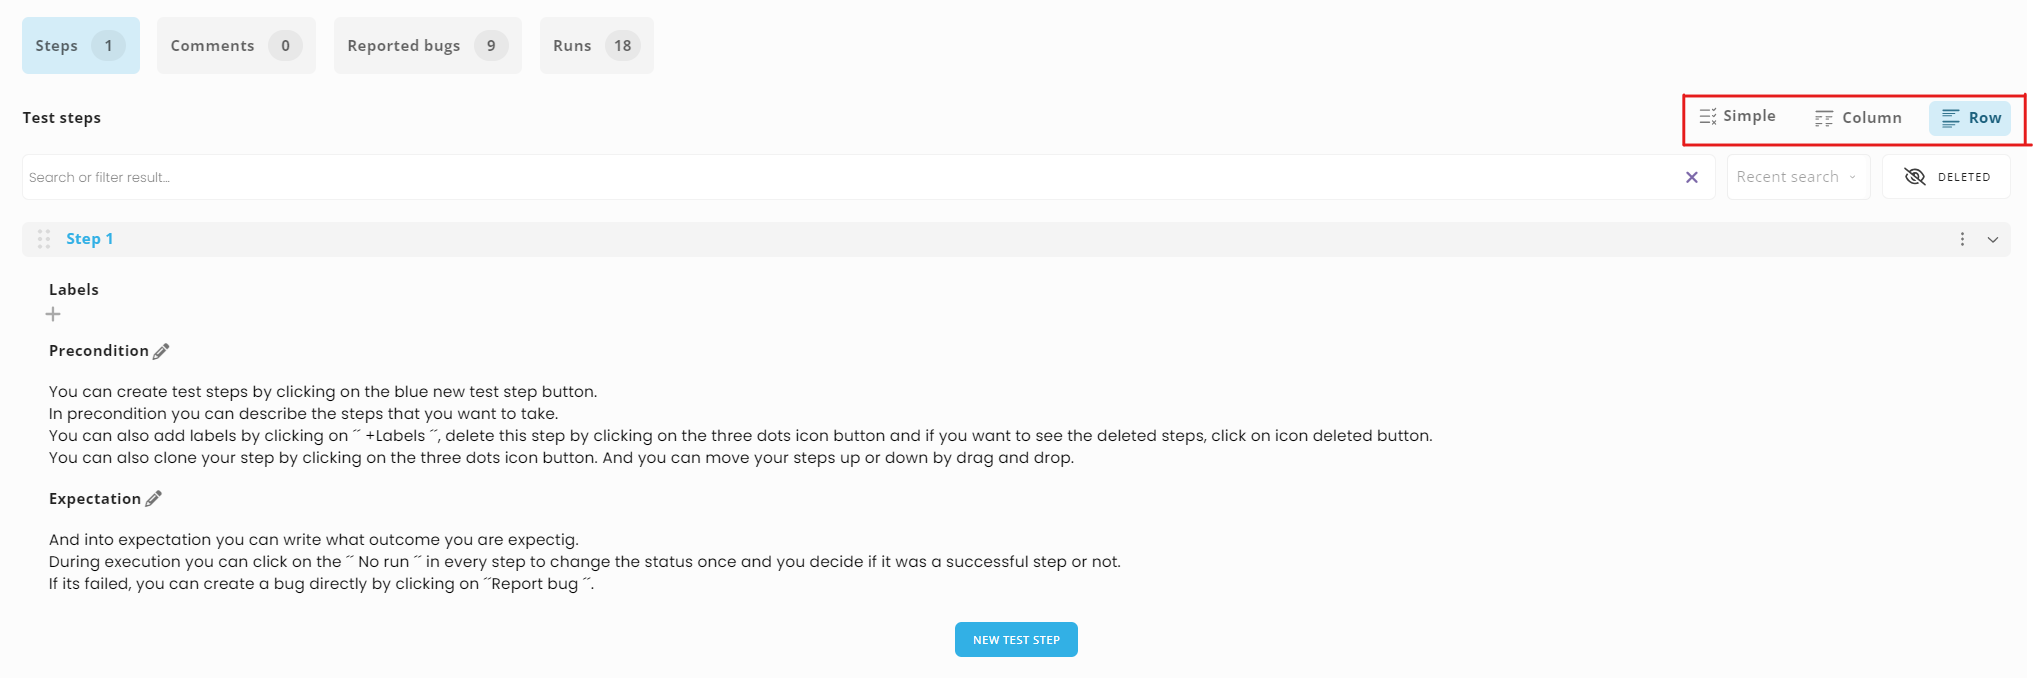
Row test case step
To create a row test case step, click on the new test step button. Write the Precondition and then write the Expectation and click Create or Create and close.
Test case execution
You can execute your test case right in the TC form. 1. For the first execution, the regular Execute button appears. For further executions, you can use the option "Grab results & run" to continue any previous execution 2. Select the Test Plan 3. Grab the last run and execute (new added steps will be in status NO RUN) 4. Or contunue the last execution.

During the execution, you can either change execution status for each step, or you can change execution status for the whole test case ( = each step will have the final execution result.) Click on the NO RUN button and select one of the following statuses: - NO RUN - NOT COMPLETE - PASSED - FAILED - N/A - BLOCKED
If all steps have the result passed → Test case will also have the result passed
If there is one failed result in the steps → The whole Test case will have a failed result
If the steps have a mix of results, such as not completed, passed, but none of the steps have the result failed → Test case will have the result not completed
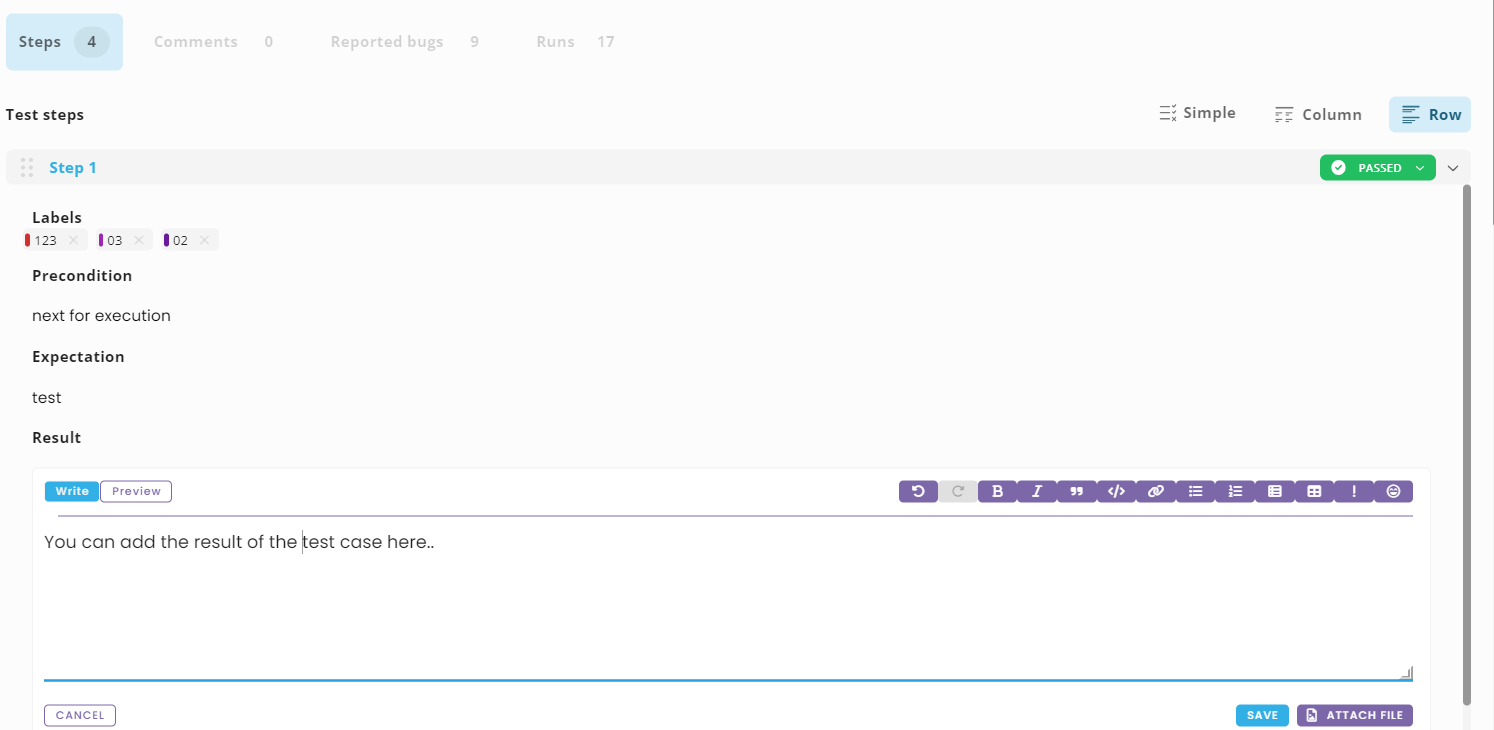
If you switched to the row test case view, you can also write the result of the execution to each step.
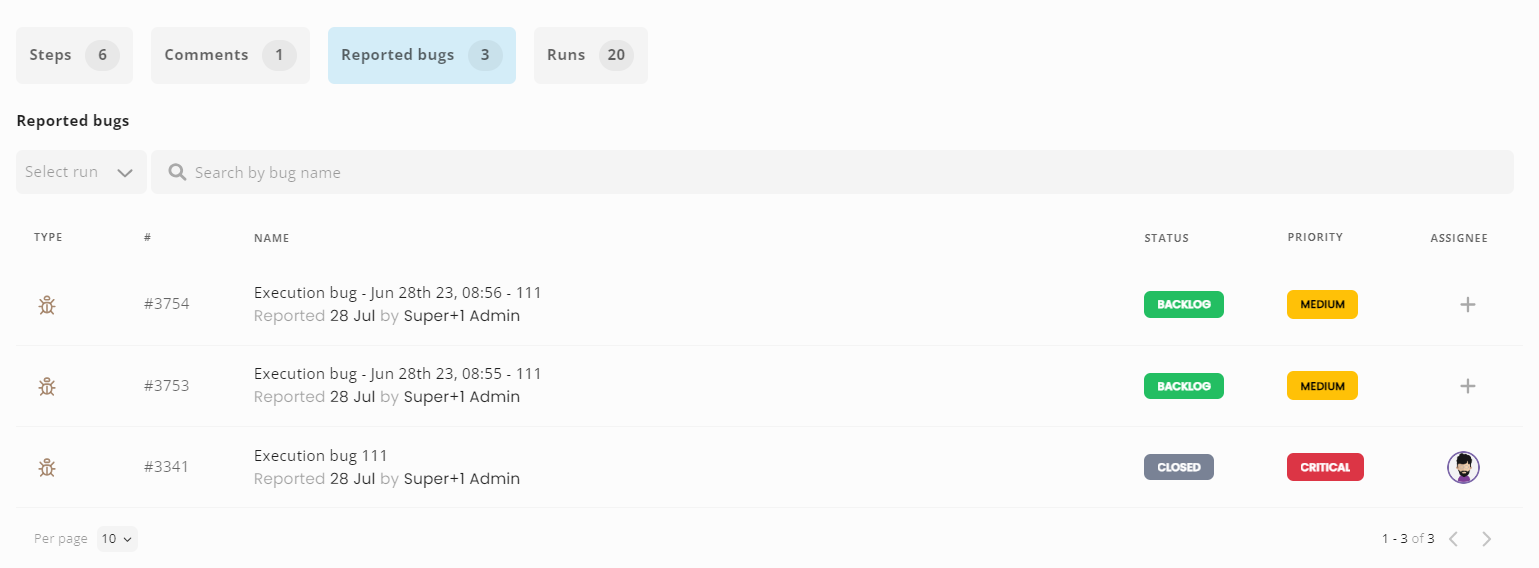
If the execution result is Failed, you have the opportunity to report a bug during the execution. Simply click on Report a bug, which will be automatically reported and the bug’s ID will be displayed. If you want to edit the reported bug, click on the bug’s ID and its edit form will open.

To finish the execution, click on the Stop execution button.

All your reported bugs you can find in section Reported bugs.
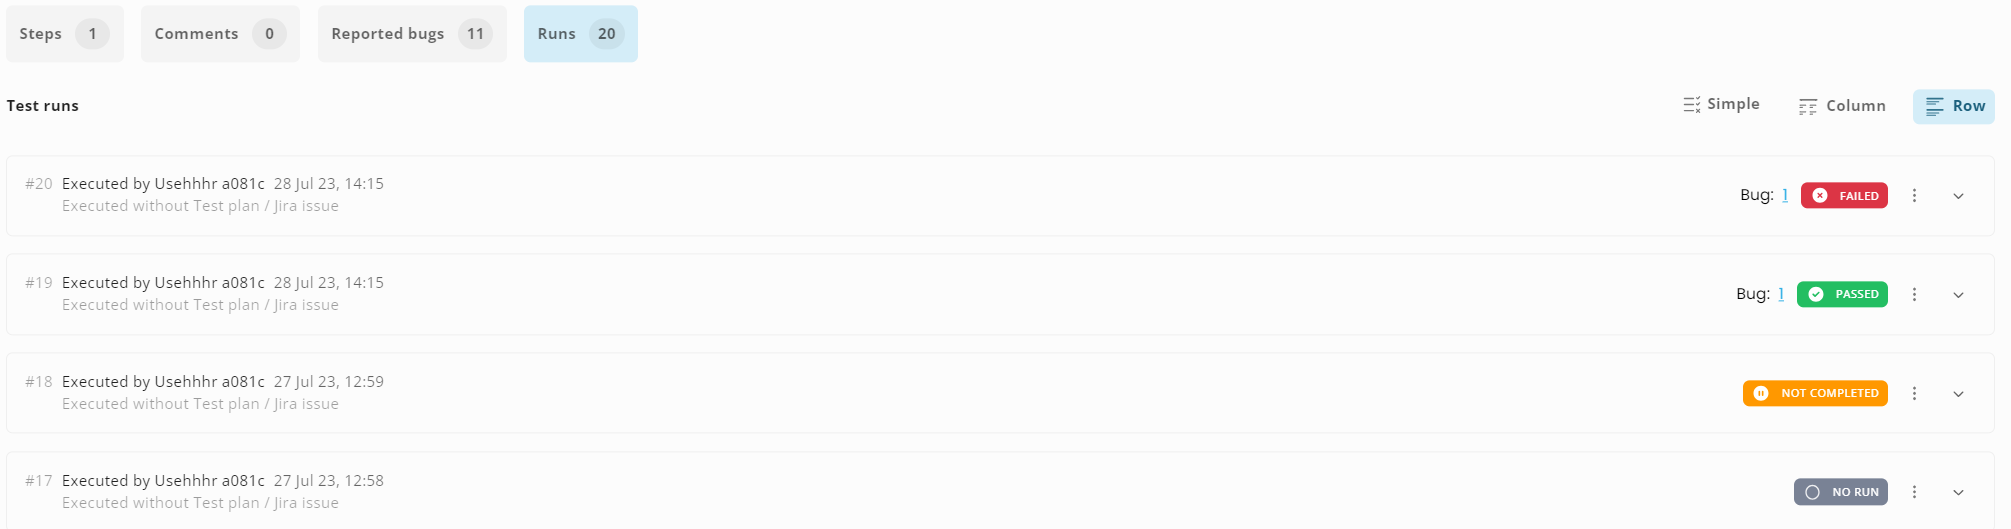
In the RUNS tab we can see the history of all executions. If the test plan execution is on, only executions related to the certain test plan will appear.
Also you have the quick access to execute the Test Case in the main page of Test Module

Or in the Main User Dashboard in section TEST.

Create a test plan
To create a test plan, simply click on "+ Test Plan" bar and press Enter. The Test Plan Modal will appear. After editing the Test Modal, click on CREATE and the next TP modal would apppear. It is very useful for writing Analyses. To be able to edit the test plan, you need to open the test plan edit form (by clicking on its name). In the test plan edit form you can also check the Summary and write a Description of the test plan.

In the test plan edit form you can write a Description of the test plan, and note features that should or should not to be tested.

If you have not linked a test plan to a test case in the test case edit form, you can link a test case to a test plan in its edit form. You have two options: 1. Click into + Select or Add Test Case field and choose an already created test case 2. Or create a new test case by typing its name on the top of this tab and then click the + button

Now your selected Test Cases can be executed in this specific Test Plan.

Execute a test plan
The execution of the test plan is activated by clicking on the execution button. Once it is activated, only the test cases linked to this test plan will appear with a NO RUN execution status. The progress of the execution will be displayed at Test plan main view. Click on the Stop button to stop the execution. All results of executed Test Plans will appear as a percentage counter widget.

Simple and Robust Import
You can import data into Test Cases. First go to Project Settings and set up the view of your Test Case, whether you prefer simple or robust view.

Then simply click on the 'Import excel'. You can only import new data - it is not possible to use the template for editing your existing test cases in your juno.one project. ID, Name, Status, Priority, TS precondition and Expectations are required. Do not add or remove any headers that are not listed in the list of template columns above, otherwise the import won't work.

Download the template fo your Imports. Here you can edit all the data under the specific header.

Headers:
ID = your test case ID
Be aware that the ID in the import template won’t be the same as the one you will see in the juno.one project. If your test case has more than one step, then write in each row the same test case ID number. For example: if you write in four rows the same test case ID 1, then a test case with ID 1 has 4 test steps.
Note: you need to write the same ID below each other - if you mix them up with different IDs in between ( different test case), you will create more test cases, rather than 1 test case with more steps.
Name = the name of your test case
Status = it is mandatory to write the same status which already exists in your juno.one project, otherwise you won’t be able to import the data
Priority = it is mandatory to write the same priority which already exists in your juno.one project, otherwise you won’t be able to import
Test plans = the name of the test plan that your test case is linked to. If you want to add more test plans, write their names and separate them with a comma (,)
Test Spaces = the name of the test space that your test case is linked to. If you want to add more test spaces, write their names and separate them with a comma (,)
Main entity = the name of the main entity that your test case is linked to. If you use your export as an import for another project, you need to use the same ID of the Main entity as the one displayed in juno.one.
Description = description of your test case
Test data = data of your test case
Expected result = the expected result of your test case
Labels = you can use an existing label name, or you can type a new label - it will be created in the project if it doesn't exist already.
Author = the name of the Author
Owner = the name of the test case Owner
Testers = the name of Testers. This column is not mandatory.
Collaborators = the name of Collaborators. This column is not mandatory.
Test step labels = labels, which are displayed for each test step
Test steps = the name of each test case step.
Test step precondition = description of the step precondition
Test step expectation = description of the step expectation
How to Import?
Only Super Admin or user with permissions can import test cases to their project. You can import only new data. It is not possible to use template for editing your existing test cases in your juno.one project. Then click into the ‘Choose file to import’ field. Confirm the file you want to import and then click Upload.
Export
You can export test cases as user or admin. Choose the type of export (XLSX or CSV) and click on the export button, then confirm Simple or Full Export. Check your email and open the provided link.

If you made an Export and want to use it as an Import for another project, you have to edit it. It is mandatory, that this file has the same column names and the same number of columns either as a Simple or Robust template, otherwise you wouldn't be able to import the data. Do not add or remove any headers that are not listed in the list of template columns above, otherwise the import won't work.
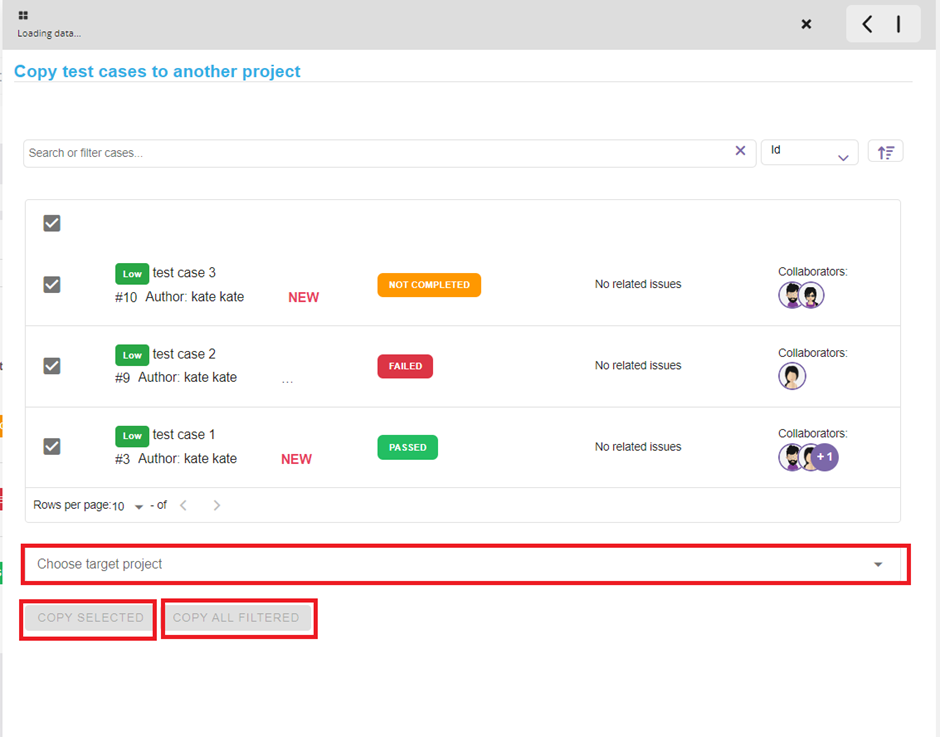
Copy test cases to another Project
You can copy test cases from one project to another by clicking on the copy to another project icon.

A new tab will open – tick all test cases or select the test cases that you would like to copy to another project. You need to confirm the name of the project you want to copy to and then click either 'Copy all' or 'Copy selected'.