Issue Management
Issue Management
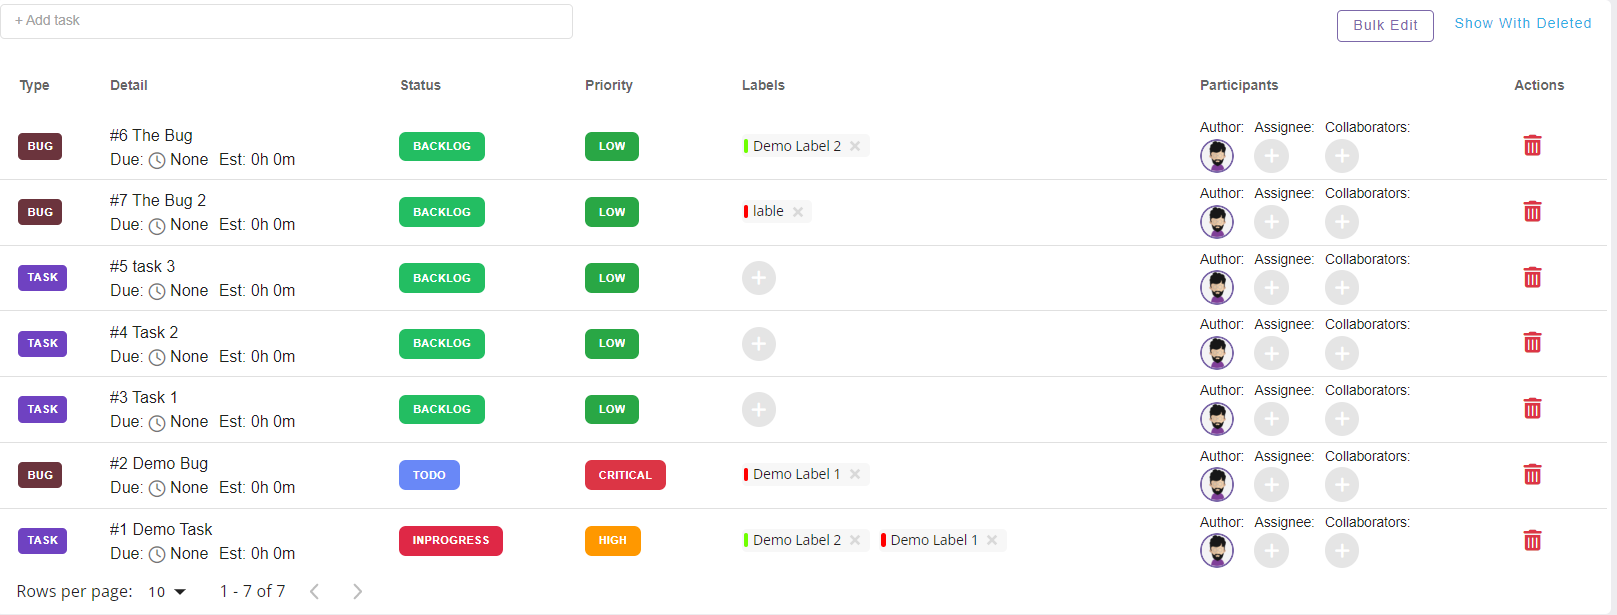
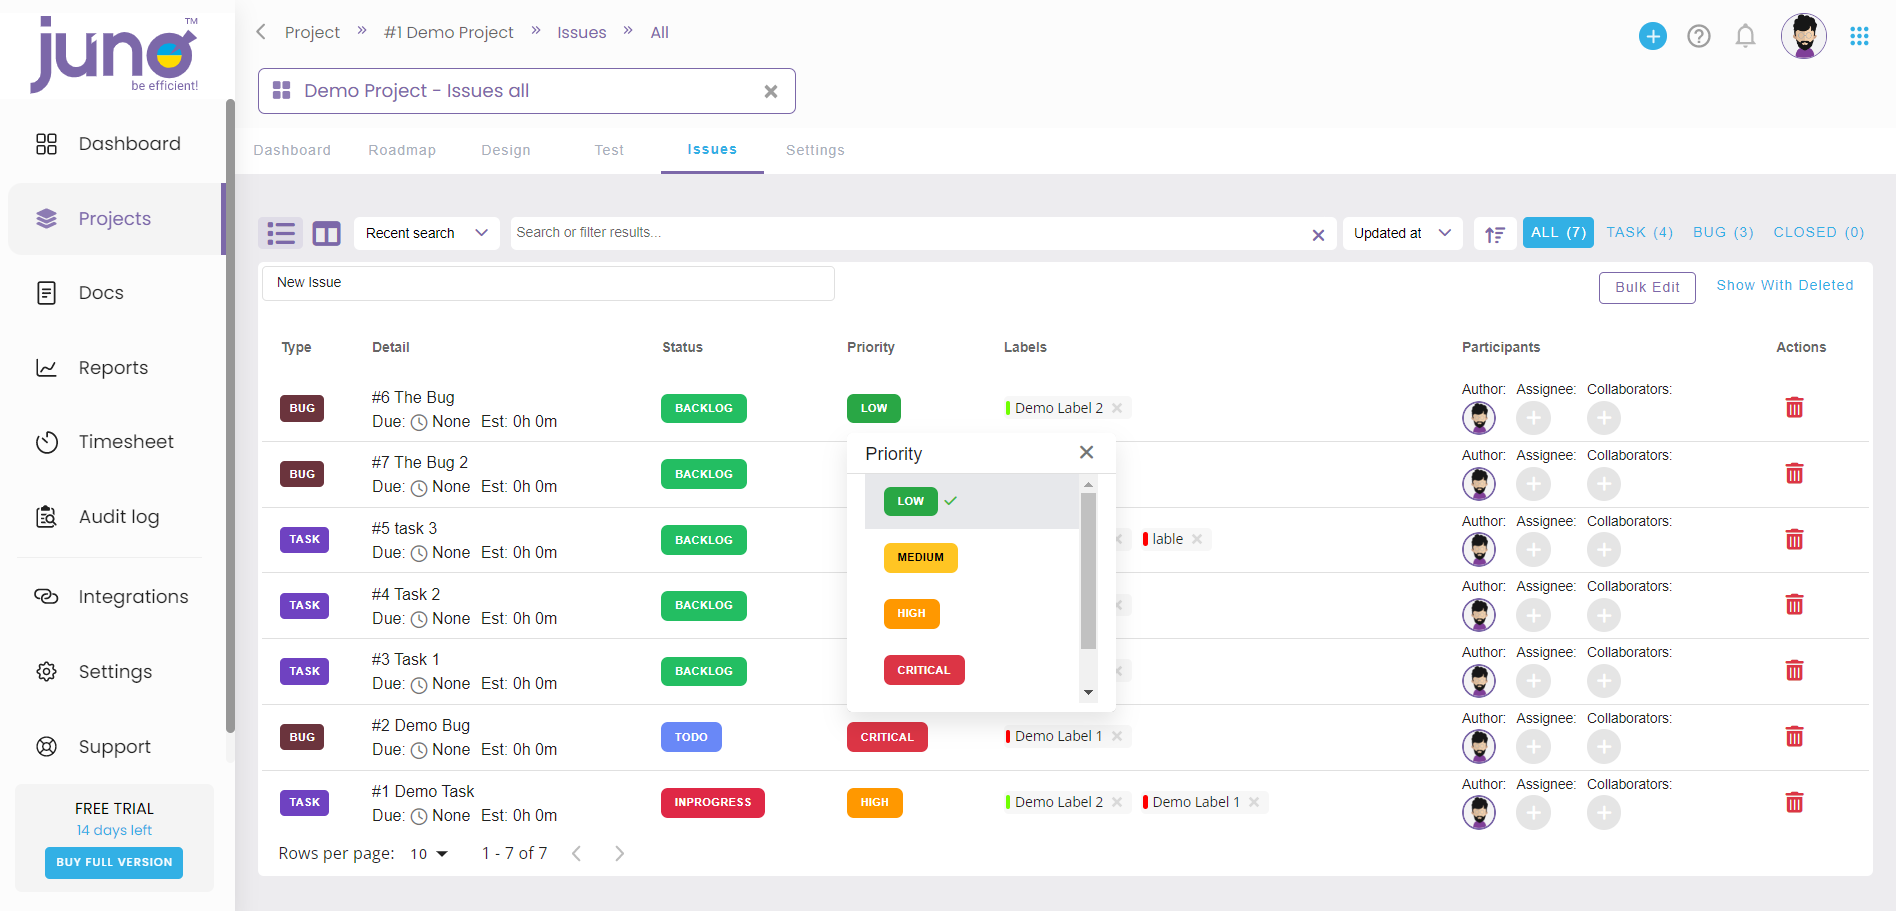
In this module you can create, edit, filter or track any issues which have occurred while you have been working on your project. All tasks and bugs are displayed on the main page with their important information like Status, Priority, added labels and assigned participants. To see only Task or Bugs, simply click on the button in the upper right corner. If you click on Closed, all issues with Closed Status will appear.
Create bug or task
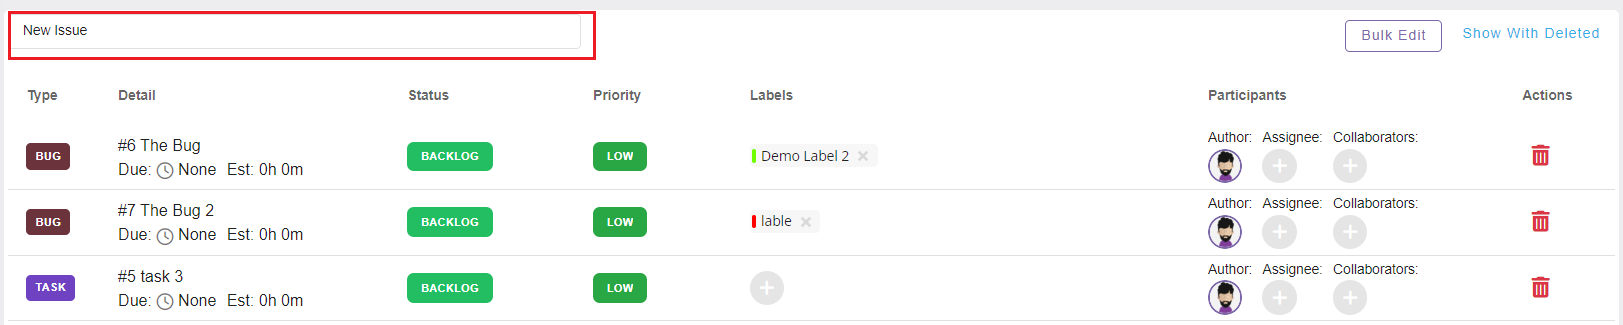
There are two ways how to create an issue: 1. On the main page – simply click into the text field +Add tasks and write the name of your issue, then press Enter. A new created task/bug will be displayed on the top of the issues list.
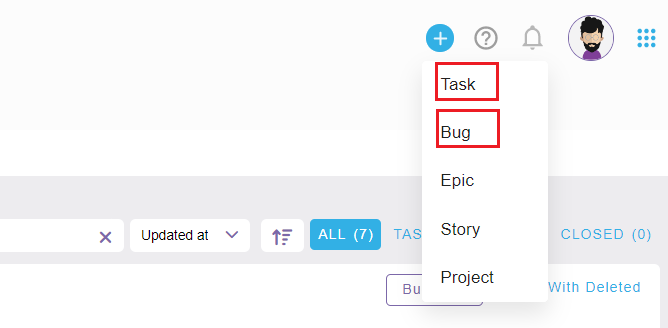
- Click on the + button in the top right corner and click on the Bug or Task button – regarding what you want to create. A bug/task edit form will open. Confirm related information and click Create. A new created task/bug will be displayed on the top of the issues list.
Edit issue
To edit any issue, simply click on the information you want to change. If you click on the Type Task/Bug – it will automatically change to Bug or reverse.
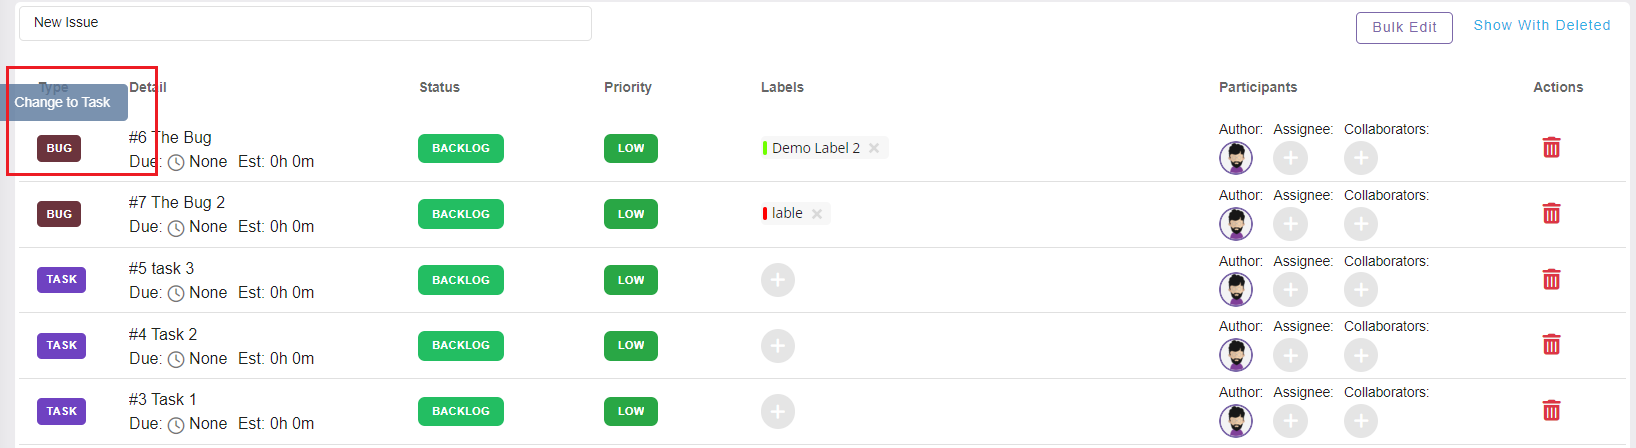
If you want to edit Status, Priority, Labels or Participants simply click on the certain button and the dropdown menu will appear.
To delete your created Issue, click on the red bin symbol. In case you want to reactive a deleted issue, click on the Show with deleted link and all deleted issues will appear with a green reactive symbol – if you click on it, deleted issue will be active again.
If you need to do a more detailed modification, click on the name of certain bug/task and its edit form will open. You can edit the same information as on the Homepage, plus you can add/edit Description, add main Entity or Roadmap.
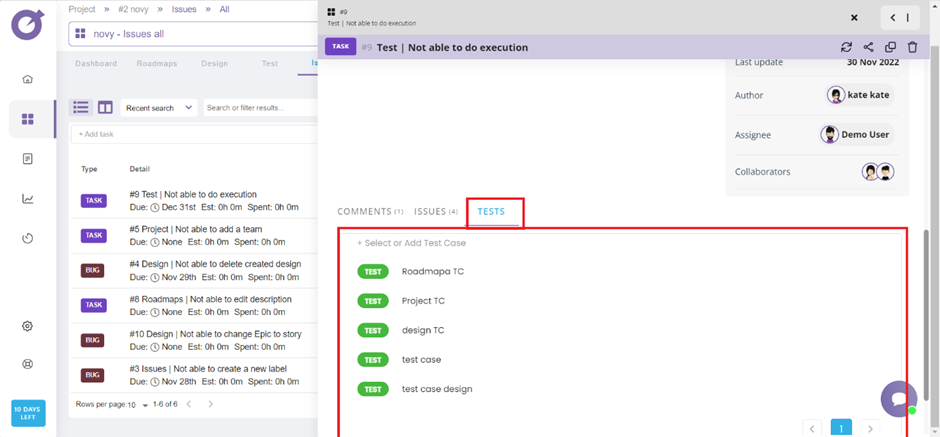
You can also add Estimate / Spent time and the Due date. In addition, you can link child entities to each issue. Click on Issues/Test and a new tab with created issues / test cases will appear. You can either add an already created test case or create a new one. Click into the +Select or Add a test case, write its name and then click on the + button on the right side.
At the bottom of the edit form, comments are displayed.
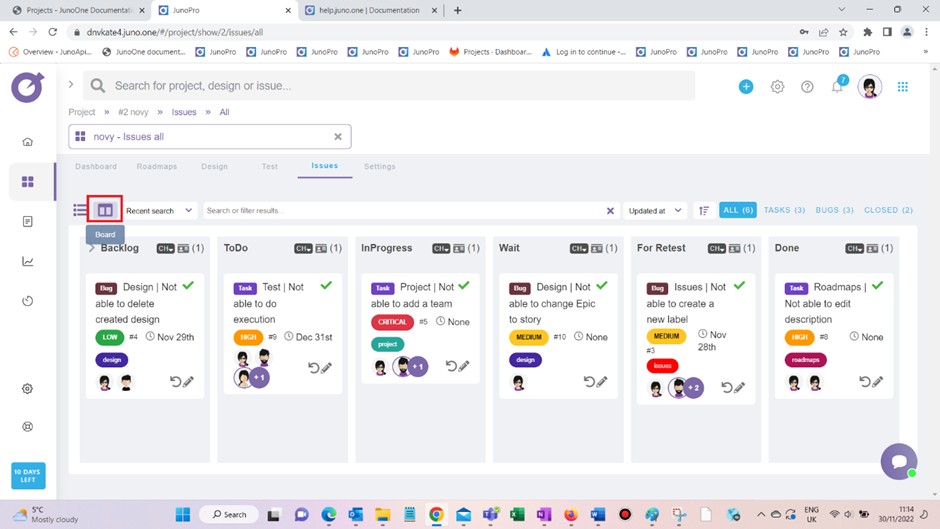
To see all issues divided by status, click on the board view. You can move issues between columns and also edit issues by clicking on the pen symbol. You can also flip the card by clicking on the rotating arrow to see more information regarding each issue.