JIRA and MultiJIRA
Jira and MultiJira Integration
SingleJIRA integration
Jira integration allows you to link multiple juno.one projects to a project in JIRA Atlassian and use the JIRA Atlassian ticketing system instead of the built-in Issues module in juno.one.
This connection allows you to run your project in juno.one and JIRA at the same time.
-
We are not downloading any of your data onto our servers, but simply displaying it in your juno.one. As soon as you turn the integration off, all the data will vanish from juno.one, only leaving the test run logs in Jira.
-
Once Jira is integrated on a juno.one project, Jira bugs and issues replace the bugs and issues that you may have previously created in juno.one. Once you turn the integration off, however, you’ll be able to work with your juno.one bugs and issues again.
Main benefits:
- Thanks to the simple set-up, your Jira issues are displayed in juno.one in a matter of seconds, so you can start working right away.
- There are no disturbances or data-loss risks during the integration.
- No need to switch between tools to track and drive the testing progress
- Absolute data security - none of your data gets saved anywhere in juno.one
- No need to use any more awkward Jira plug-ins
- Our company does not store any data from Jira in internal systems. All communication takes place "in real time".
MultiJIRA integration
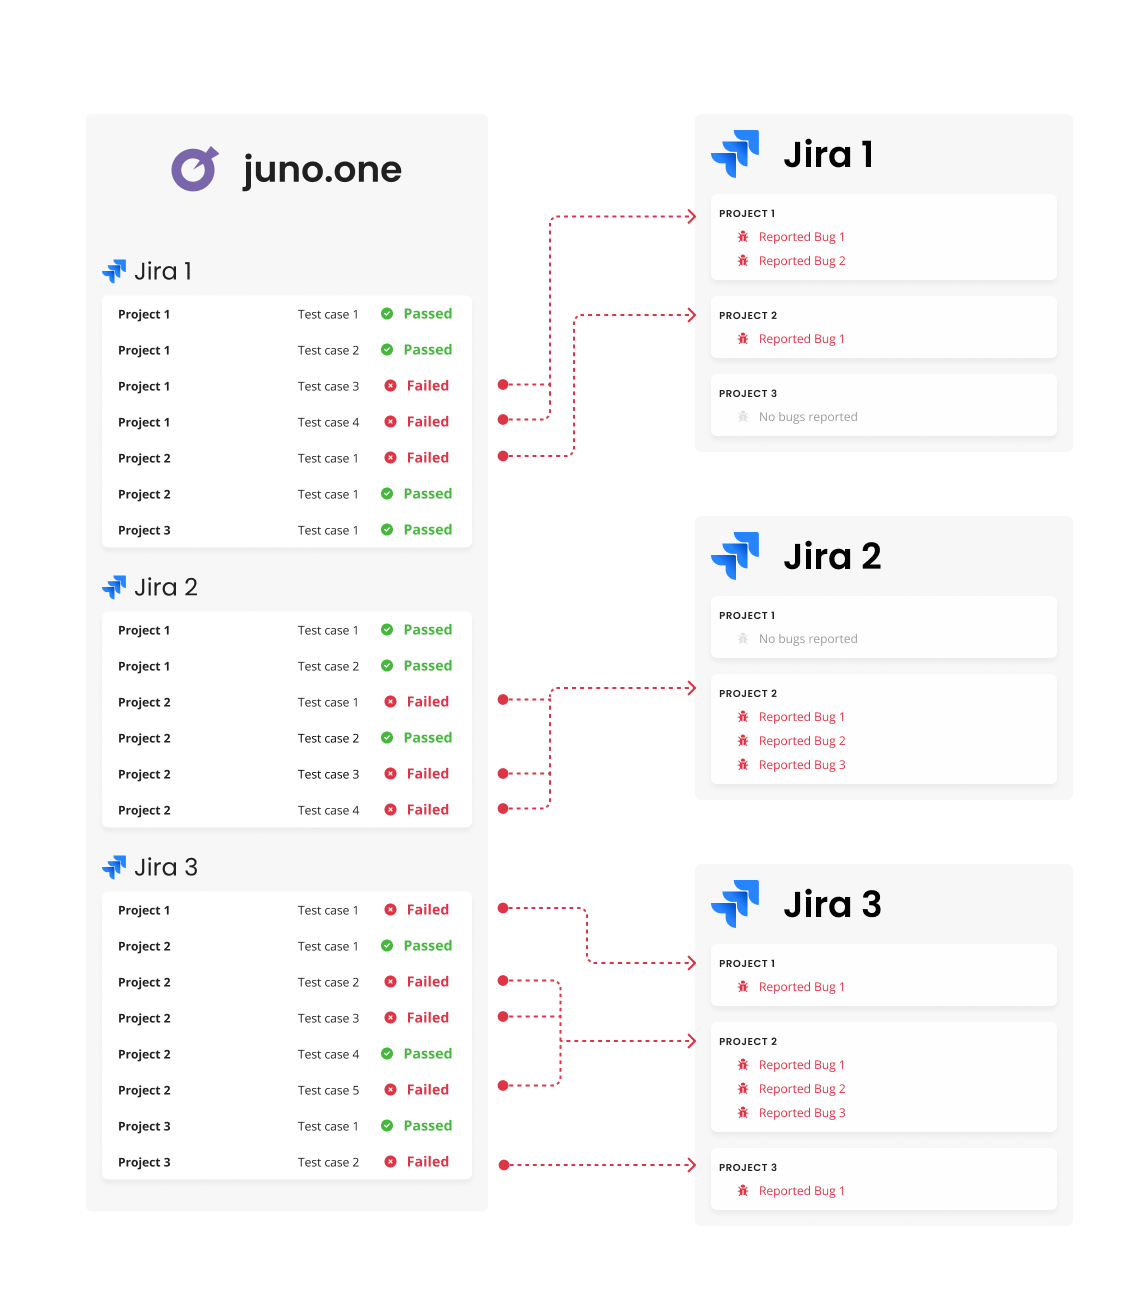
MultiJira integration allows you to connect a juno.one Project to multiple JIRA projects.
You connect multiple JIRA projects to a single juno.one project the same way as you do with a single JIRA project. The whole process is described step-by-step below.
Main benefits:
- If you are a testing supplier for various clients, you can view all of the JIRA issues in one place without the need to jump from one JIRA to the other.
- No additional JIRA licenses are needed for your testing team – just integrate JIRA into juno.one and have your testers work there.
- Report bugs directly into respective JIRA projects as you go through the testing process
- Save vital resources such as money and time by optimizing your testing efforts.
Both single- and multiJIRA are ready to work in cloud as well as on-premise.
How to set Global settings of Jira Integration?
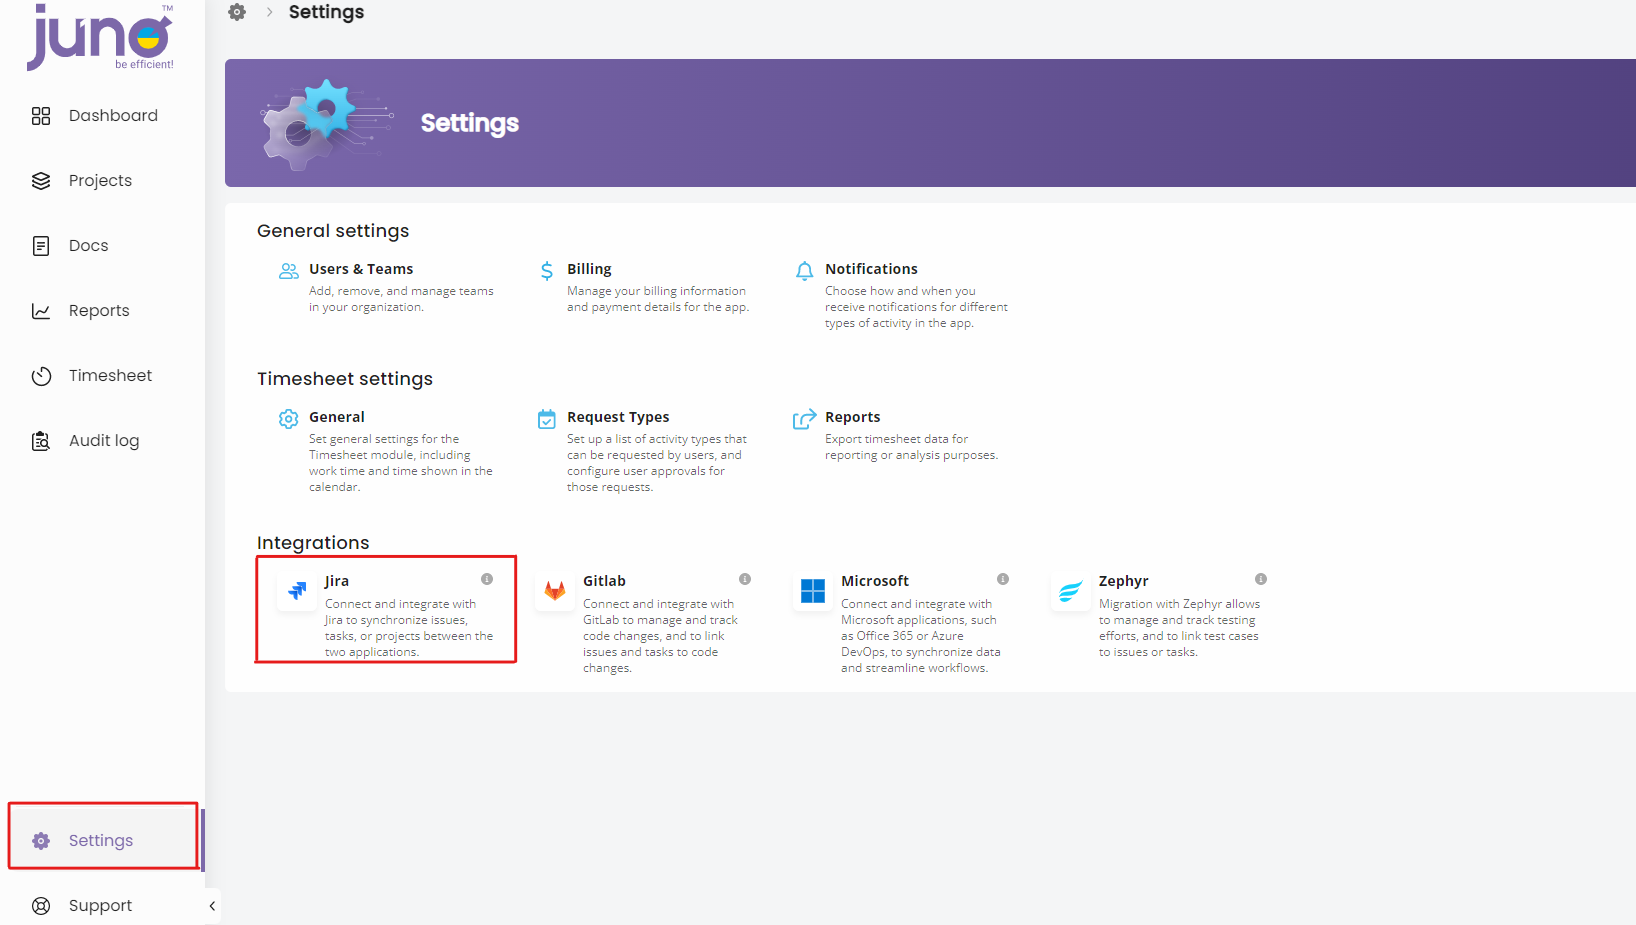
First of all, click on the Settings button on the left sidebar and then select Jira in section Integrations.
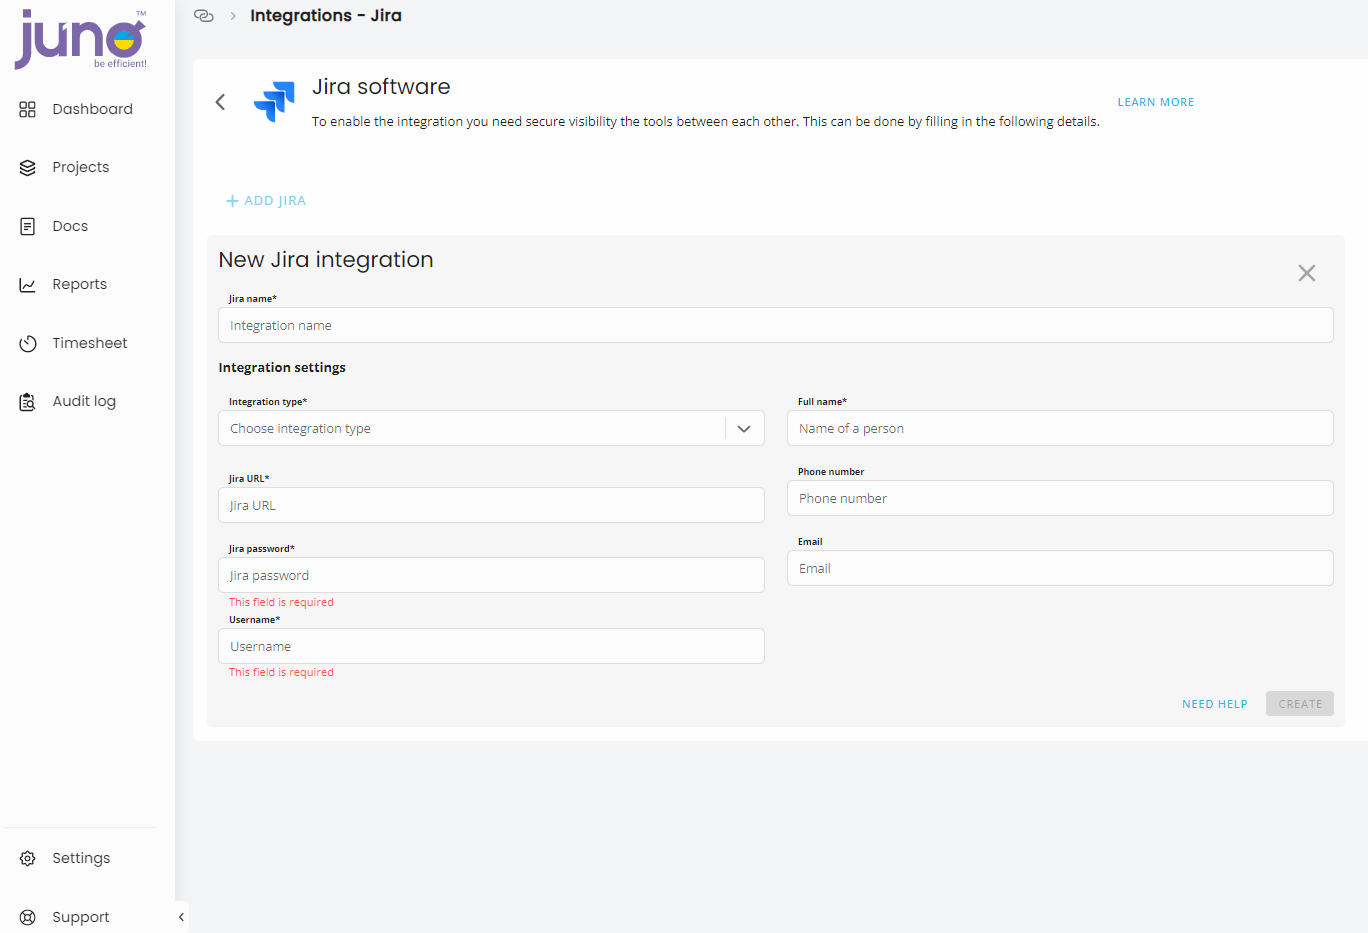
Then enter all information and click ‘Create’. If you click on ‘Learn more’ button, you will be redirected to the help.juno.one website. In the section ‘Learn more’, you will find the JIRA integration FAQ.
- Integration type - depending on whether your JIRA is OnPremise or Cloud
- Jira URL (example:" jiratest.atlassian.net " - you will need to type the URL without https://)
- Jira access token / password – generate a token from your Atlassian account. More information about how to generate a token can be found here:(https://support.atlassian.com/atlassian-account/docs/manage-api-tokens-for-your-atlassian-account/) In case you use integration type OnPremise, you need to enter your JIRA password
- Username – it is the same e-mail address you use for your JIRA login
Thanks to the MultiJIRA integration, you can add as many JIRA Integrations as you need.
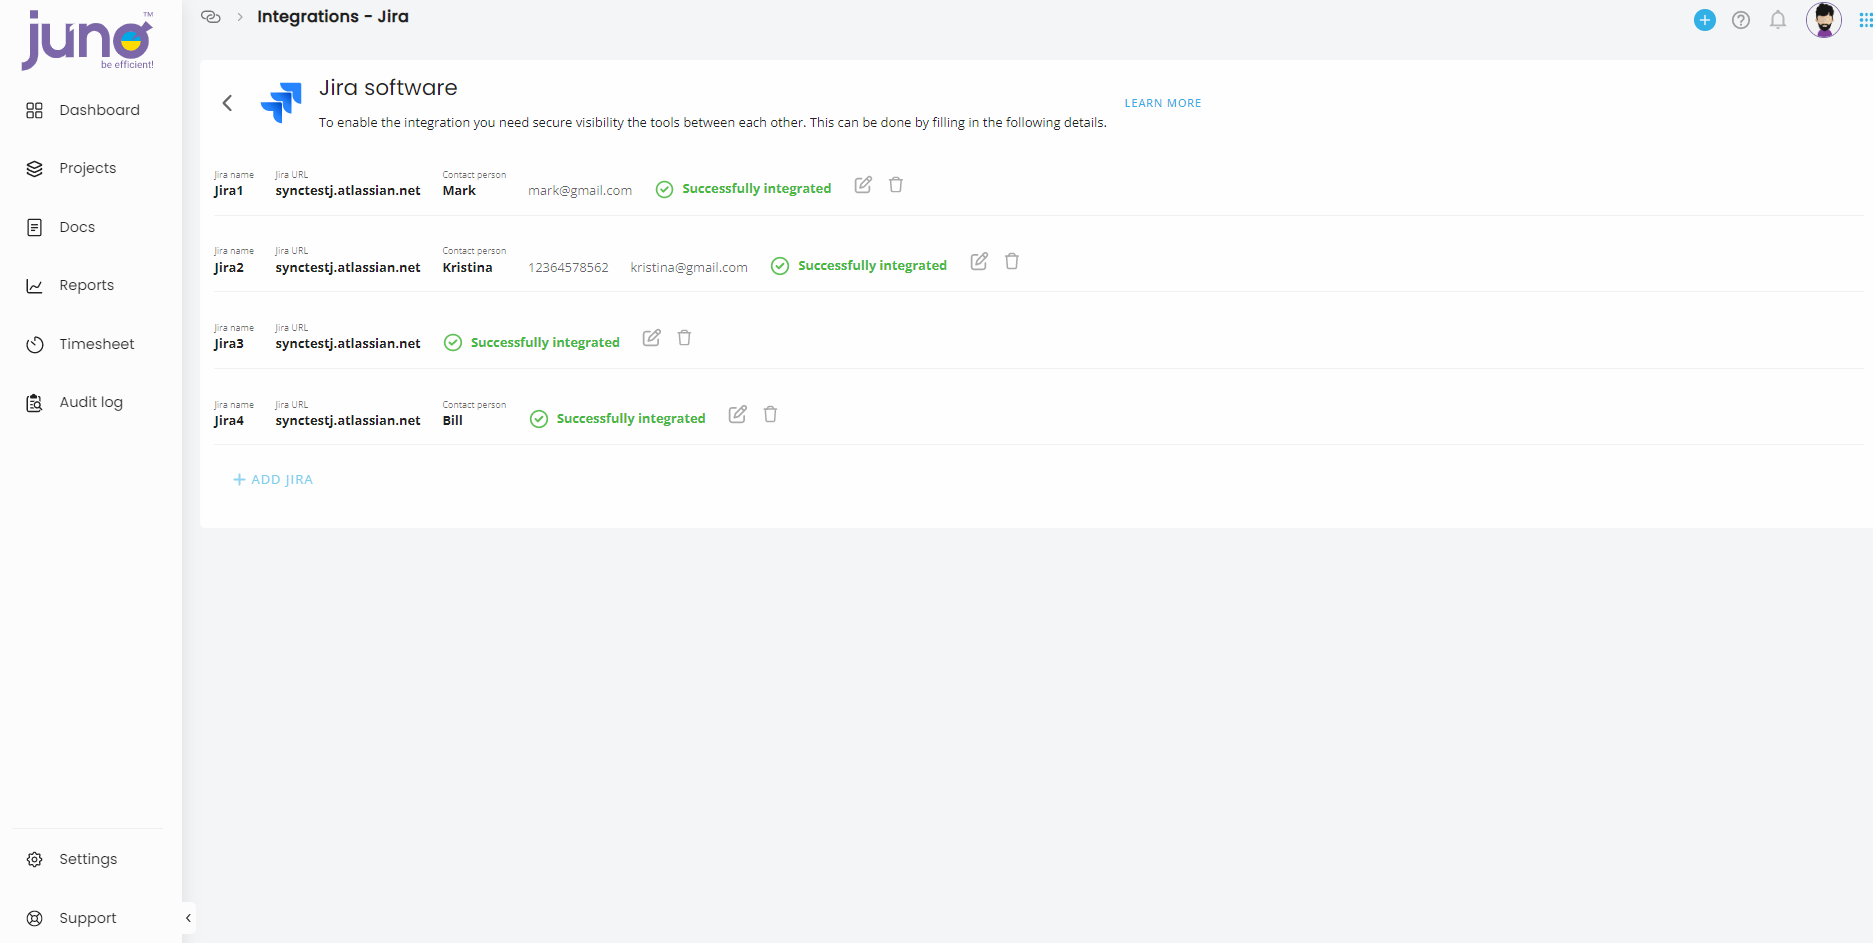
If you want to edit Jira integration, click on the pen symbol. You will need to confirm Jira access token, to be able to make any updates.
How to set Project Settings
Once the JIRA Integration is successfully created, open the Project in juno.one that you want to connect with JIRA. Go to the Project Settings and click JIRA Integrations. You can create either a Single or a MultiJIRA Integration.
- Single Jira (= the execution into Jira is possible)
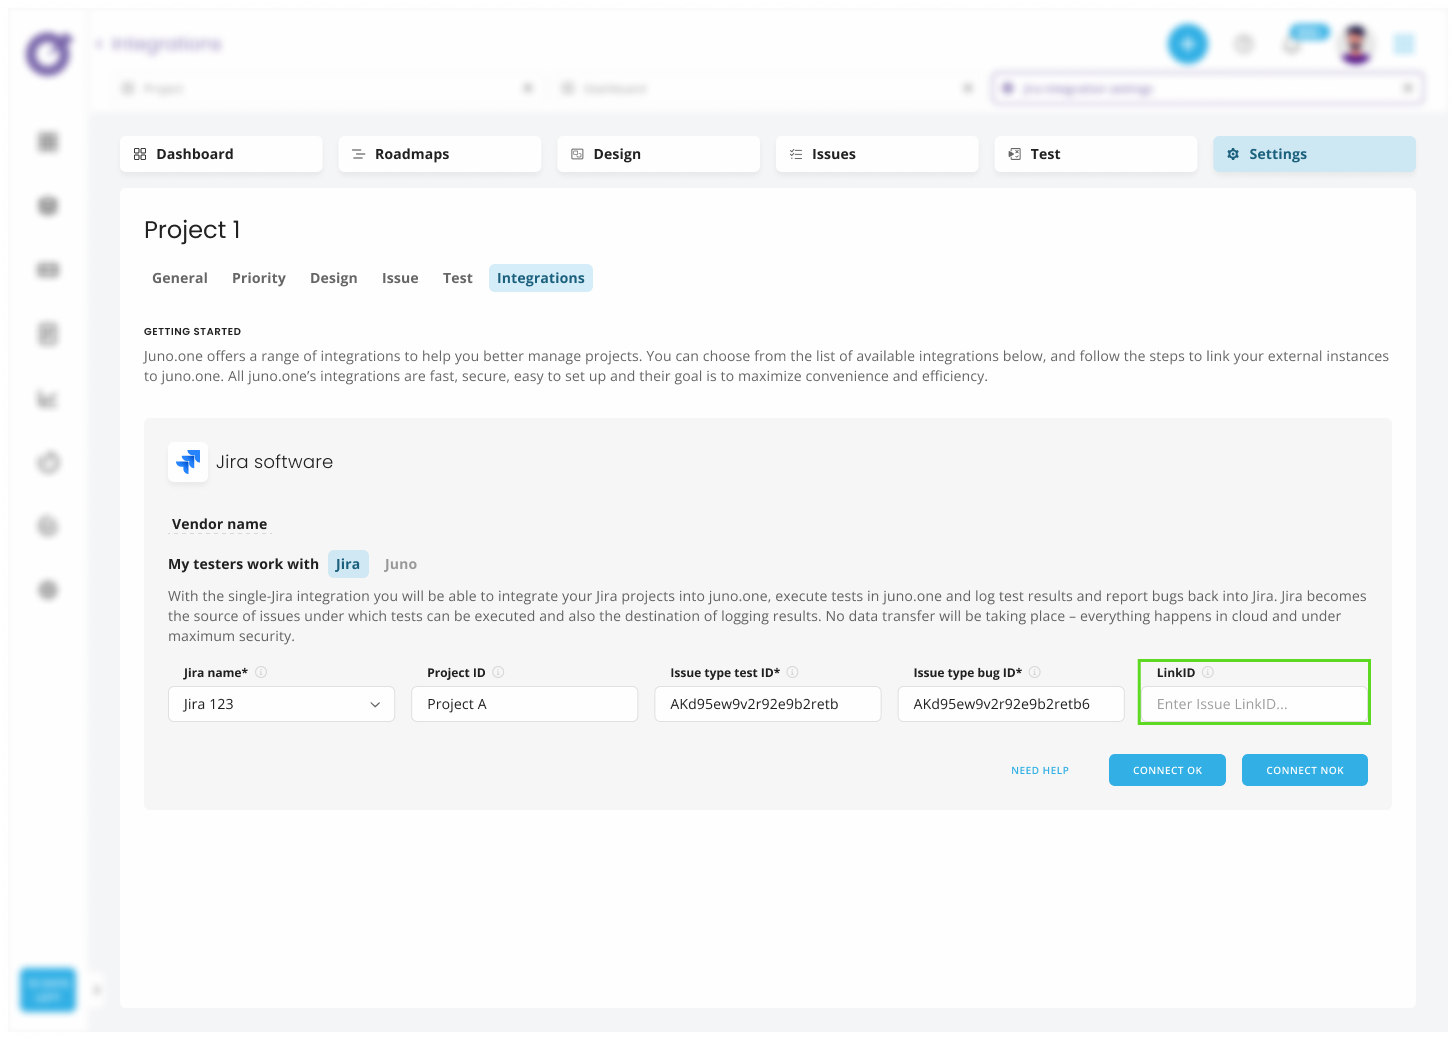
To create single JIRA Integration, choose JIRA in the field ‘My testers work with’. Confirm the Name, choose JIRA integration (which you created in the global settings), Project ID, JIRA Issue type test ID and JIRA Bug type ID. Then click on the “Create” button -> integration between juno.one and JIRA will be created. If you want to disconnect JIRA and juno.one, click on the “Disable” button.
How to get Jira Issue type test ID, Jira Bug type ID and Link ID
- Log into Jira Atlassian
- Click on the project you want to use for integration
- Open your project, go to the Project settings and click on Issue types
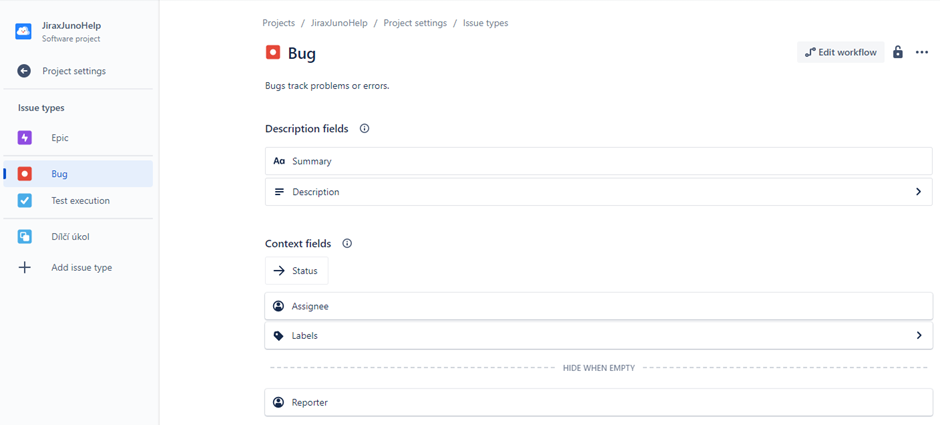
- In Issue types, create 1x Issue type for Bug and 1x for Test execution (this can also be a sub-task).
IMPORTANT: You can call both issue types whatever you like, we recommend using the name "Test" for the issue type where test executions will be logged, and the name "Bug" for the issue type that will be used for logging bugs during test execution.
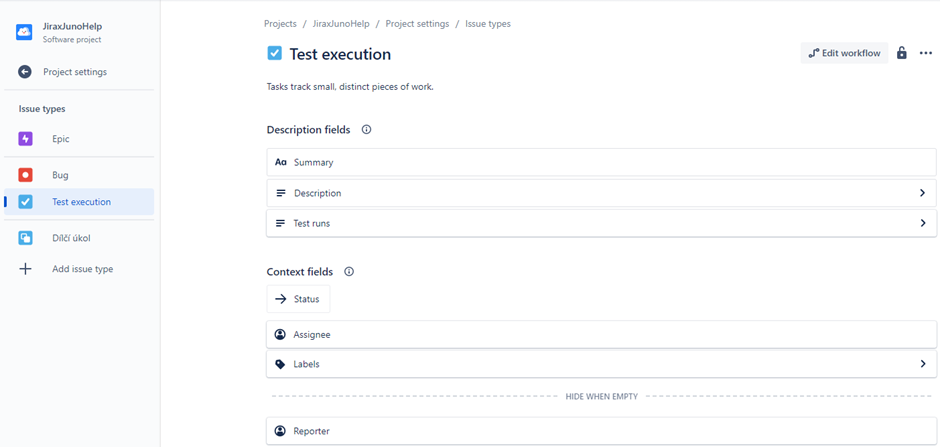
- You must add a new Paragraph called “Test runs” to the Test execution issue type, to make sure the executions from juno.one will be logged here.
IMPORTANT: Calling the paragraph custom field "Test runs" is mandatory.
- At the end of the URL address you’ll find the ID number for the Issue type test and Jira bug type, which is used for integration with a project in juno.one

- In Jira Atlassian, in the Board view, create an Issue with Issue type test, which will be used to display test executions
- The types of Jira links and how to set them up are described here.
In the LinkID field, you can enter the ID of a Jira link that you have previously defined in Jira. You can use this option if you want your bugs (issue type bug ID) to connect to your tests (issue type test ID).
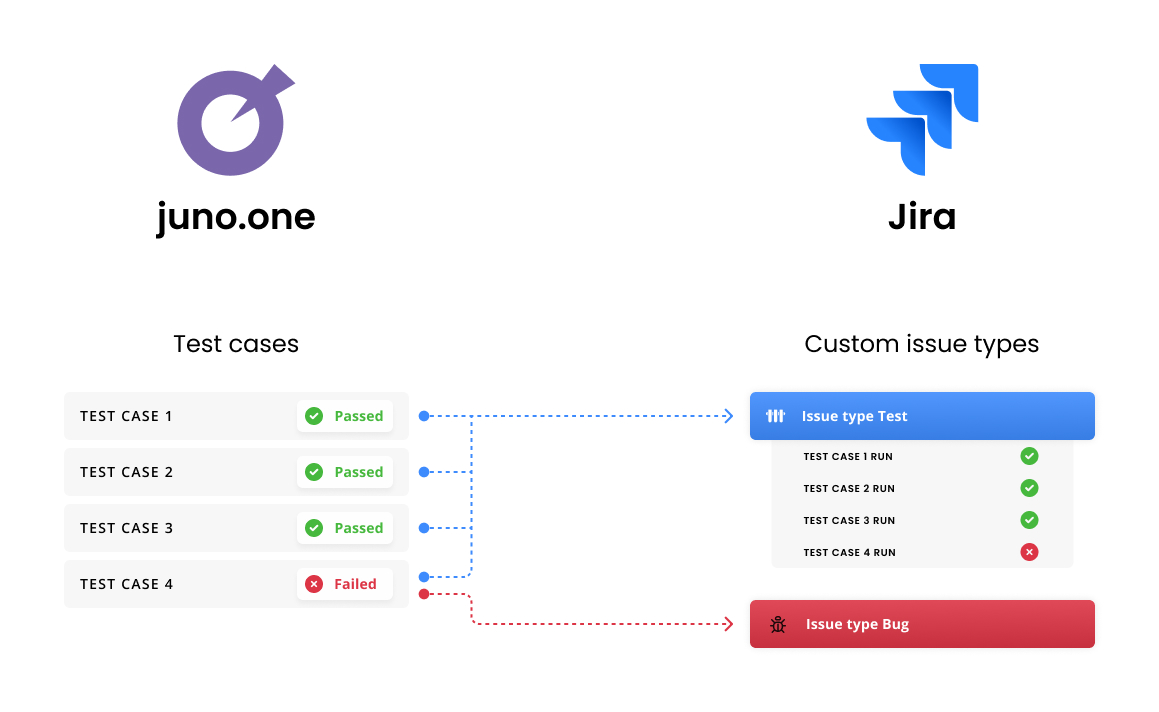
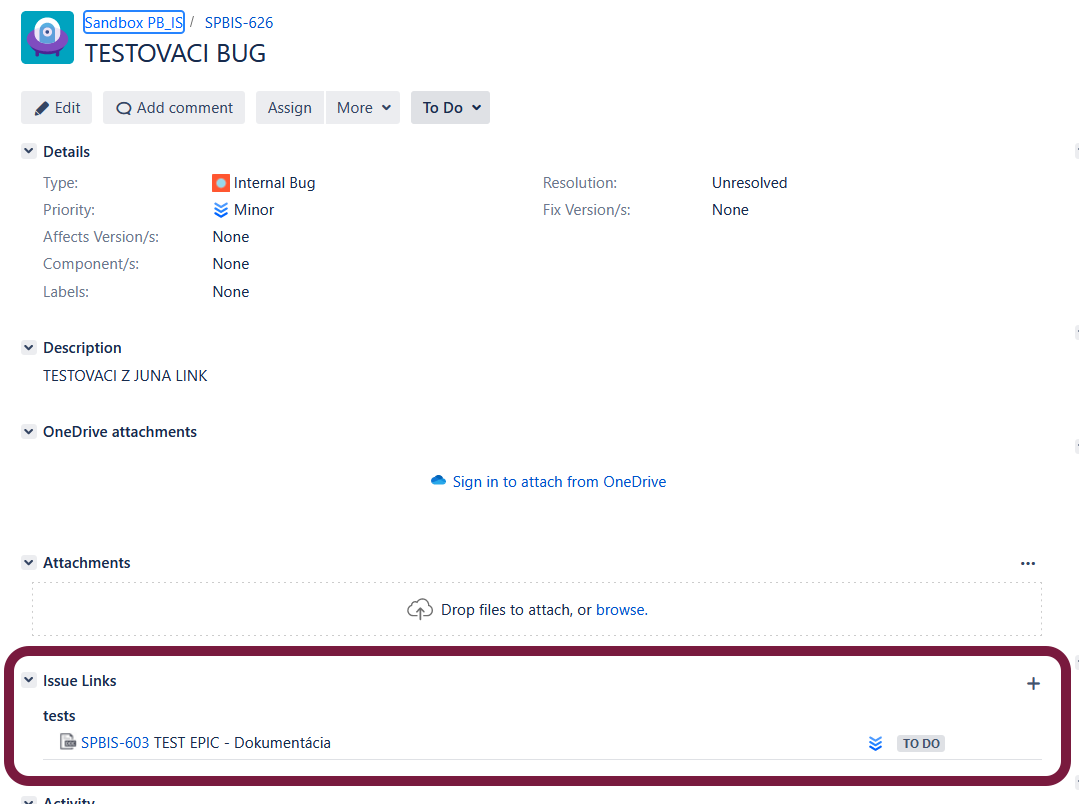
When executing a bug during a test execution under a Jira issue, you can select a Linked Issue that will be connected to the bug through the Jira link that has been configured during the Jira integration setup.
The connection will then be displayed in Jira as follows:
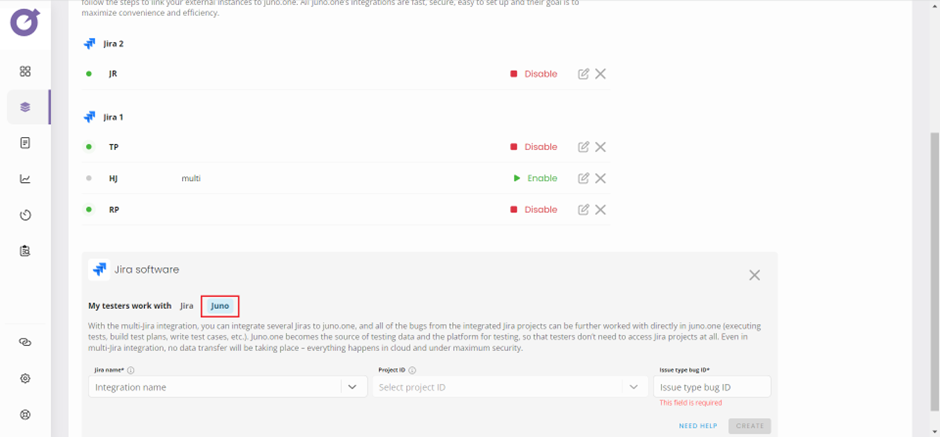
- Multi Jira (= the execution into Jira is not possible)
To create a multiple JIRA Integration, choose juno.one in the field ‘My testers work with’. Then choose JIRA name (which you created in the global settings), Project ID and JIRA Bug type ID. You can decide which integration you want to keep enabled / disabled.
How to use the integration (Single JIRA Integration only)
1. Test Execution
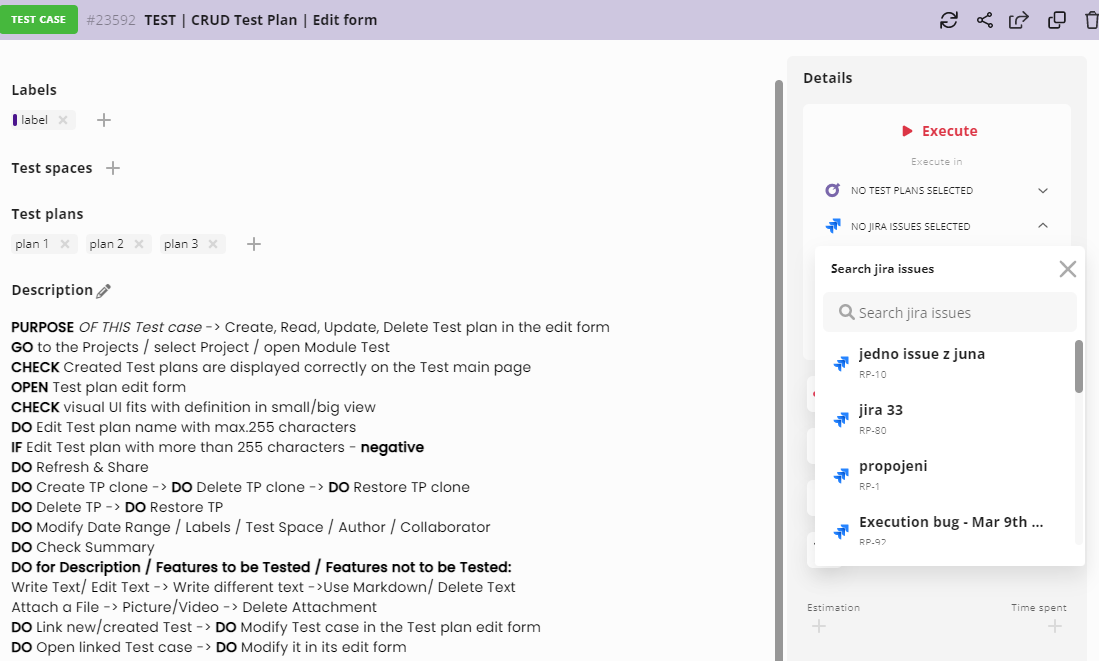
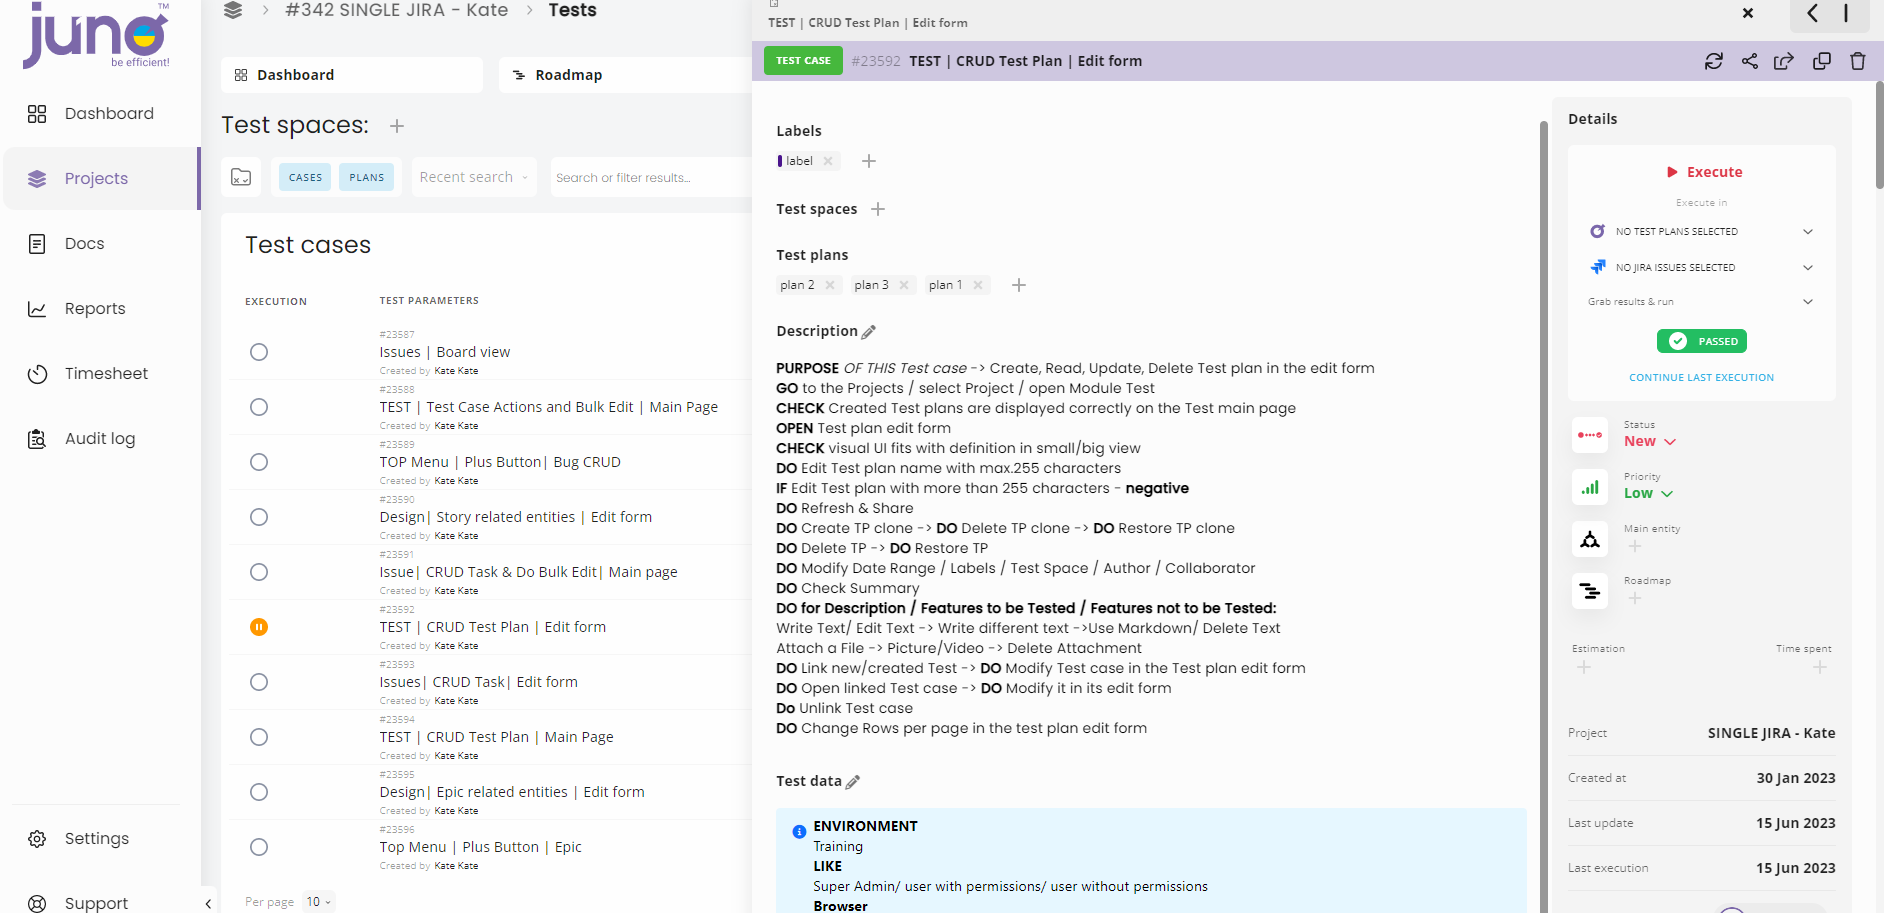
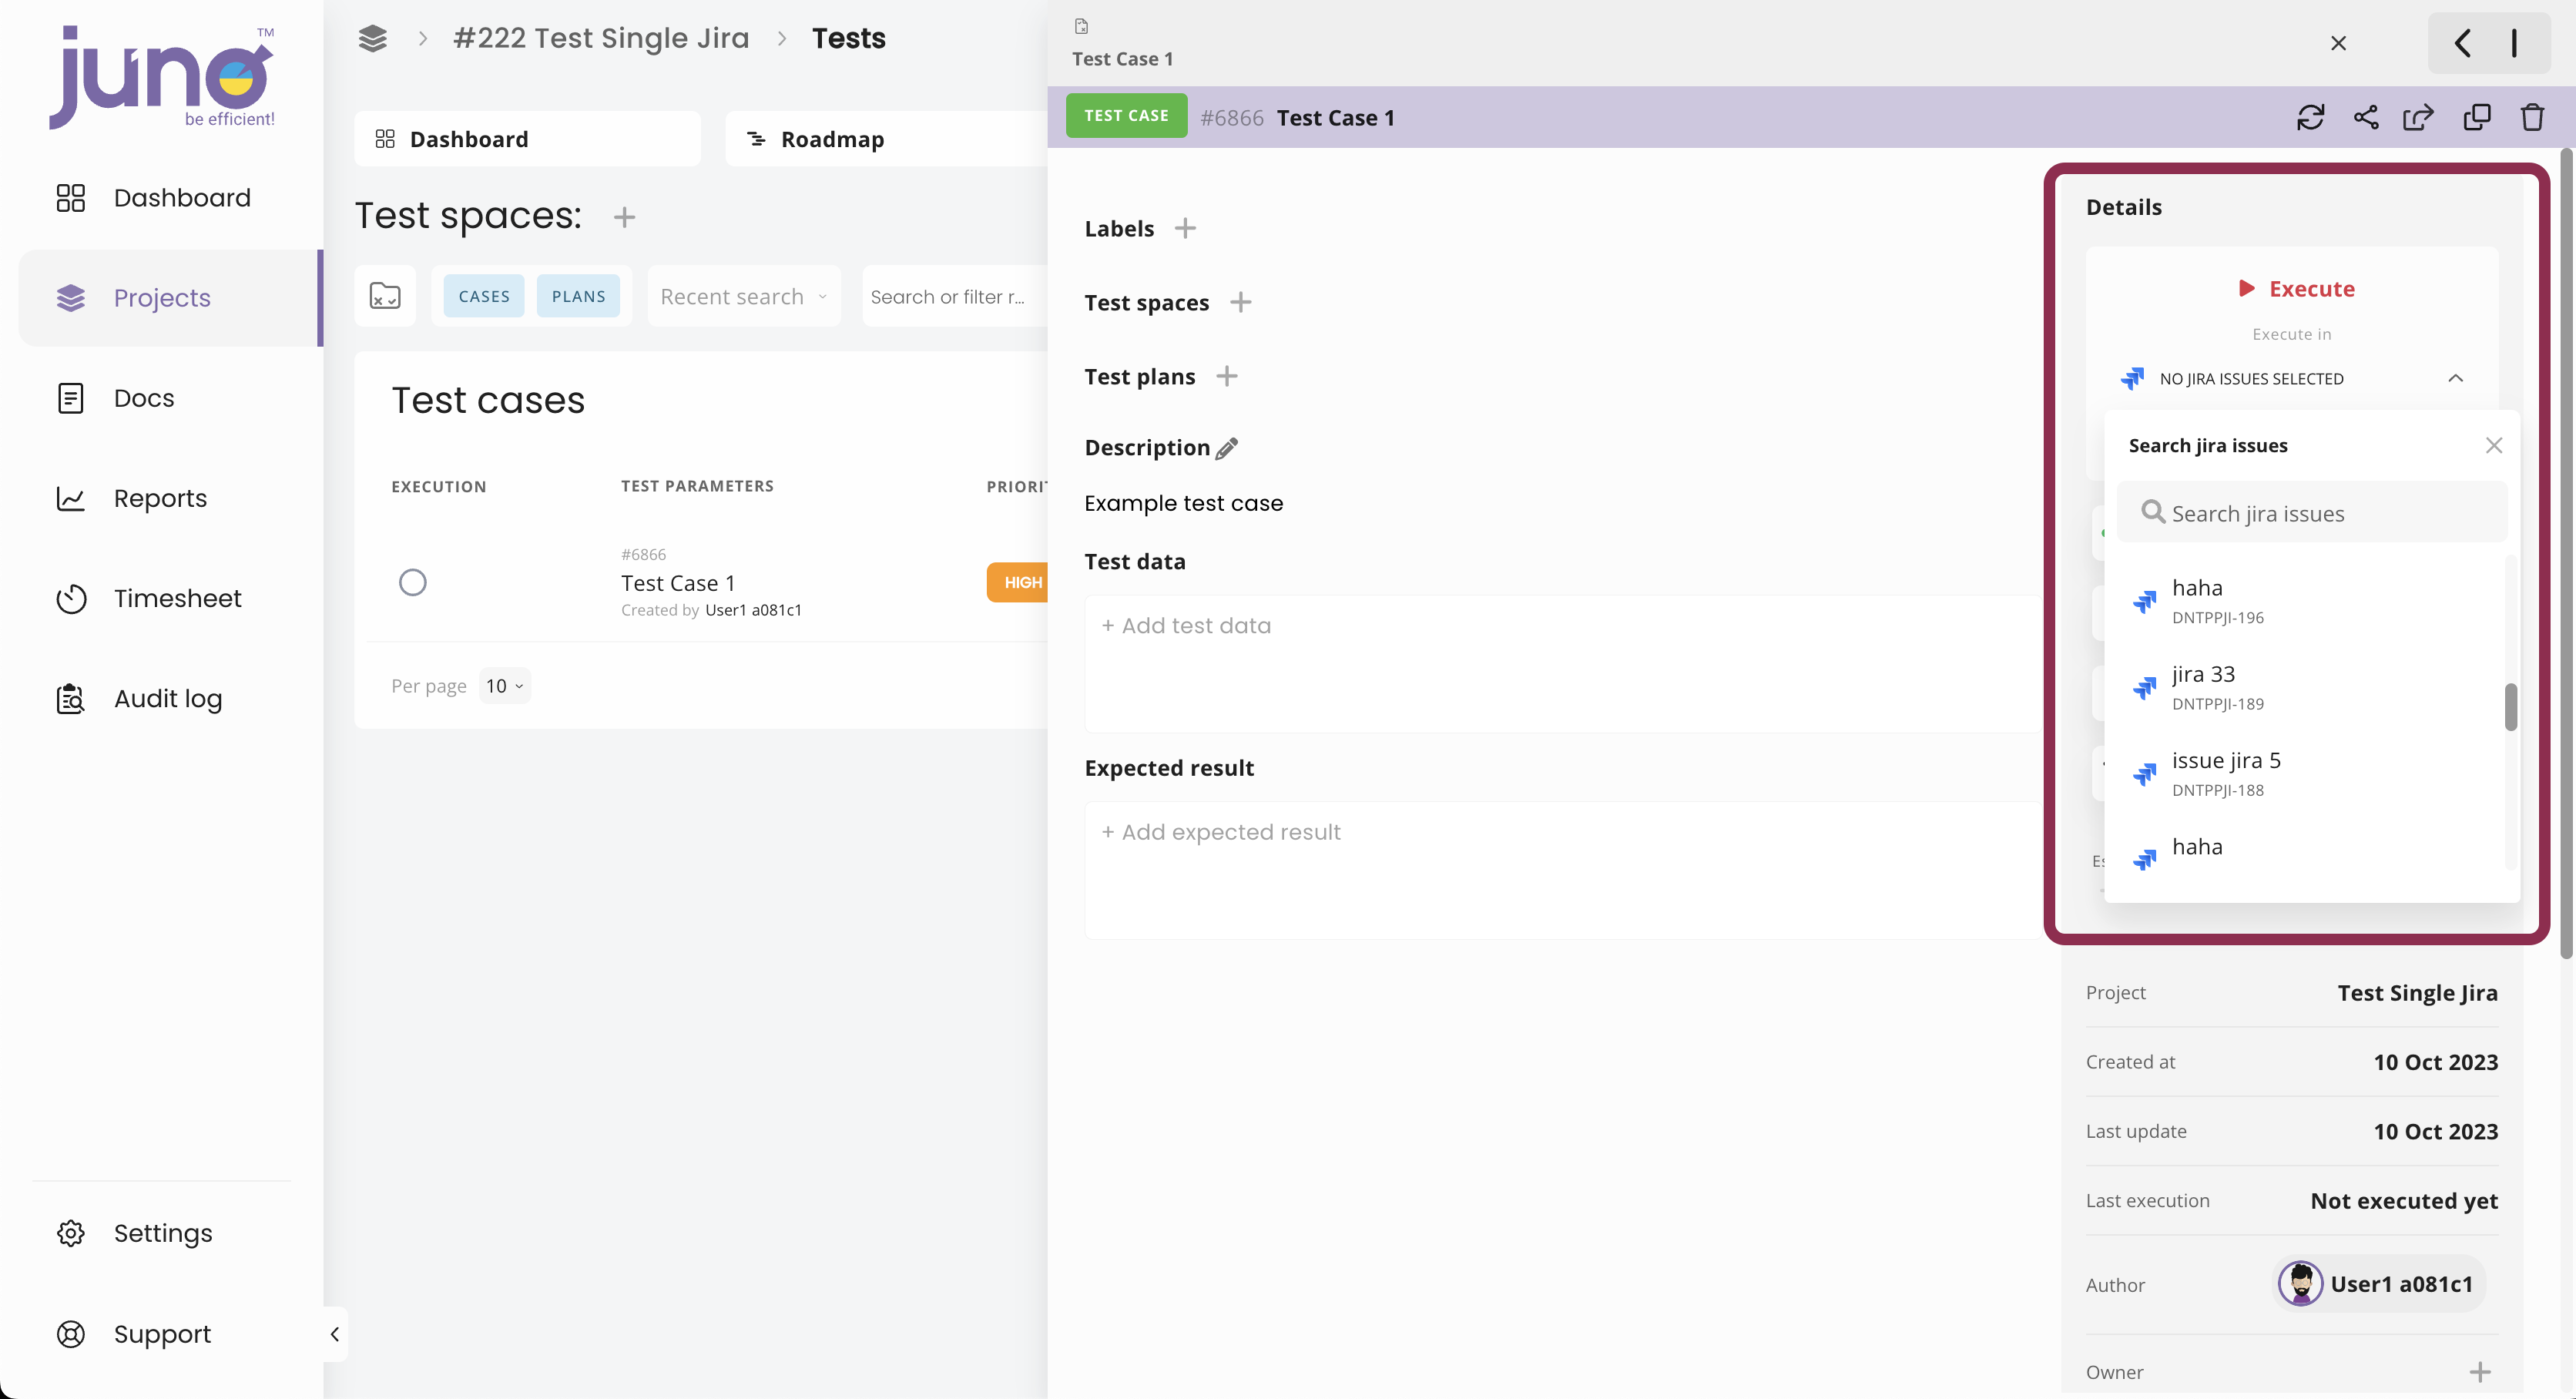
- Open a test case that you want to execute and choose the JIRA issue in which you want to run the execution.
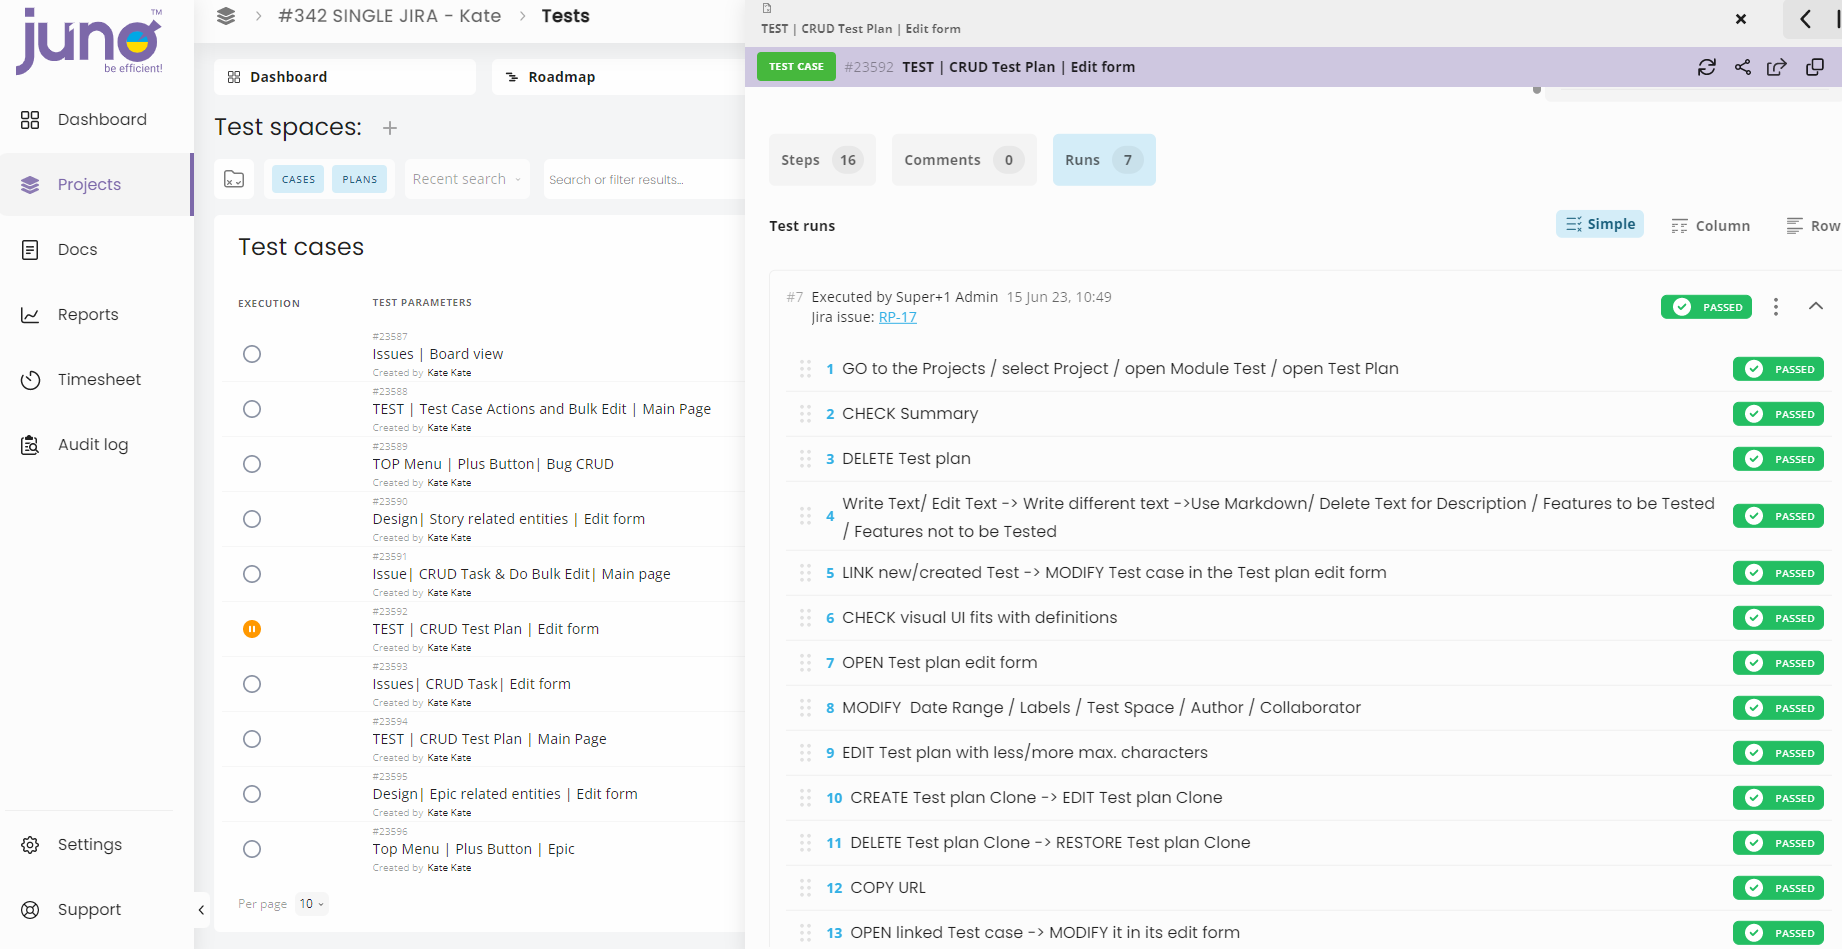
- Change the execution status either for an individual test case step, or directly for the entire test case. End the execution with the ‘Stop Execution’ button. The result will be written to juno.one and JIRA Atlassian.
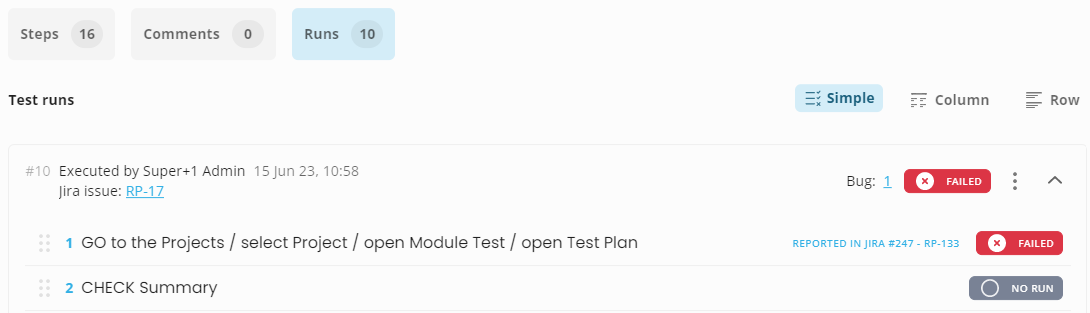
Last execution displayed in juno.one:
Test runs inside the test case
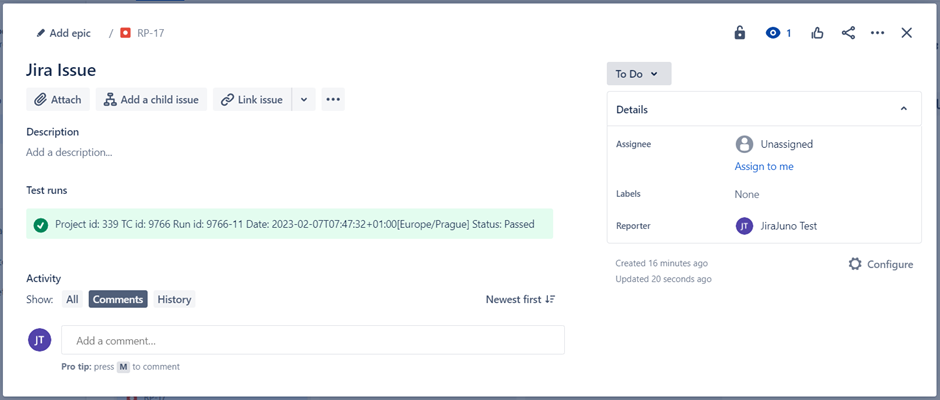
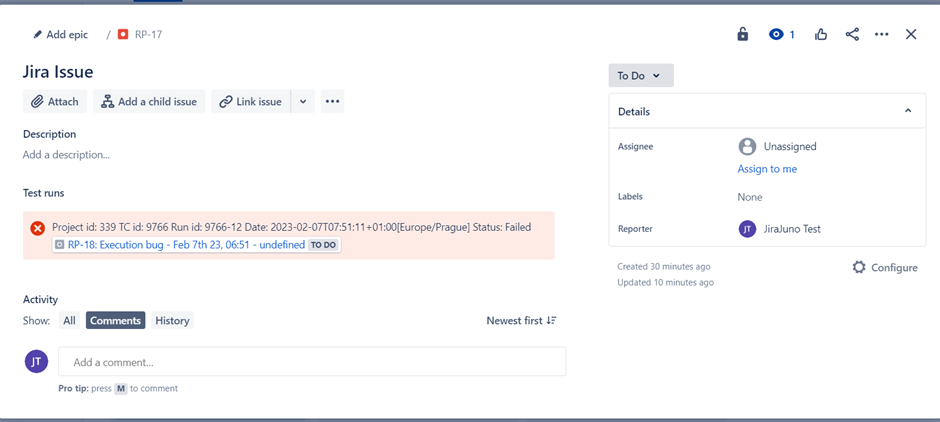
Last execution displayed in JIRA Atlassian:
Test runs inside cloud JIRA
2. Report a Bug
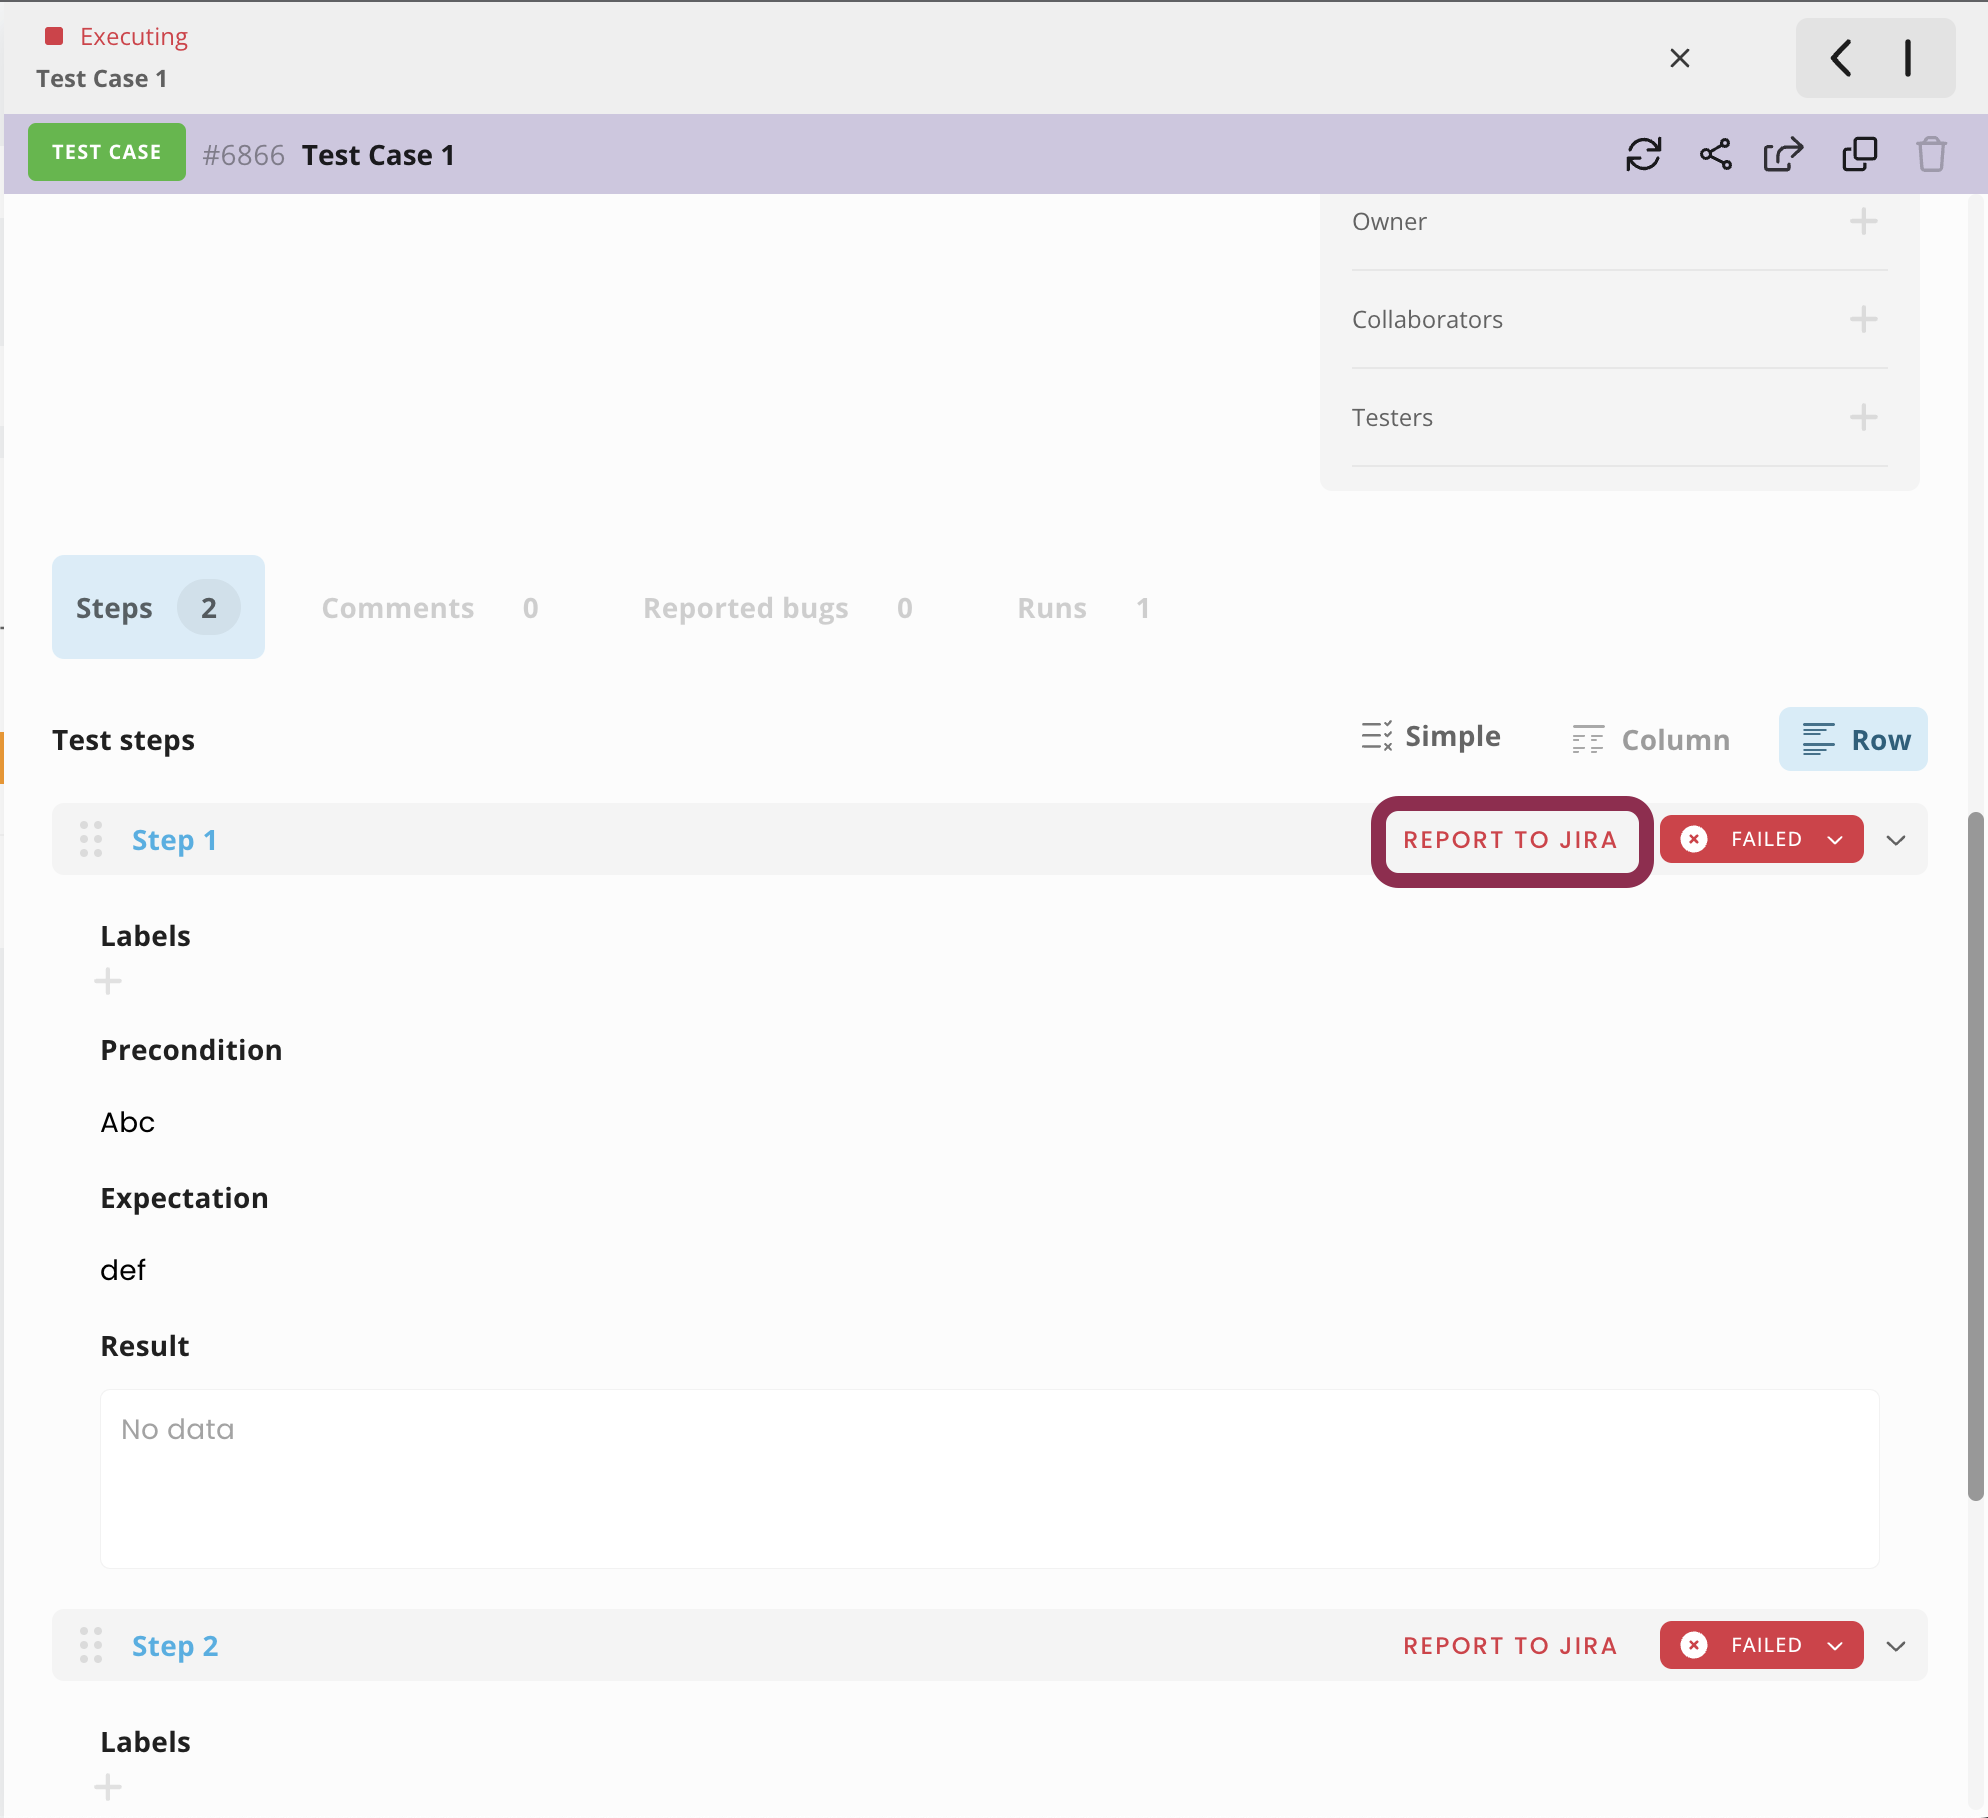
If the result of execution / test case step is FAILED -> you can report a bug.
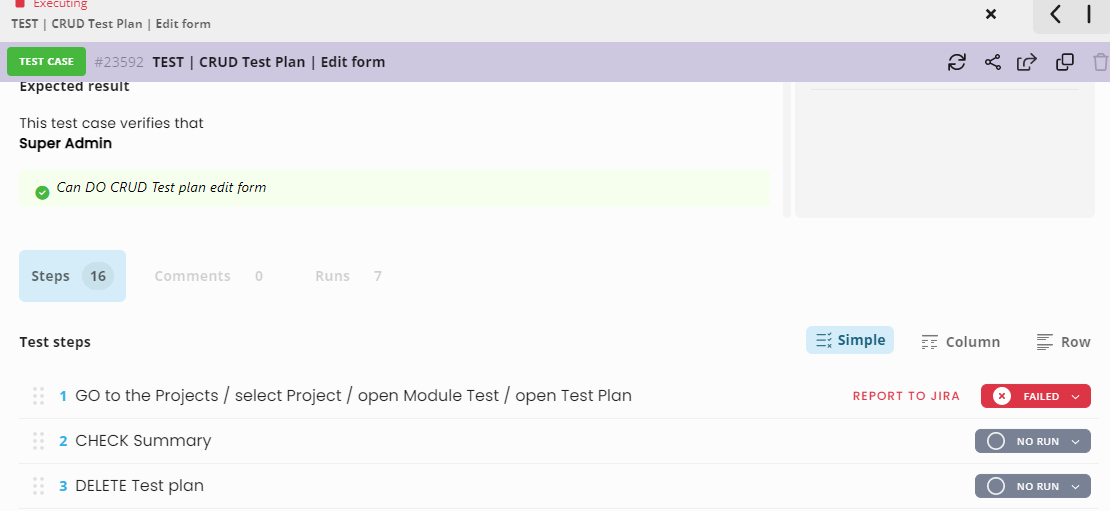
Reported bug in juno.one:
Test runs inside the test case
 ]
]
Reported bug in JIRA Atlassian:
In issue type test - link for the reported error is displayed within the failed execution
Parent entities and hierarchy
In your Jira instance, your admin sets up the types of entities (issue types) – Tasks and Subtasks. This determines the hierarchy and the connection possibilities in Jira.
In the juno.one logic, only entities of the type Subtask can have a parent entity, and it can only be a Task type entity.
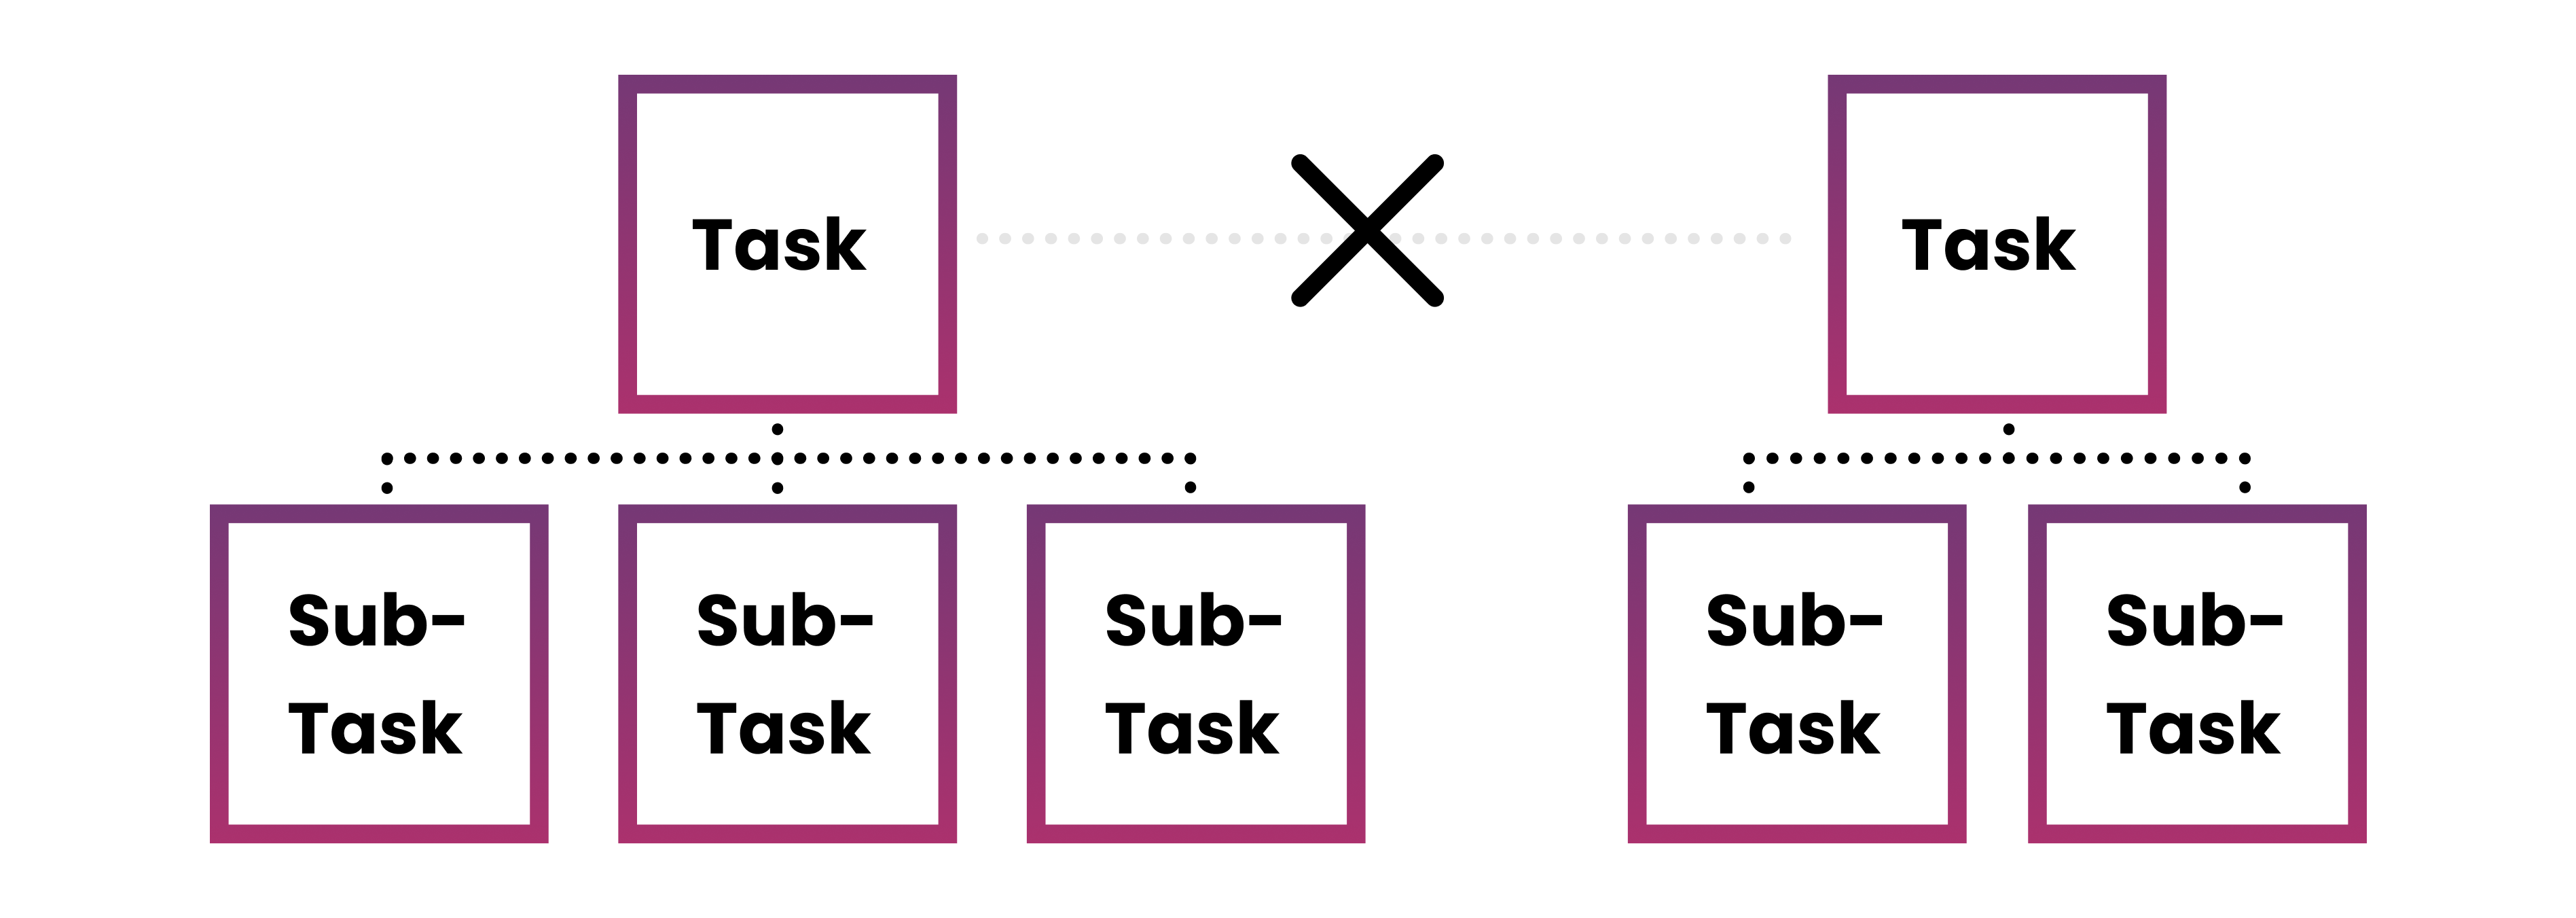
Example: Your Jira Issues are a Task type entity, and your Jira Bugs are Subtask-type entity. Once you create a bug in juno.one, you can assign a Jira issue to it as a parent entity. However, you can't assign another bug as a parent entity.
An Issue also can not have another Issue as a parent entity, because juno.one doesn't allow same-level Jira entities (Task type) to be related as parent and child.
Issue Type Test ID / Issue type Bug ID
Issue type test ID
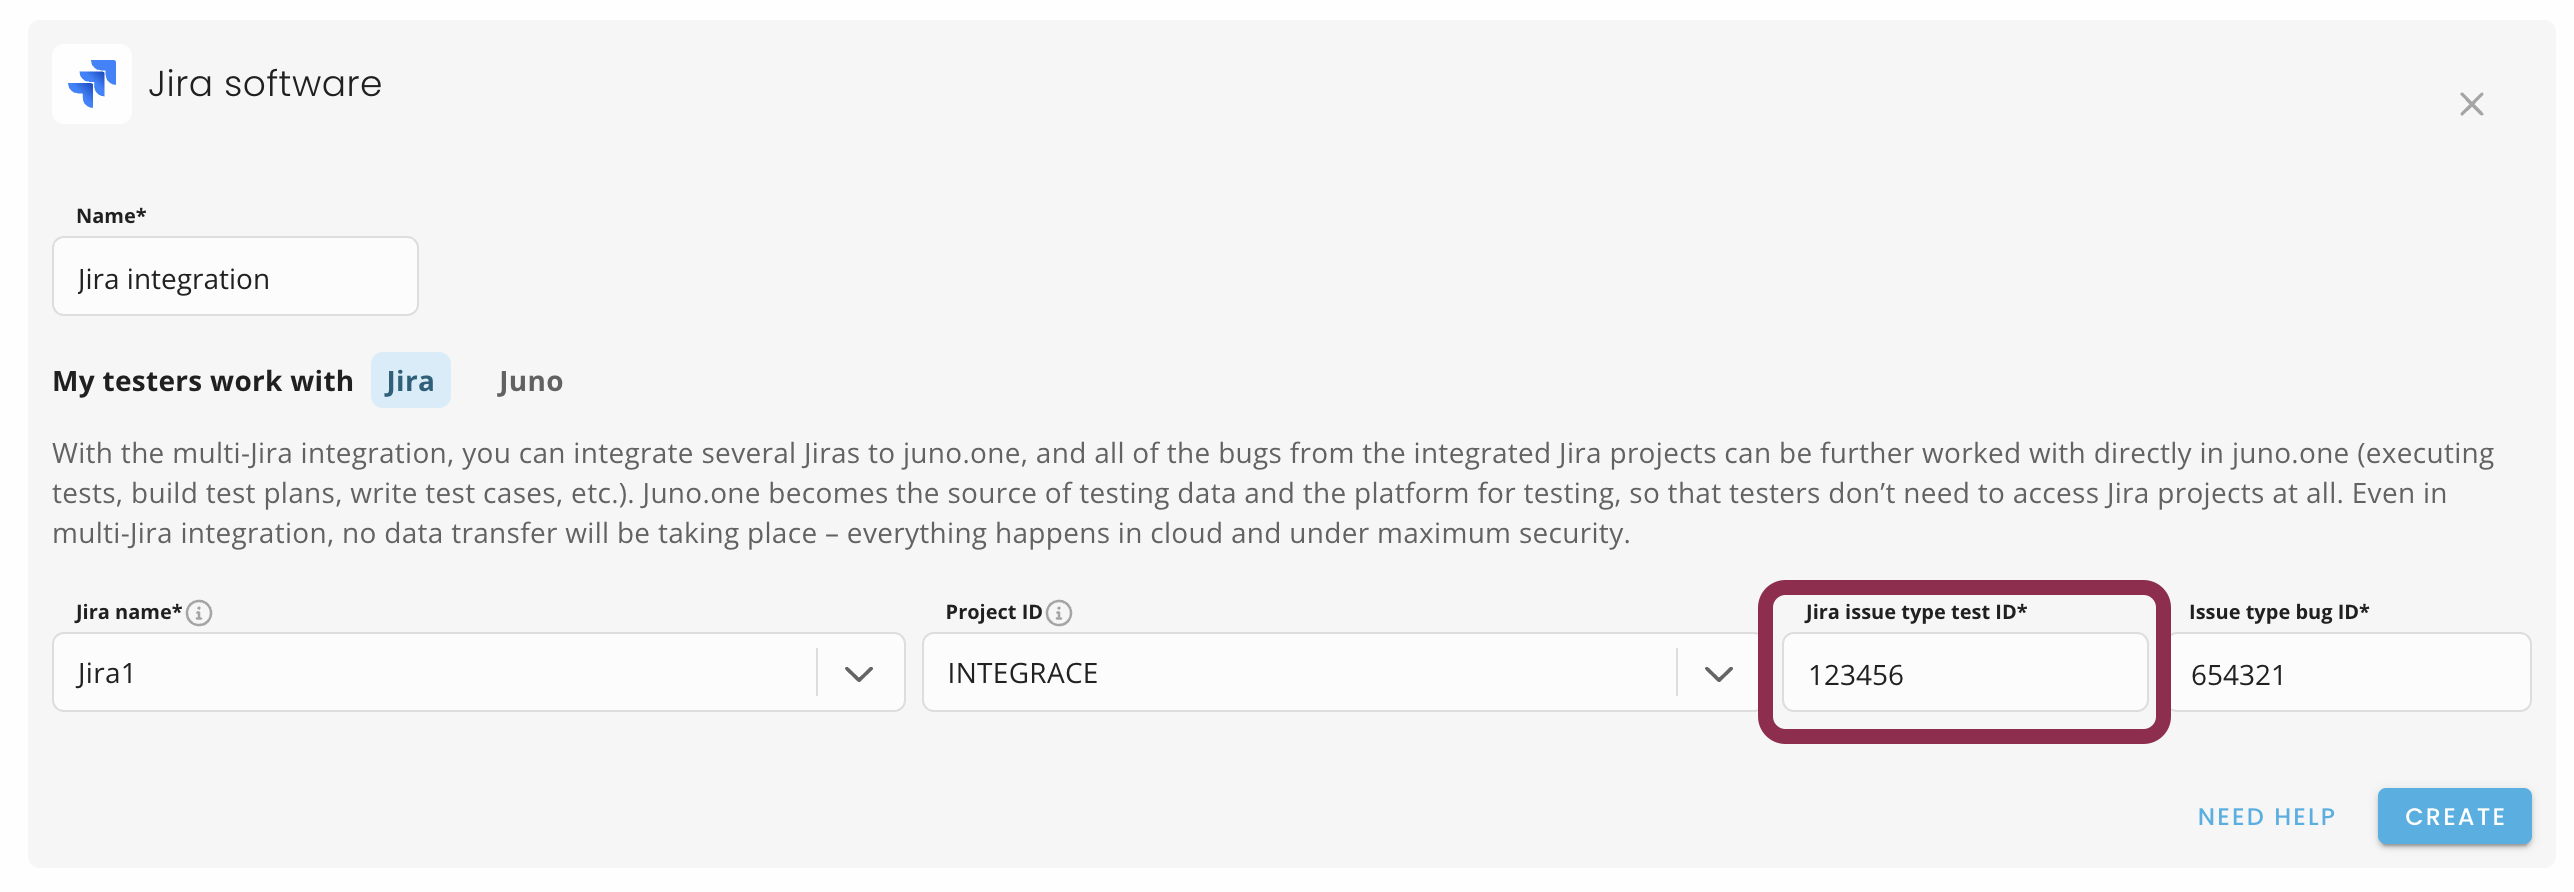
In the Issue type test ID field, you fill in the ID of the entity type that you wish to execute tests under. In Jira it could be Issues, Tests, etc. These entities will then be shown in the detail of a juno.one Test Case:
In the Issue Type Test ID's case, it does not matter whether the Jira entity is set as a Task or Subtask.
Issue type bug ID
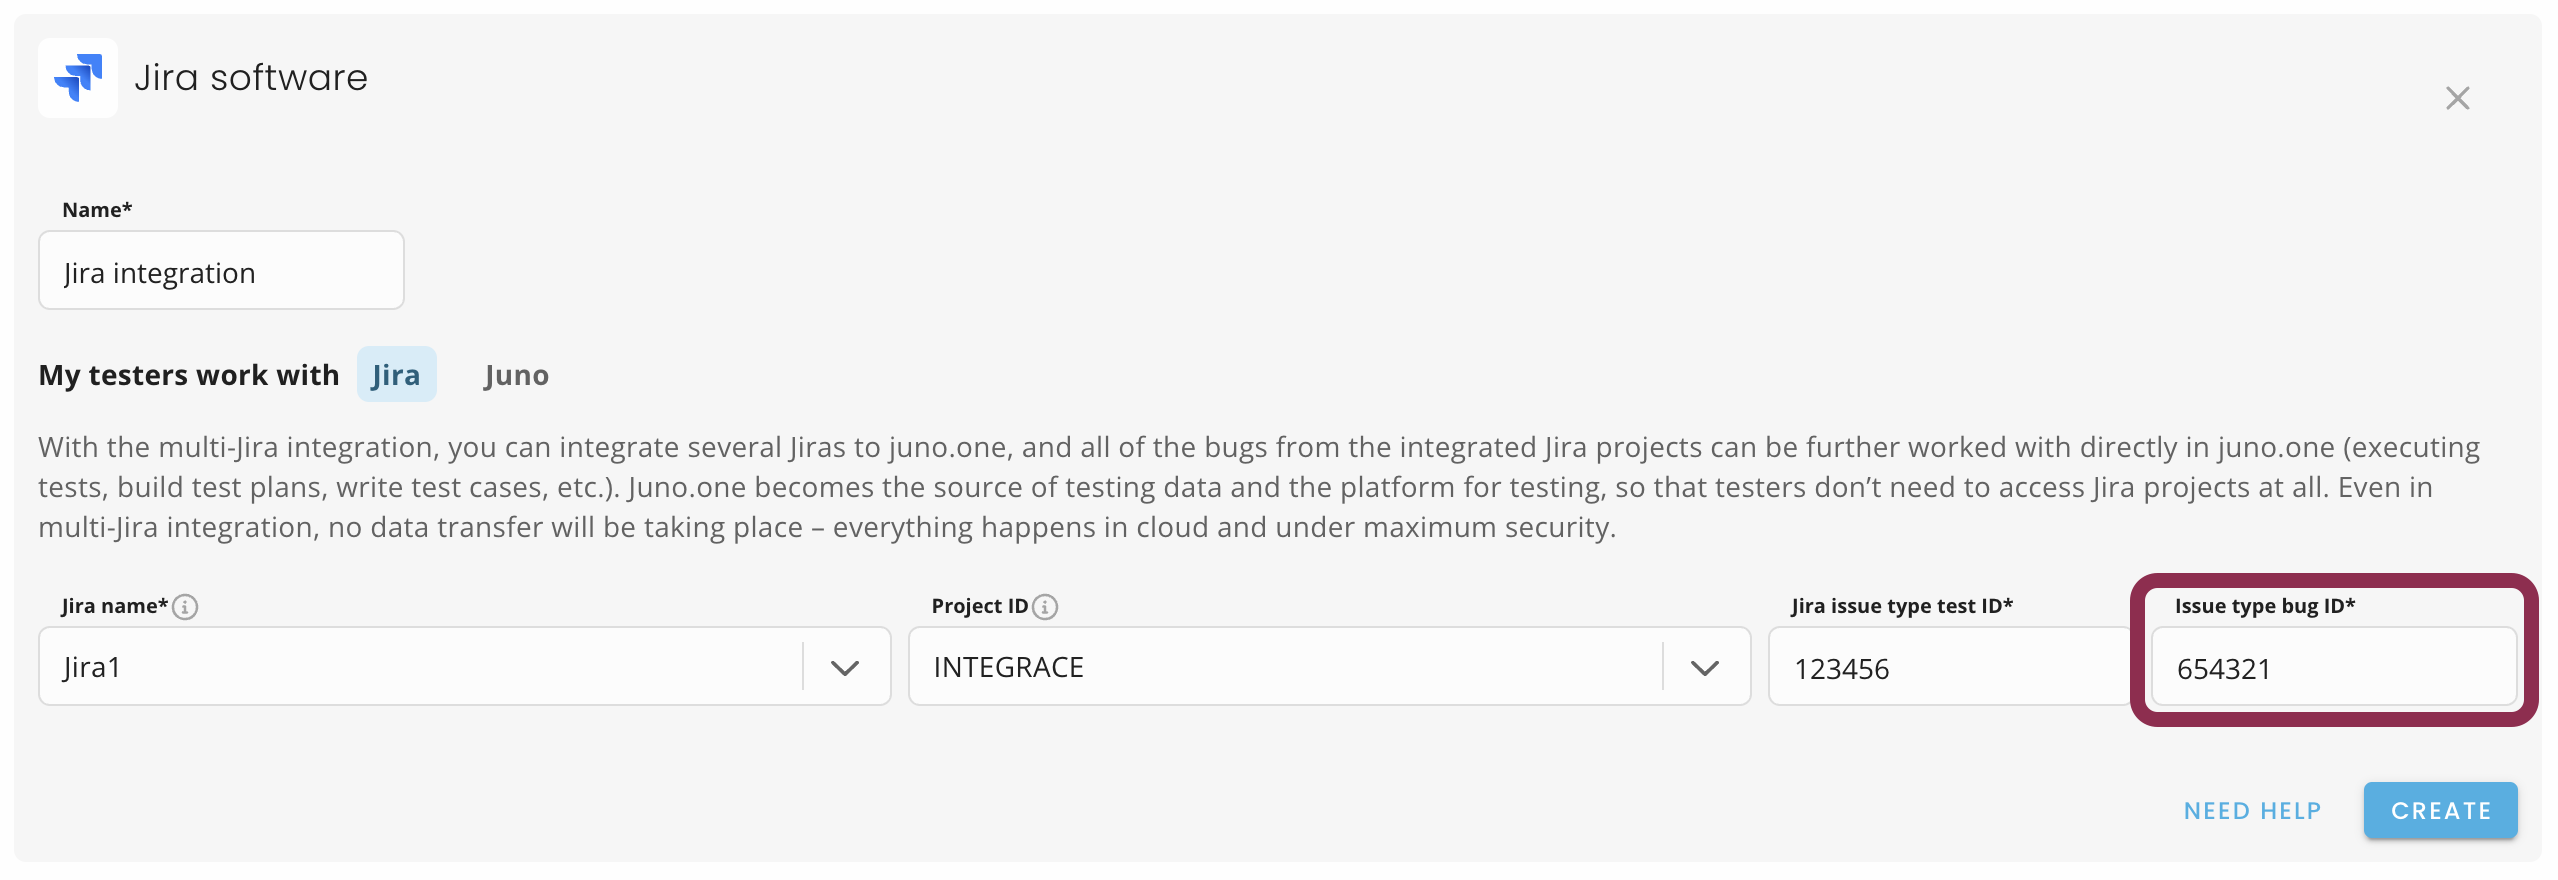
This field is for entering the Jira Issue Type ID that will be used for recording Bugs into Jira encountered during test execution in juno.one. This Jira Issue Type needs to be set as Subtask type entity in your Jira, in order for you to be able to link them to parent entities (Task type entities). It works as follows:
- First, during a failed test execution, you click on REPORT TO JIRA to create a new Bug.
- Then in the modal, you enter all necessary information and select the parent entity here:
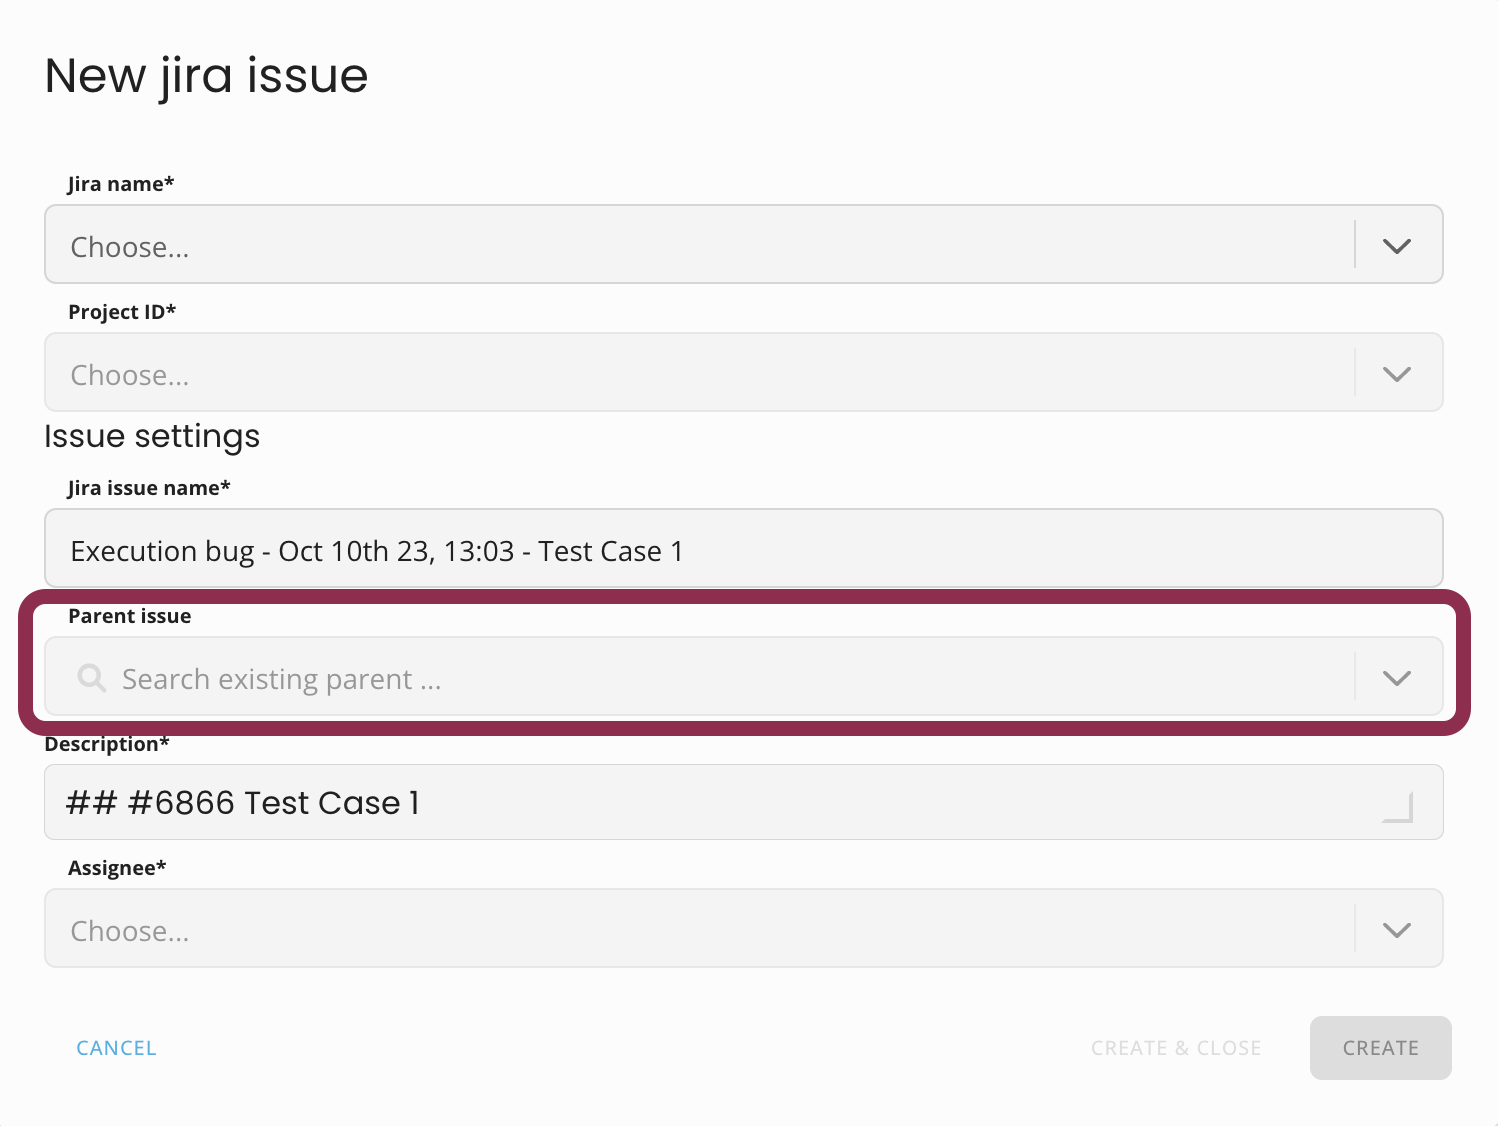
The field “Parent issue” will only be available if your Issue Type Bug (whose ID you entered during the integration set up) is set in your Jira as a Subtask type entity.
Module Issues
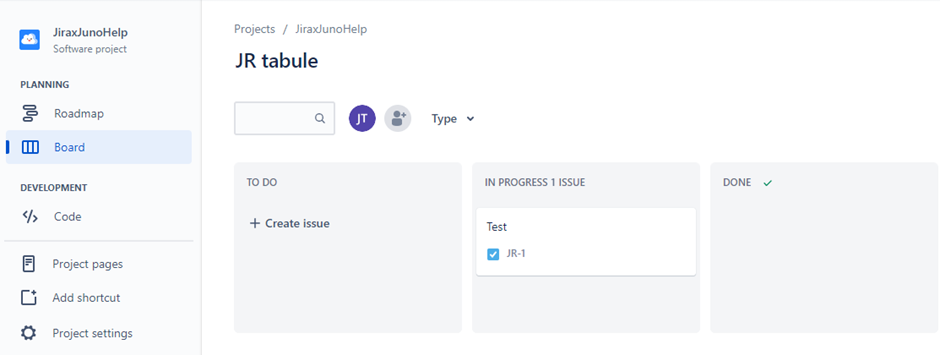
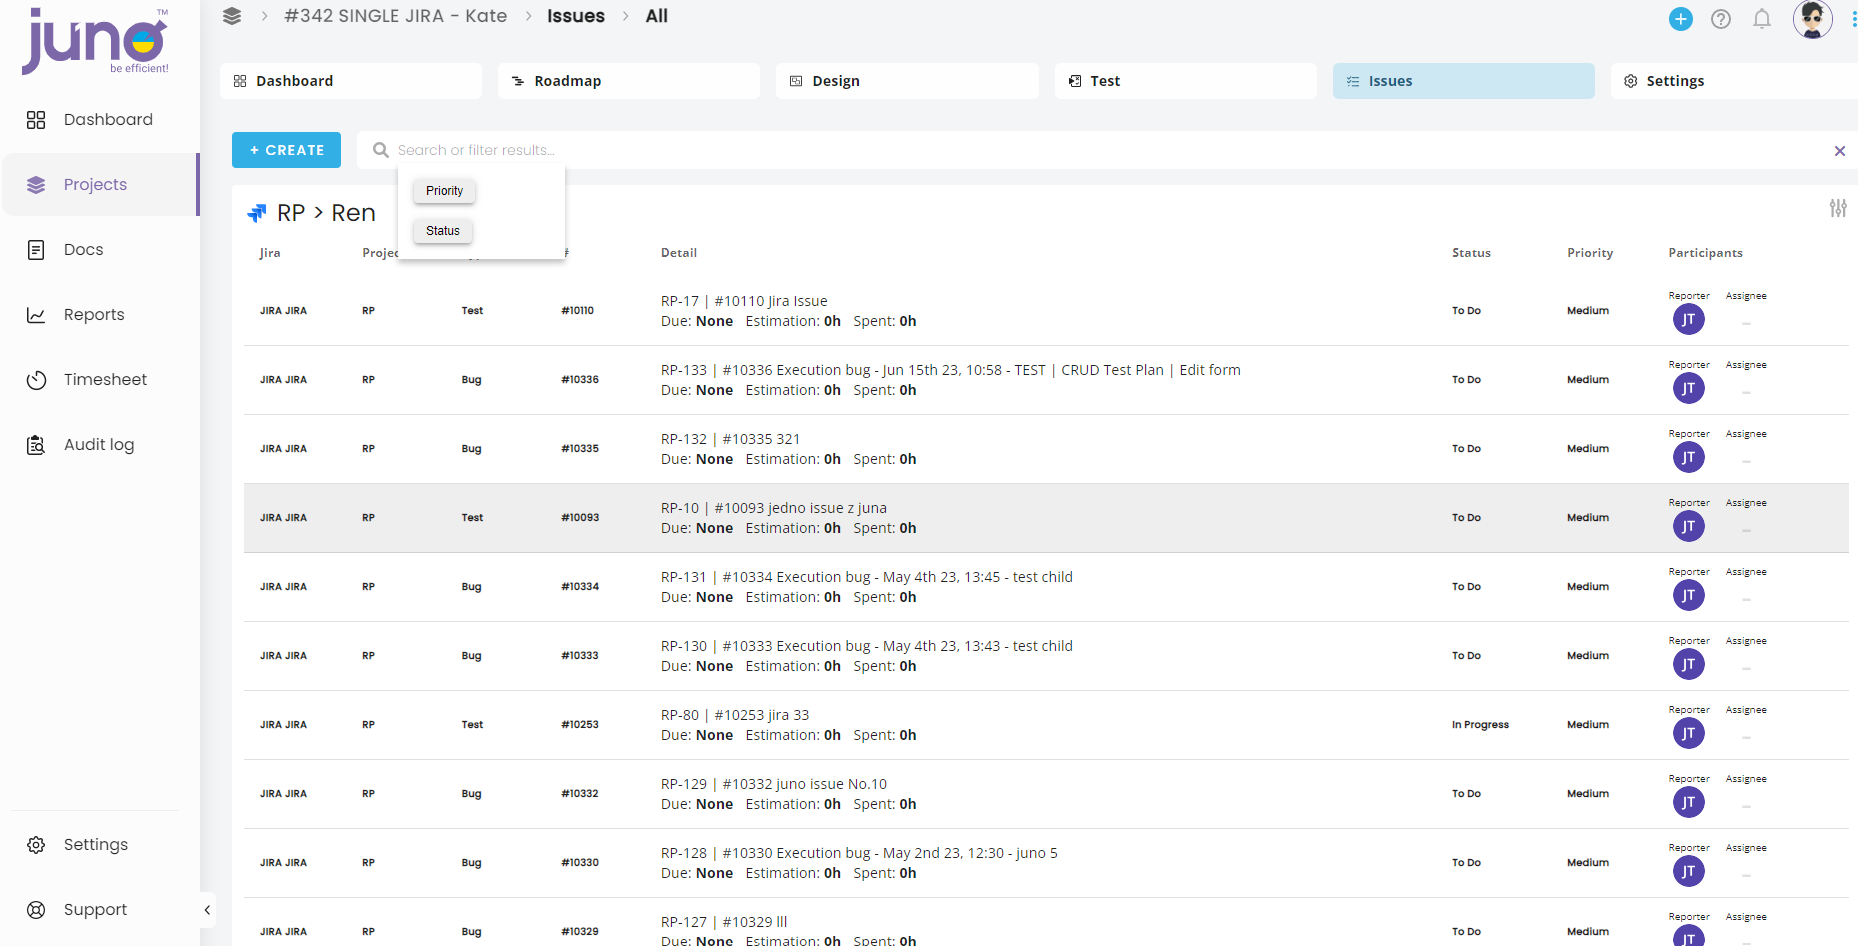
If Single Jira Integration is enabled, you can see all Jira issues type Test. Any Issues can be searched by name or to be selected by Priority/ Status in juno filter. If you want to create a new issue, simply click on the +Create button - a new issue edit form will open. Confirm all requested information and then click Create.
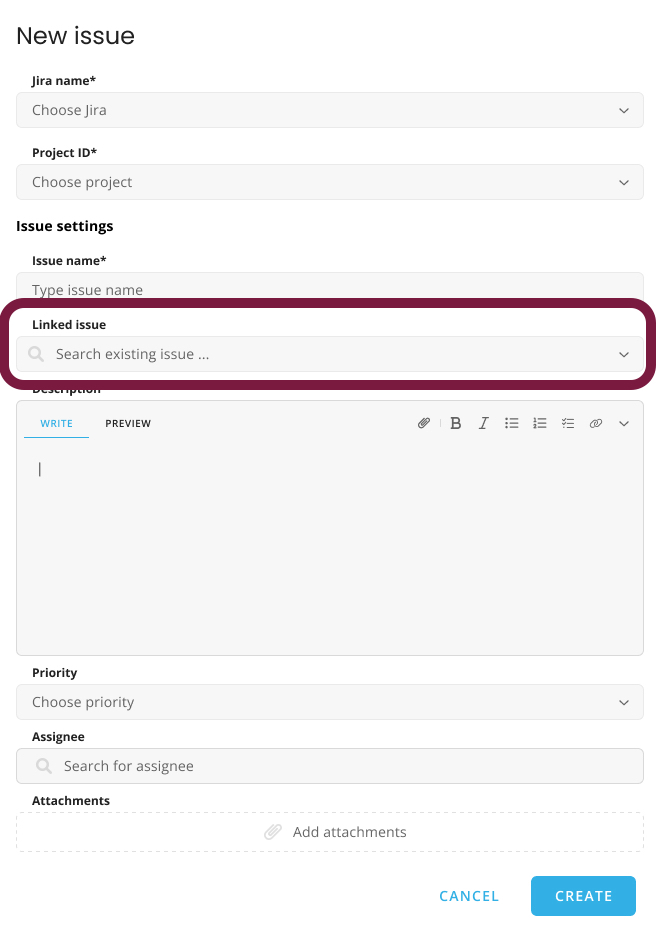
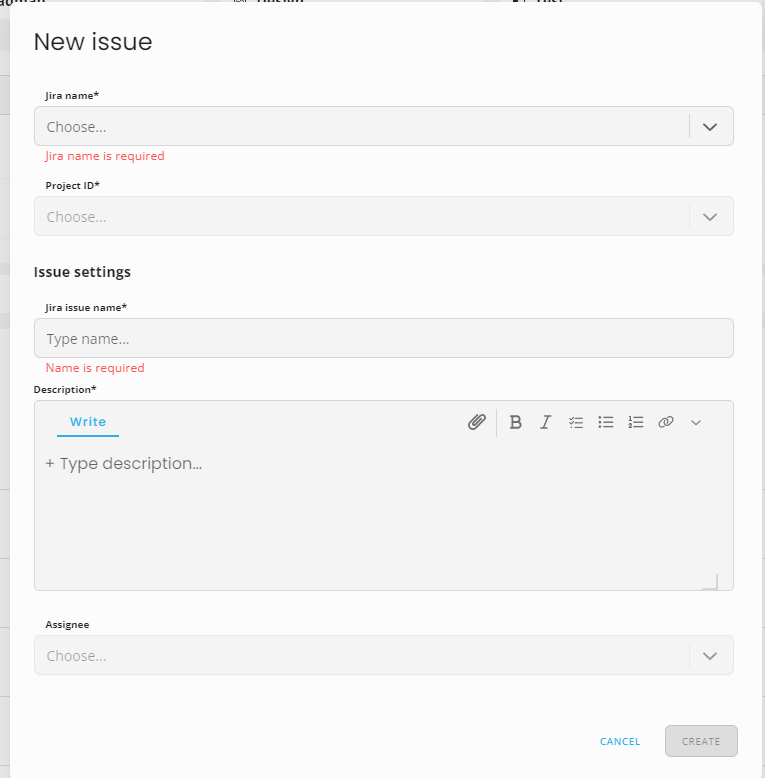
In Project, where is Multi Jira Integration connected, only issues of enabled Jiras will be displayed. If you enable all your Jira integrations in Project Settings, all issues type Bug will be displayed. When creating a new issue in multijira Project, you need to choose Jira name and Project ID in the edit form.
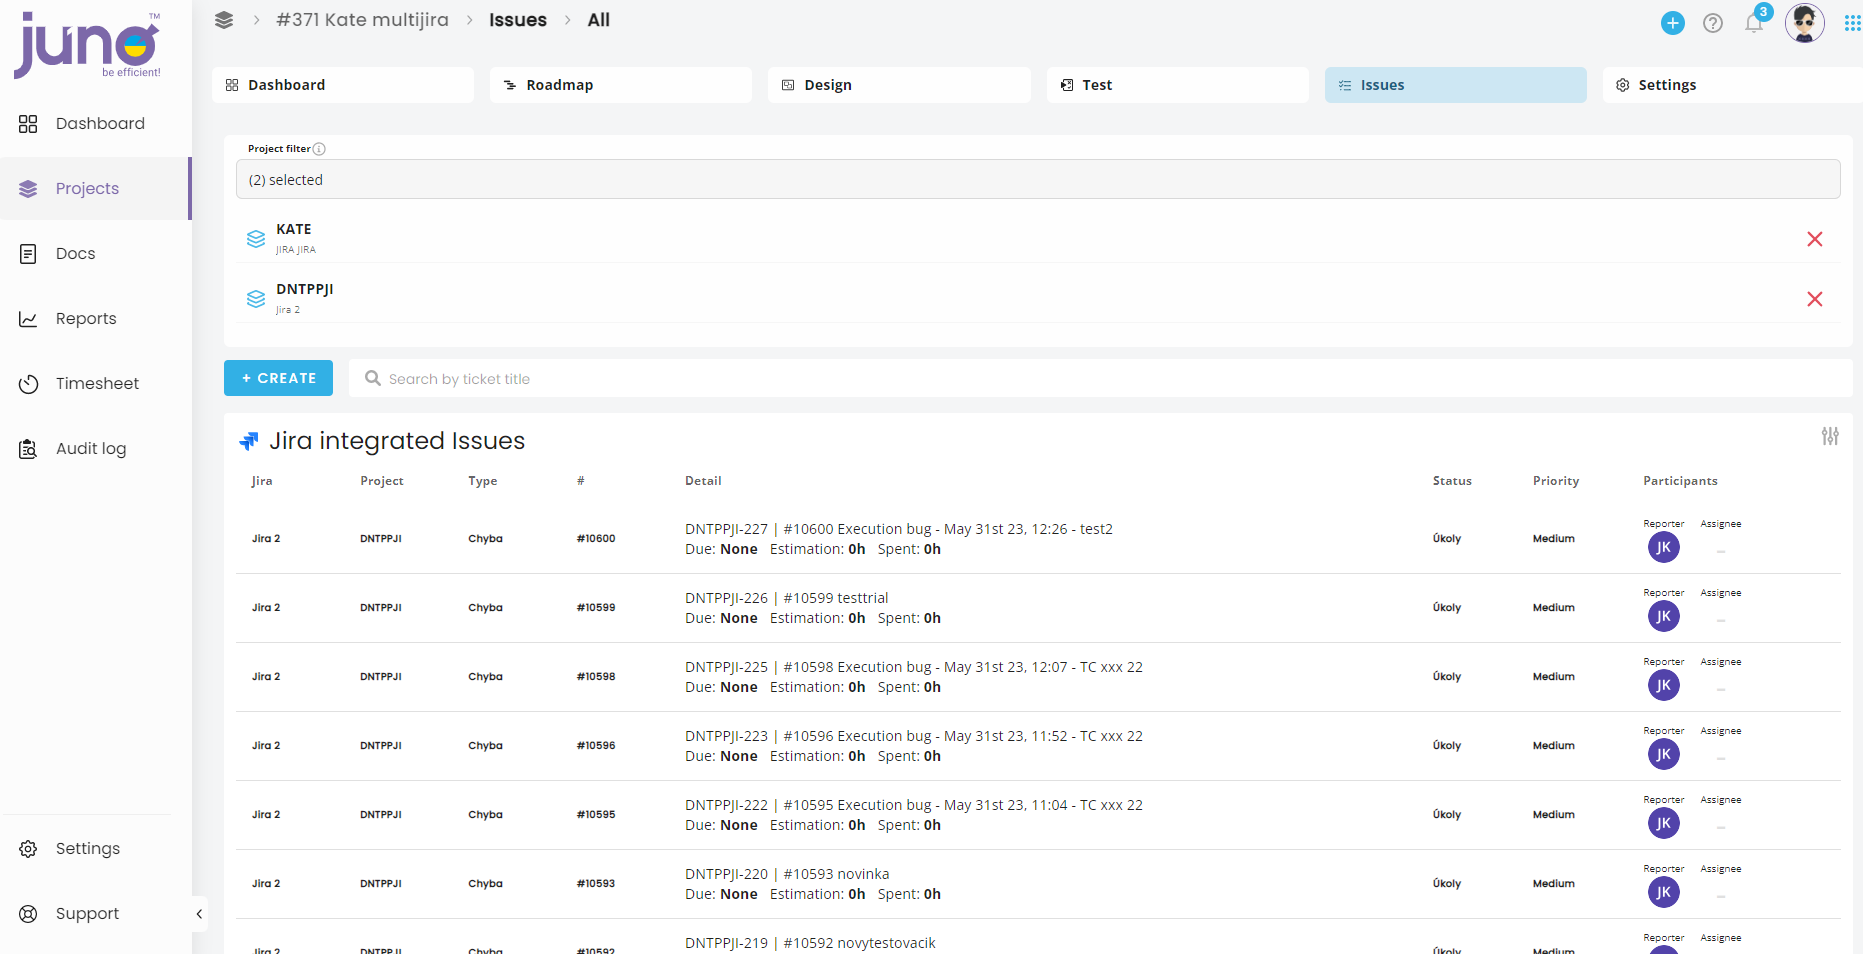
When creating a new issue in multijira Project, you need to choose Jira name and Project ID in the edit form.
Please note that if a JIRA integration is active, Gitlab can't be integrated, and vice versa.